How to Restore Leather: Assess, Clean, Condition and Repair Bags, Jackets and Shoes
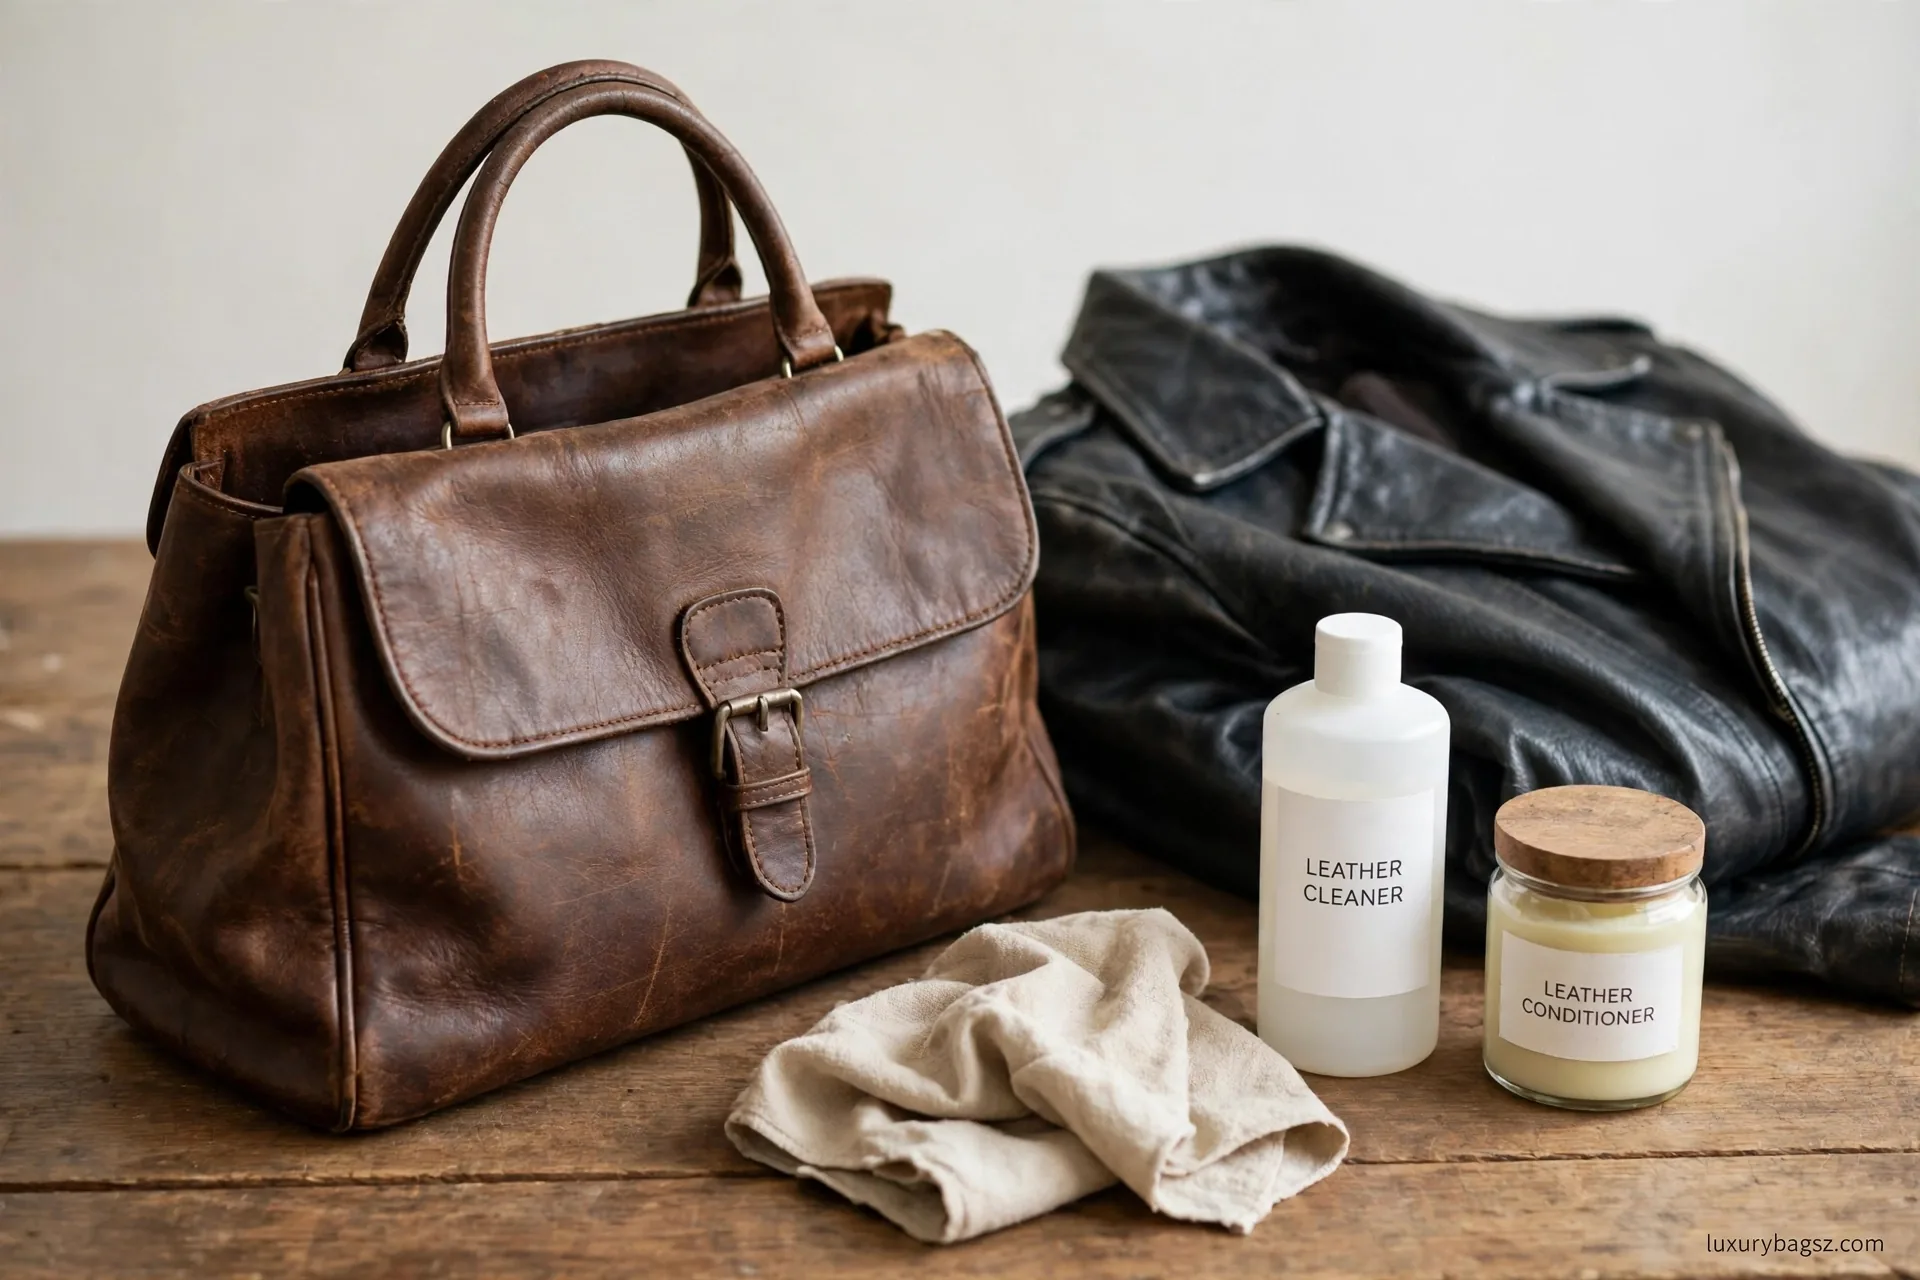
Restoration Begins With an Honest Look
Most tired leather does not need replacing. It needs the right order of work: assess first, clean second, feed third, and only then repair colour or structure. Skipping ahead is how good pieces get worse, because conditioner seals dirt in and dye sits on grease instead of leather. Mould gets its own protocol in our guide to removing mould from a leather bag.
The direct answer is simple. Light dryness, fading, and surface scuffs on smooth leather are usually fixable at home with gentle cleaning, thin conditioner, and matched colour. Deep cracks, tears, broken handles, and wide colour loss are professional jobs, and some damage cannot be undone at all.
Start in daylight, with clean hands and no product yet. Look at the whole piece, flex it gently, and note what is surface damage and what goes deeper. That five-minute check decides everything that follows, including whether you should stop and get a quote first.
This guide covers bags, jackets, and shoes in smooth and grained leather, with notes where suede, nubuck, patent, and exotic leathers need a different route. Where guides disagree, this guide says so plainly, so you can choose the cautious route on a piece you value.
Key Takeaways
- Assess in daylight before any product touches the leather.
- Clean before conditioning or recolouring, or you seal dirt in.
- Conditioner restores softness; it does not replace lost colour.
- Thin layers beat one heavy coat for conditioner, filler, and dye alike.
- Suede, nubuck, and patent need dry or dedicated methods, never standard creams.
- Small tears need a backing patch and flexible adhesive, never rigid glue.
- Torn seams, broken handles, and deep cracks belong to a professional.
- Peeling bonded leather, rotted fibres, and deep mould damage often cannot be restored.
Assess the Damage Before You Touch It
Work in natural daylight, not under a warm lamp, which flatters colour and hides fading. Look over the whole piece slowly: outer panels, corners, edges, handles, straps, seams, and the lining. Damage clusters where leather flexes, rubs, or carries weight, so check elbows, cuffs, bag corners, and shoe vamps first.
Flex each panel gently and watch how it moves. Leather that folds softly but looks dull is usually just dry. Leather that creases sharply, feels papery, or shows a web of fine lines is dry and stressed, but often still recoverable with feeding. Leather that splits when flexed has broken fibres, and no cream will knit those back together.
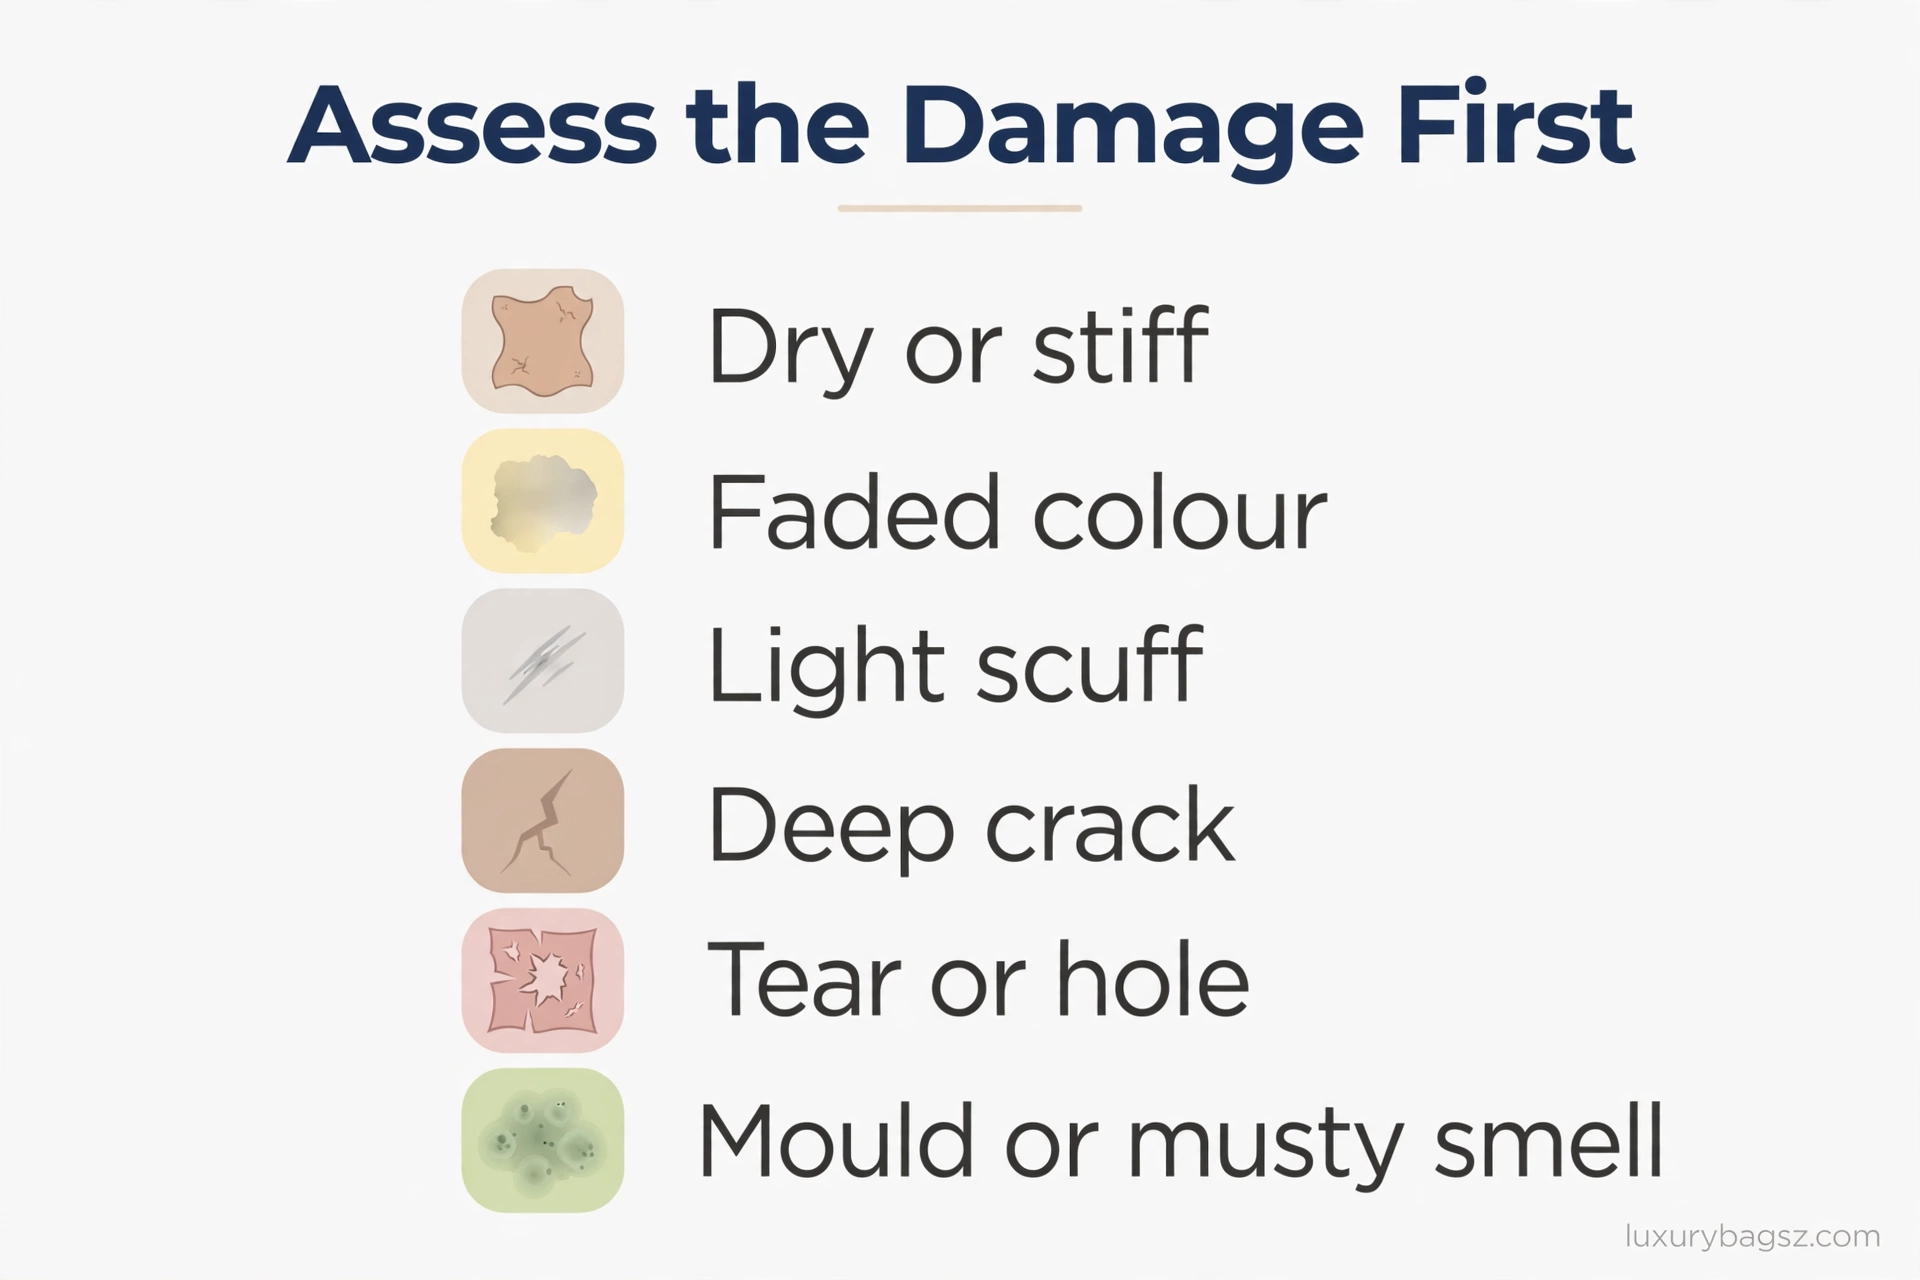
Sort every mark into a type before you act. Dryness, fading, a light scuff, a deep crack, a tear, and a musty smell are different problems, and each one has a different fix. A scuff that softens when you rub it lightly is in the finish only. A pale line that stays pale has lost colour and will need pigment, not just conditioner.
Check the inside too, because linings fail before shells do. A torn lining, a loose pocket, or a musty interior changes the job and the cost, even when the outside looks fine. Note every fault in a short list, with its location, so you can work through the piece in order instead of fixing one mark and missing a worse one nearby.
Use the same careful eye you would use when grading a used piece, as in the guide to grade designer shoe condition, and be honest about value. A much-loved everyday bag justifies more effort than a barely worn piece with major damage, where a professional quote should come before any home work.
Identify the Leather and Its Limits
Smooth finished leather is the most forgiving to restore. It has a coating that holds dye, tolerates gentle cleaner, and takes conditioner well. Grained leather behaves similarly and hides small marks better, which is why a scuff that would show on a smooth panel can almost vanish on a pebbled one.
Aniline leather has little or no heavy topcoat, so it stains easily and absorbs product fast and unevenly. Colour work on aniline is harder, because there is no coating to hold new pigment evenly, and a test spot is not optional. If you are unsure whether a piece is aniline, treat it as delicate and test everything first.
Suede and nubuck are buffed leathers with a nap, not a smooth face. Standard creams, oils, and dyes flatten the nap and darken patches unevenly, and are very hard to remove. For these leathers, dry brushing and a dedicated protector are the home limits, and colour restoration is usually a professional job. A suede brush used dry is the right starting tool, not a cream.
Patent leather is coated to a high shine. It resists water but shows scuffs, scratches, and colour transfer clearly, and heat can cloud or soften the coating. Recolouring patent at home rarely looks even, so small scuffs are often best left alone or handed to a specialist. Exotic leathers such as crocodile and python need specialist advice before any product is applied.
Bonded leather deserves a plain warning. It is shredded fibre under a coating, and once that coating peels or flakes, there is no real hide underneath to feed or dye. Surface touch-ups may hide a small flake for a while, but peeling bonded leather is not a restoration candidate in the way full-grain leather is.
Check the maker guidance and any care card before you start. A maker may warn against water, solvents, or particular products on a specific finish, and that warning outranks any general guide, including this one. When guidance is missing and the piece is valuable, pale, or vintage, a professional opinion costs less than a wrong product.
Clean Before You Restore Anything
Cleaning is not a preliminary chore; it is the step that makes every later step work. Dirt, body oil, and old product block conditioner from absorbing and stop filler and dye from bonding. Clean first, let the piece dry fully, and only then judge how much damage is actually left.
Start dry. Brush shoes lightly, wipe bags and jackets with a dry soft cloth, and clear dust from seams, folds, and under collars and straps. This step alone often improves a piece a lot, because a layer of dust dulls colour and makes dry leather look worse than it is.
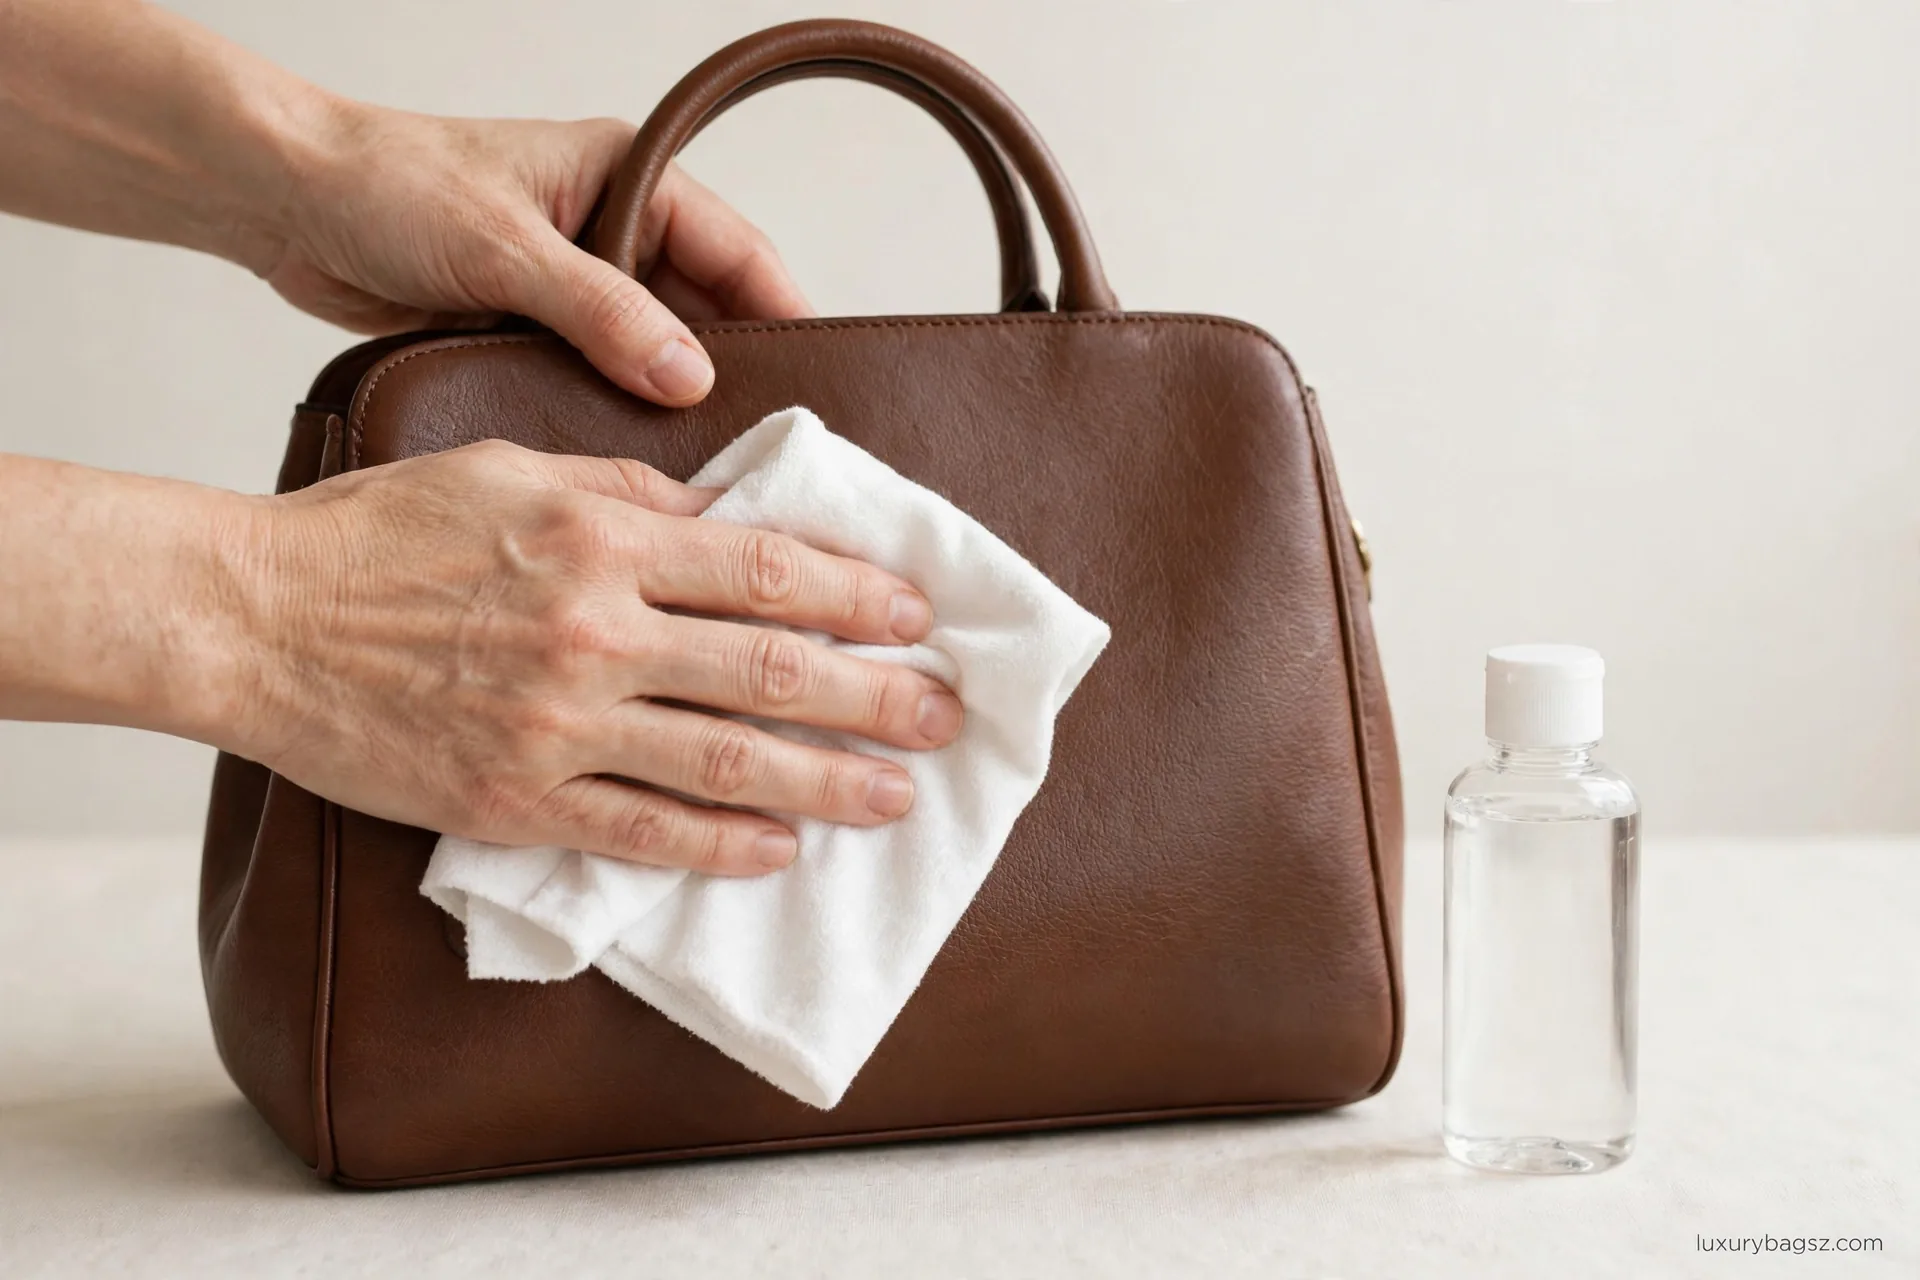
For smooth leather, work with a leather cleaner on the cloth, never poured straight onto the piece, in small panels, wiping residue away as you go. Keep the leather damp, not wet, and let it air-dry at room temperature away from radiators and direct sun. Heat dries leather fast and unevenly, and that stiffness is exactly what restoration is trying to undo.
Sources disagree on household shortcuts, so here is the disagreement plainly. Some guides suggest a mix of dish soap and warm water, distilled vinegar on scratches, or kitchen oils on marks.
Other guides warn that household cleaners strip finish, vinegar and oils darken or dry leather unevenly, and heat from a hair dryer damages dye. On a valued piece, the cautious route wins: use a cleaner made for your leather type, patch-test it, and skip the shortcuts.
Saddle soap has its place on sturdy smooth leather, and the guide to saddle soap explains when it suits and when it does not. Note the trap, though: wax and oil in a soap can stop filler and colourant from bonding later, so if you plan filler or dye work, clean with a plain leather cleaner instead and keep waxes for the final protection step.
For general routines beyond restoration, the guide to leather bags and shoes care sets out the same clean-then-condition order in everyday form. Mould and musty smells need dealing with before any feeding: wipe the surface gently in a ventilated place, let the piece dry fully, and hand heavy or returning mould to a professional rather than conditioning over it.
Condition Dry Leather Back to Suppleness
Conditioner replaces oils that leather has lost, and that is why dry, stiff leather often looks and feels much better after one careful feed. Apply a thin, even layer with a soft cloth, work it across the whole panel rather than just the worst mark, and let it absorb before you judge the result.
One heavy coat is the classic mistake. Excess conditioner sits tacky, attracts dust, darkens colour unevenly, and can soften leather so much that a bag loses shape. Two thin coats, with full absorption between them, feed the leather without that greasy film. Buff away any excess with a clean, dry cloth once the product has had its time.
Colour change is normal and must be expected. Conditioner almost always darkens leather while it absorbs, and on pale leather some darkening can last. Always test on a hidden spot, such as an inside flap, a strap underside, or a shoe tongue, and wait a full day before conditioning a visible panel. If the test darkens more than you can accept, stop.
Condition only the leathers that accept it: smooth and grained leather, after cleaning, when fully dry. Never condition suede, nubuck, patent, or most exotics with standard creams or oils. New leather rarely needs conditioner straight away, and leather that already feels soft and supple should be left alone until it shows dryness again.
Timing matters after cleaning. Leather should be clean and fully dry before conditioning, because conditioner over dirt or dampness seals both in. If you are unsure which product suits a particular piece, the Saphir Renovateur guide explains that product's method in detail and is worth reading before substituting a different cream.
Flex the leather gently as it softens, and check it again in daylight. Fine dryness lines often fade a lot once the hide is fed, and that may be all the piece needed. If stiffness remains after two thin coats and a day of rest, the problem is deeper than dryness, and the crack and tear parts below, or a professional, are the next step.

Fix Light Scuffs and Surface Marks
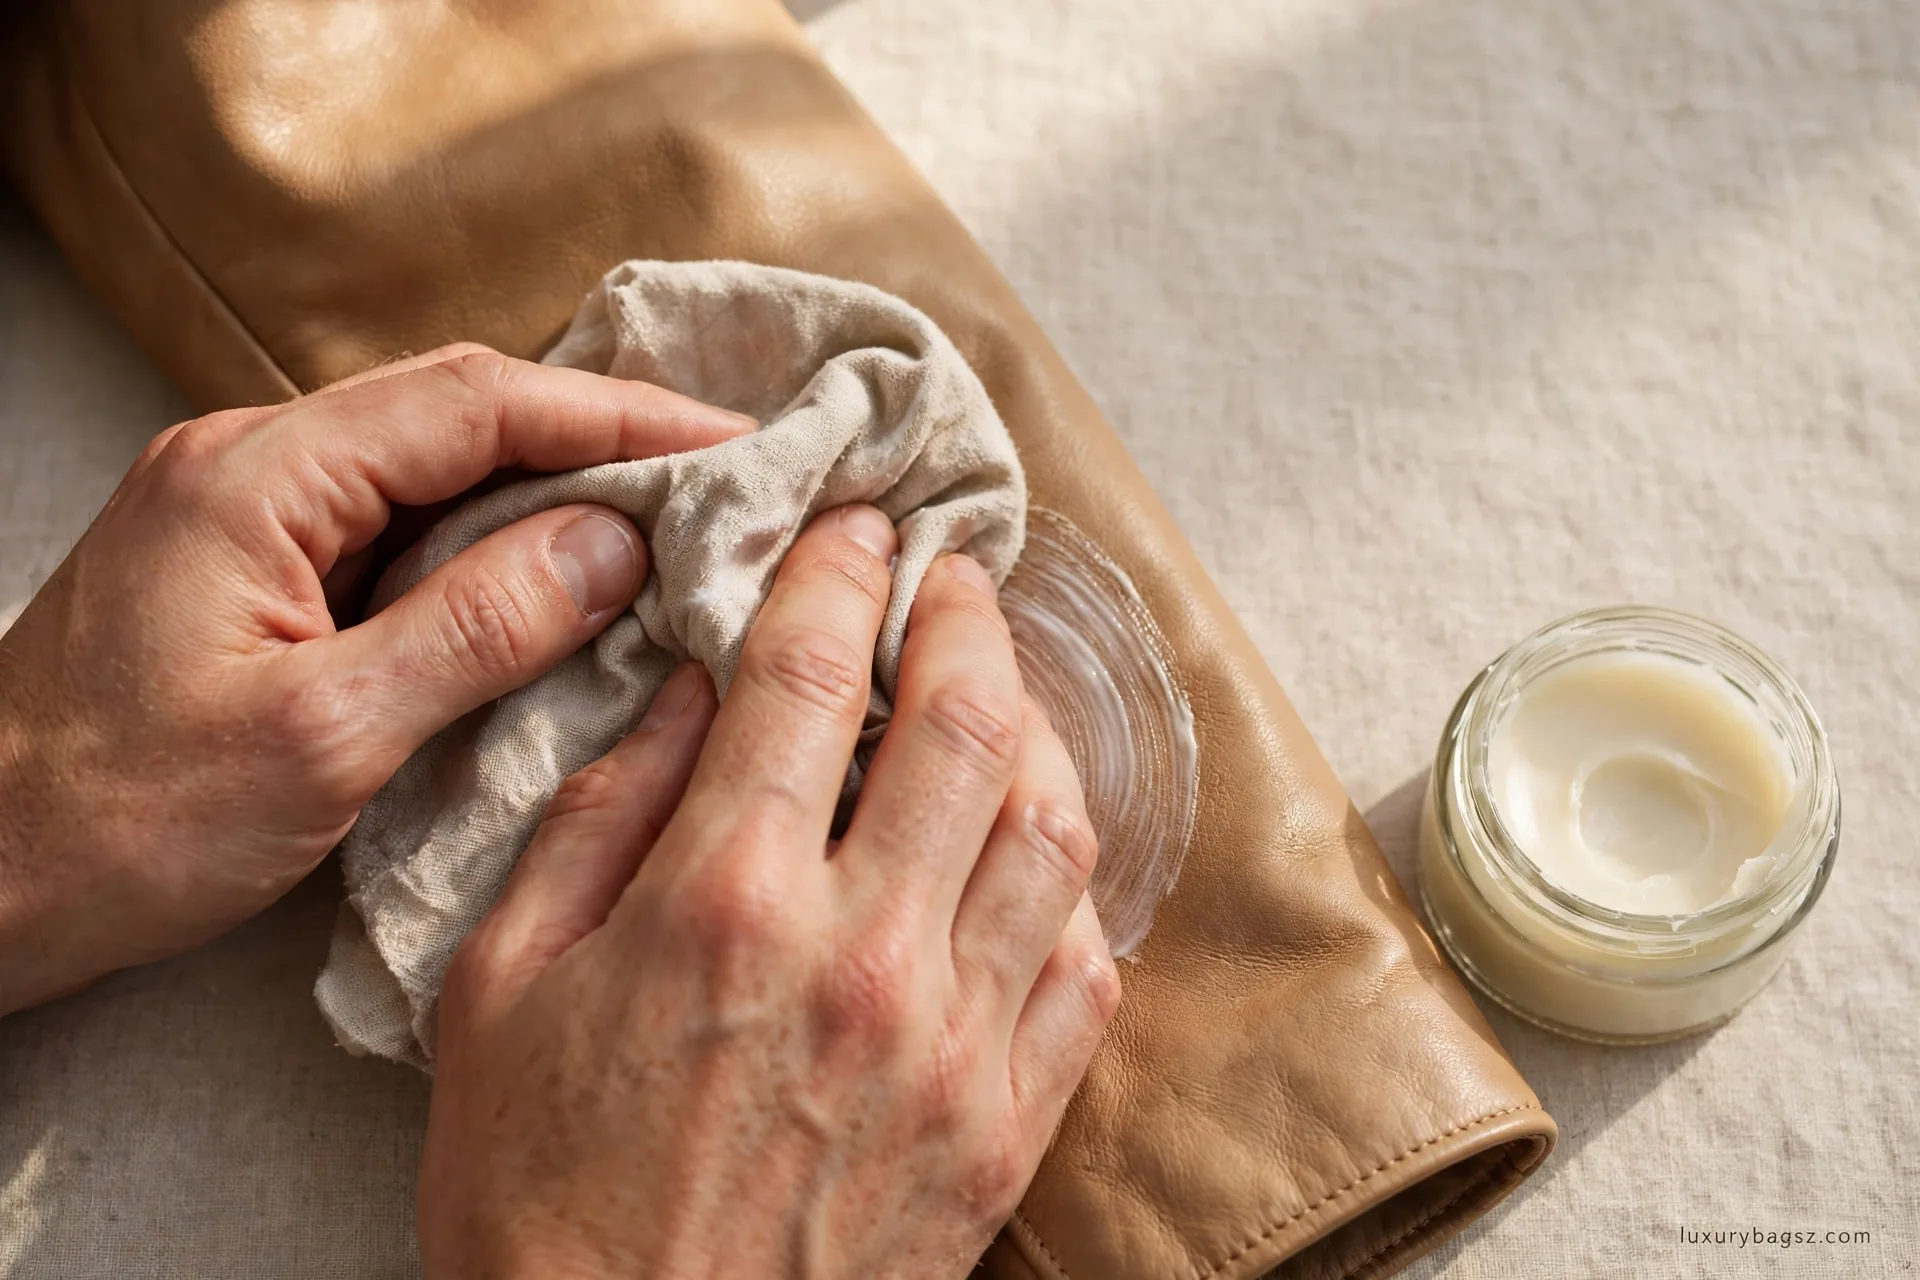
Light scuffs are the easiest restoration win, provided you judge their depth first. Rub the mark lightly with a clean fingertip: if it softens and blends, it is in the finish only, and a little conditioner worked in with light circular pressure will usually fade it. Buff with a dry cloth and check in daylight, not under a lamp.
If the scuff leaves a pale line after conditioning, the finish and some colour have gone, and conditioner alone will not bring the colour back. That mark moves to colour work in the colour restoration section, where a matched pigment, applied thinly, does what feeding cannot. Do not keep rubbing a pale line with conditioner in the hope that it will eventually darken; it will only overfeed that spot.
For a scuff on grained leather, the texture works in your favour, because the raised grain breaks up the mark. Work conditioner into the grain gently with a soft cloth, rather than scrubbing across it, and let the texture hide what remains. On smooth leather, the same mark shows more, so take more care to feather the edges of any product you apply.
Avoid abrasive pads, stiff brushes, and aggressive erasing on smooth leather. They remove finish around the mark and leave a shiny, worn patch that is harder to fix than the original scuff. If a mark does not improve after two gentle passes, stop and reassess its depth instead of pressing harder.
Water marks need a separate judgement. On sturdy dark smooth leather, lightly dampening the whole panel and letting it dry evenly sometimes evens a water mark, but on pale or delicate leather this can backfire and leave a larger mark. Test first, or hand a pale piece to a professional, because a water mark made bigger is a harder repair than the original.
Restore Faded Colour in Thin Layers
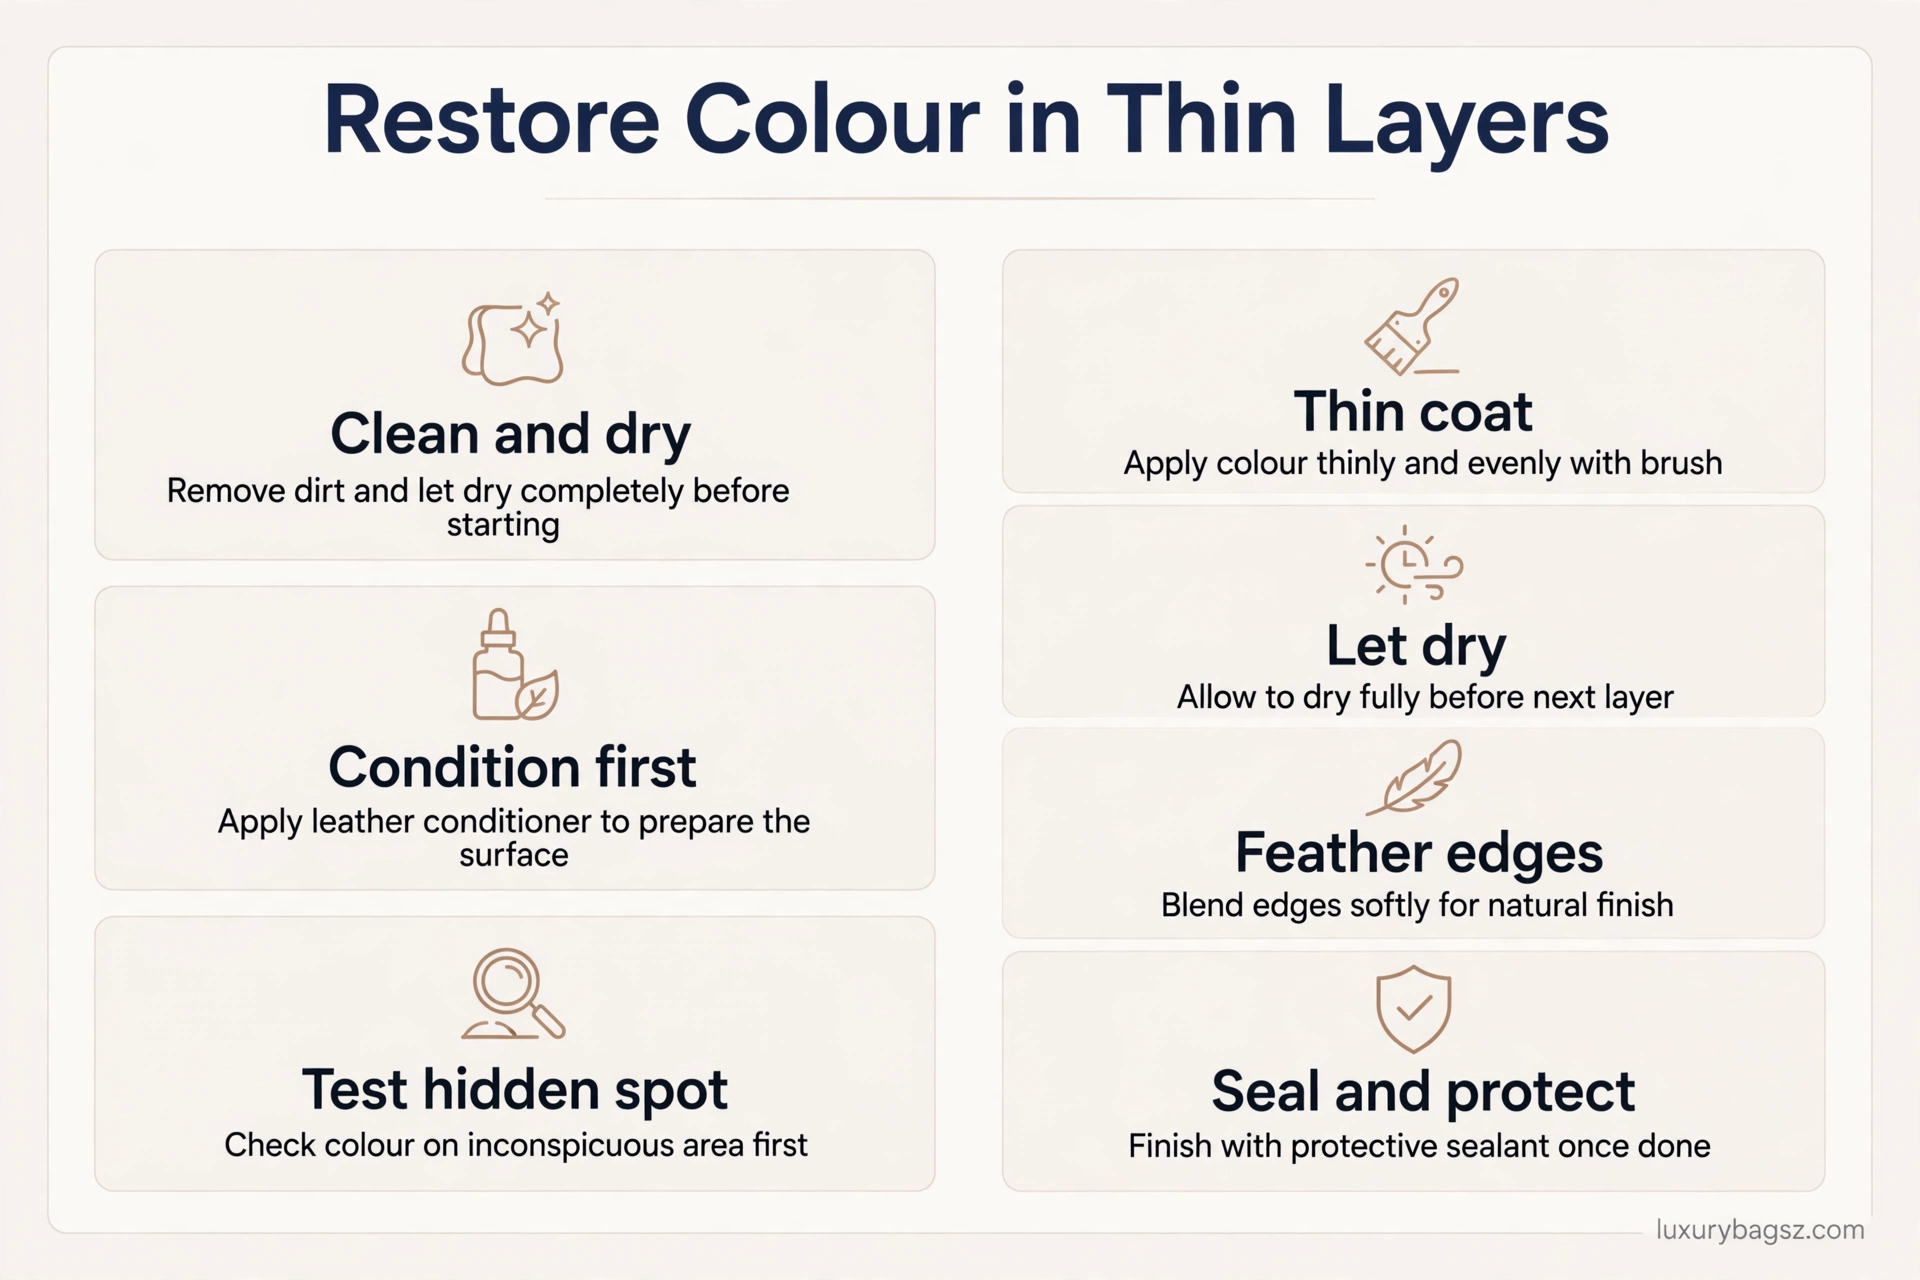
Conditioning deepens tone slightly and lifts dullness, but it does not replace pigment. If a panel still looks pale after cleaning and conditioning, colour is what is missing, and recolouring is the honest next step. Recolouring works best on smooth finished leather, where a coating can hold new pigment evenly.
Match the shade before you commit. Test the colourant on a hidden spot and let it dry fully, because wet colourant looks darker than dry colourant, and a shade that matches wet can look wrong once dry. If you cannot get a close match, do not proceed on a visible panel; a wrong shade draws the eye more than fading does.
Apply in thin layers with a sponge or soft applicator, feathering the edges outward so the new colour blends into the old. Let each layer dry fully before the next, and build up slowly rather than laying one heavy coat, which dries unevenly and can crack at flex points. Treat the whole panel, not just the palest patch, or the repair will show as a hard edge.
Finish with a compatible protective balm or sealant once the colour is completely dry, so the new pigment does not rub off on clothes or hands. Check the colourant maker's guidance for which sealant suits its product, because a mismatched topcoat can cloud or peel. Keep the piece out of strong sun while it cures, and avoid flexing the panel hard until the finish has set.
Sun-faded leather often arrives with dryness too, so the order matters: clean, dry, condition, then recolour. Recolouring dry leather without feeding it first gives a brittle finish over a thirsty hide, and the colour will crack sooner. Even fading across a panel is straightforward; heavy fading on one panel takes careful blending, and aniline, suede, and nubuck are harder because there is no coating to hold colour.
Fill and Repair Cracks
Fine cracking is usually a symptom of dryness, and thirsty leather regains flexibility once it is fed. Clean, dry, and condition first, flex the panel gently as the product works in, and avoid aggressive rubbing, which can turn a hairline crack into a split. Many fine webs of lines improve a lot at this stage and need nothing more.
Deep cracks are different: the surface fibres have split, and no cream rehydrates a broken fibre. These need filling rather than feeding. Work a flexible leather filler in thin layers, letting each layer dry, until the surface sits flush with the leather around it. Smooth lightly only if the filler maker advises it, and keep sanding, if any, very light and local.
Filler rarely matches the leather around it in colour, so recolouring usually follows filling, using the thin-layer method in the colour restoration section. Expect the filled area to look slightly different in texture, especially on grained leather, where filler cannot copy the grain exactly. A good fill is one that stops catching the eye at normal distance, not one that is invisible under close inspection.
If cracking covers a whole panel, or runs along a seam, a handle root, or a shoe flex point, stop and get a professional opinion. A panel-wide crack means the hide itself is weakened, and filler over a large area will crack again as the piece flexes. A professional can judge whether a panel can be stabilised, backed, or replaced, and that judgement is worth more than a tube of filler.
Cracks on bonded leather are a different case again. Once the coating splits and flakes, filler sits on a failing surface and will not hold for long. Do not invest in a full recolouring job on peeling bonded leather; the honest answer is usually to accept the wear, use the piece hard, or replace it.
Repair Small Tears, Holes, and Loose Edges
Small tears can be repaired at home if they are short, away from a seam, and in leather that is otherwise sound. Do not pull the tear, which lengthens it and distorts the edges. Clean around the damage, slide a backing patch slightly larger than the tear underneath, and bond it with a flexible adhesive made for leather.
Bring the edges together so they touch without overlapping, hold them while the adhesive cures, and let it cure fully before any colour work. A patch that only hides damage, without bonding the edges, will reopen the first time the piece flexes. Once cured, a thin colour touch-up over the join, feathered outward, helps the repair blend in.
Never use rigid super glue on leather. It dries hard and brittle while leather stays soft and moves, so stress transfers to the edges of the rigid spot and the leather tears again just outside the repair. Flexible leather adhesive exists for exactly this reason, and it is the only adhesive to use on a tear you hope will hold.
Holes need a filler or an inset patch, depending on size. A pinhole can be filled in thin layers like a deep crack, while a larger hole needs a patch of matching leather set in and colour-matched, which is skilled work. If the hole sits on a corner, an edge, or a high-stress point, hand it to a professional, because a home patch there will fail under load.
Loose edges and peeling edge paint are early warnings, not cosmetic details. Edge dressing on shoe soles and edge paint on bags wear with use, and small chips are normal. When edge paint peels widely or a sole edge feels rough and frayed, book a repair before moisture reaches the fibres underneath, because edge touch-ups are quick when caught early.
Decide: DIY or a Professional
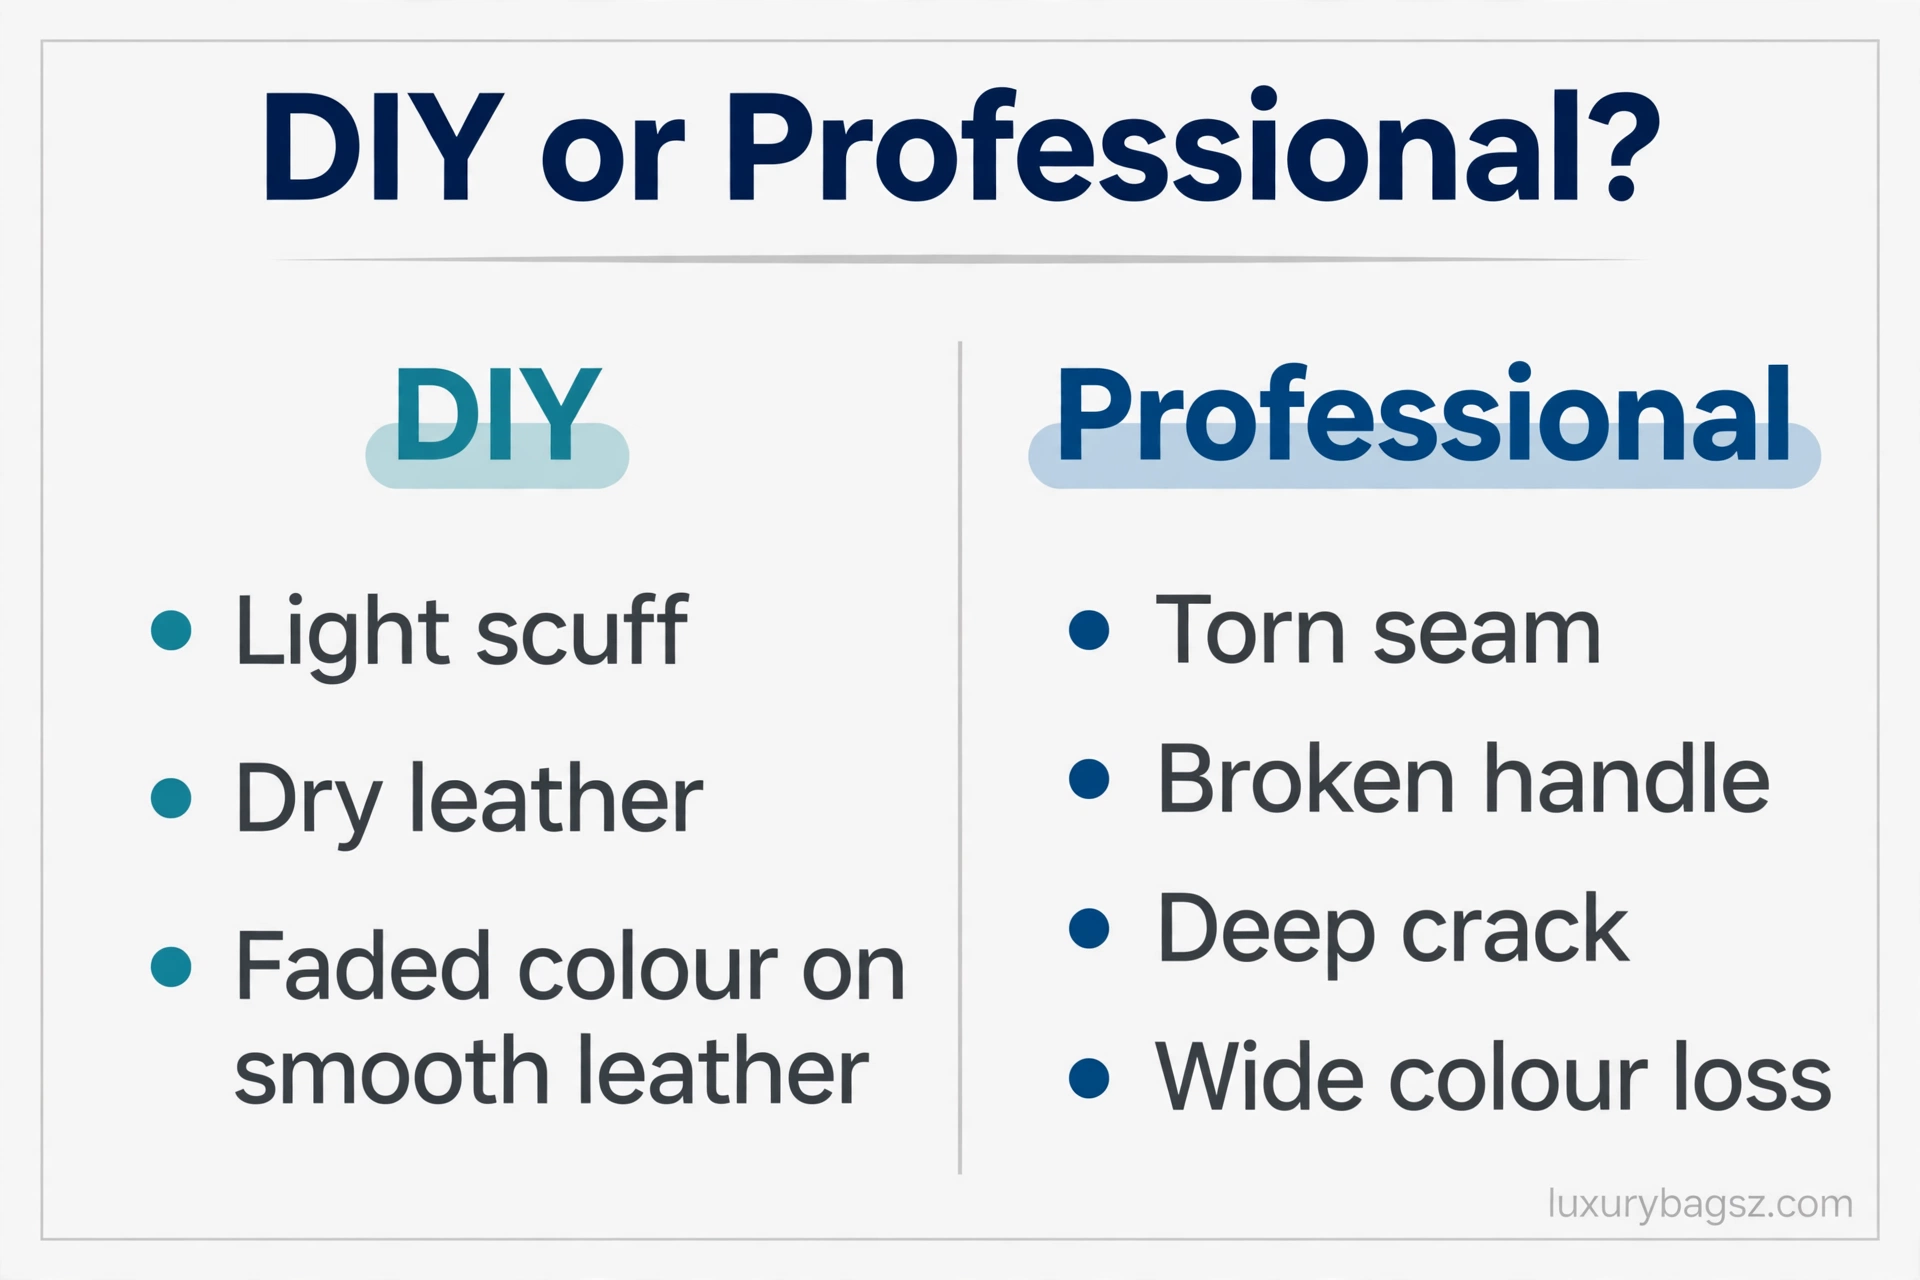
DIY suits surface work on sound leather: cleaning, conditioning, light scuffs, dryness, and careful recolouring of a faded smooth panel. These jobs are reversible in the sense that a mistake is usually limited to one panel and can often be corrected by a professional later, though not always cheaply.
Professional work suits anything structural or wide-area: torn seams, broken handles, cracked panels, large stains, wide colour loss, damaged linings, and any repair on a valuable, vintage, or exotic piece. A professional also suits any job where you cannot get a colour match, because a wrong shade on a visible panel is worse than fading.
Ask a restorer the right questions before handing a piece over. Ask whether they have worked on your leather type and on pieces of similar value, ask to see examples of similar repairs, and ask honestly whether the repair will show. A good restorer will tell you when a colour match is approximate, when a repair will be visible at close range, and when replacing a part beats patching it.
Cost is part of the decision, and a quote first is wise. Replacing heel tips, restitching a seam, or touching up an edge is usually inexpensive. Rebuilding a bag handle, relining a bag, or recolouring a large panel costs more, and should be weighed against the piece's value and how much you wear it. For a much-loved everyday piece, repair usually wins; for a barely worn piece with major damage, the quote may change your mind.
Do not start a home repair on a piece you intend to take to a professional if the repair could complicate their work. Extra holes, rigid glue, and layers of wrong-colour dye all make a professional repair harder and more expensive. When in doubt, get the quote first and do nothing until you have it.
What Cannot Be Restored
Some damage is permanent, and naming it plainly saves wasted effort and money. Peeling bonded leather cannot be restored to a sound hide, because the coating is failing and there is no real leather underneath to feed. Rotten or perished leather, where fibres crumble or tear with little force, cannot be fed back to strength.
Deep mould damage that has eaten into the hide, widespread deep cracking across a panel, and leather that has gone stiff and brittle through long heat or sun exposure are usually beyond home restoration, and often beyond professional restoration too. A professional may stabilise such a piece for display or light use, but it will not return to everyday strength.
Colour loss on suede and nubuck, and on uncoated aniline, is very hard to restore evenly, because there is no coating to hold new pigment. A professional may improve it, but a perfect match is unlikely, and home dye attempts on these leathers usually make the patchiness worse. Patent leather with a clouded, cracked, or peeling coating is similarly hard to bring back evenly.
Structural failure at a handle root, a strap attachment, or a seam that has torn through weakened leather may be repairable with a new panel or a rebuild, but that is a reconstruction, not a restoration of the original leather. Be clear with yourself about which you are paying for, and whether the piece's value justifies a rebuild.
Finally, a repair that would need to hide damage under thick filler and heavy dye across a whole piece is usually a sign to stop. Thick coatings crack at flex points, peel at edges, and look wrong in daylight. A piece that can only be saved by coating it heavily is often better kept as a well-loved, visibly worn piece than turned into a stiff, coated imitation of itself.
Protect the Result and Store It Well
Restoration is wasted if the piece goes straight back to the habits that damaged it. Once clean, conditioned, and repaired, protect the surface with a product suited to the leather type: a balm or protector for smooth leather, a dedicated spray for suede and nubuck. Apply it in light, even passes and let it dry fully before use.
Keep the piece out of direct sun, including sun through a window, which fades colour and dries leather even indoors. Keep it away from radiators, heat vents, and hot cars, and blot spills at once instead of rubbing them in. These habits decide how long a restoration lasts far more than the products used in the restoration itself.
Storage matters as much as care. Store bags upright, stuffed lightly so they hold shape without stretching, with the dust bag on and handles arranged so they do not press creases into the body. Hang jackets on a wide, shaped hanger, never a wire one, and store shoes with trees or light stuffing. Never store leather in sealed plastic, which traps moisture and invites mould.
For delicate bags, the same storage care applies in more detail, as in the guide to store a Hermès Kelly bag. For everyday bags, the cleaning routine in the guide to clean Chanel bags shows how gentle, regular cleaning prevents the next restoration.
Check stored pieces every few months for damp, mould, fading, or flattening, because storage damage often appears months later, when its cause is forgotten.
Reapply protector after deep cleaning or after a season of heavy wear, because protection wears off. Do not layer multiple products on the same day; a cleaner, a conditioner, and a protector used together can interact and leave a tacky or cloudy finish. Space them out, let each layer dry, and let the leather tell you when it needs more.
Mistakes That Make Damage Worse
The most common mistake is cleaning too aggressively. Harsh products, stiff brushes, and repeated scrubbing damage finishes faster than dirt ever would. Gentle, repeated light cleaning beats one harsh session every time, and if a mark does not lift after two gentle passes, stop.
The second mistake is conditioning everything, including leathers that should never take cream. Suede, nubuck, and patent do not take standard conditioner, and even smooth leather suffers from too much product. Condition lightly, rarely, and only the leathers that accept it, and always test first on pale leather.
The third mistake is drying leather with heat. Radiators, hair dryers, and hot cars feel efficient, but they stiffen and crack leather, and heat also disturbs dye. Room-temperature air drying, with shape support, is slower and far safer, and it is the only drying method restoration should rely on.
The fourth mistake is recolouring before cleaning and conditioning. Dye over dirt, grease, or dry leather bonds badly, looks uneven, and cracks sooner. The order is fixed for a reason: clean, dry, condition, then recolour, then protect. Skipping a step to save time usually costs a second, harder repair.
The fifth mistake is using rigid glue, fabric dye, or shoe dye on leather. Fabric and shoe dyes crack, transfer, or refuse to bond properly on leather, and rigid glue creates a hard spot that tears around its edges. Use products made for leather, in thin layers, and when a product's label does not say it suits your leather type, do not use it on a piece you value.
Frequently Asked Questions
Can I restore leather at home?
Yes, for surface work on sound smooth leather: cleaning, conditioning, light scuffs, dryness, and careful recolouring of a faded panel. Structural damage, wide colour loss, and valuable or exotic pieces belong to a professional.
What order should leather restoration follow?
Assess first, then clean, then dry fully, then condition, then fill or recolour if needed, and protect last. Skipping cleaning seals dirt in, and recolouring dry leather gives a brittle finish that cracks sooner.
Can conditioner fix faded leather?
Only partly. Conditioner deepens tone slightly and lifts dullness, but real colour loss needs pigment. If a panel still looks pale after cleaning and conditioning, colour, not feeding, is what is missing.
Can cracked leather be repaired?
Fine cracking from dryness often improves a lot with feeding. Deep cracks, where fibres have split, need flexible filler and usually recolouring, and panel-wide cracking needs a professional opinion.
Can I fix a tear in leather myself?
A short tear away from a seam can be backed with a patch and flexible leather adhesive, with edges touching, not overlapping. Tears on seams, shoulders, or high-stress points, and long tears, are professional jobs.
Why do sources disagree about dish soap, vinegar, and oils?
Some guides suggest household shortcuts, while others warn they strip finish, darken unevenly, or damage dye. On a valued piece, the cautious route wins: a cleaner made for your leather type, patch-tested first, and no heat drying.
Can suede and nubuck be restored at home?
Only within dry limits: brushing, erasing light marks, and a dedicated protector spray. Creams, oils, and dyes flatten the nap and darken patches unevenly, so colour restoration on these leathers is usually professional work.
Can peeling bonded leather be restored?
No, not to a sound hide. Bonded leather is fibre under a coating, and once that coating peels, there is nothing underneath to feed or dye. Touch-ups may hide a small flake briefly, but the peeling will continue.
How do I know when to stop and call a professional?
Stop when damage is structural, covers a whole panel, sits on a seam or handle root, or when you cannot get a colour match. Also stop before a home attempt that could complicate a professional repair, such as rigid glue or wrong-colour dye.
How long does a leather restoration last?
It lasts as long as the habits around it do. With gentle cleaning, protection, sun and heat avoidance, and breathable storage, a good restoration holds for years. Without those habits, the same damage returns, often faster than the first time.
Final Verdict
Restoring leather rewards patience and order more than products. Assess honestly in daylight, clean gently, feed thinly, repair colour and structure in thin layers, and hand structural work to a professional you trust. Know what cannot be restored, and do not spend good money coating a piece that can only be kept as a well-worn favourite.
Start with the piece you reach for most, work through it in order, and judge each step in daylight before moving to the next. Done that way, restoration does not make a bag, jacket, or pair of shoes look new again in a false sense; it makes them look cared for, supple, and honest, which is the better result and the one that lasts.