How to Spot Fake Hermès Oran Sandals: 12 Checks, the H Cutout, Sole Stamps, and the Traps That Prove Nothing
The H, Stitching and Stamps That Give Fakes Away
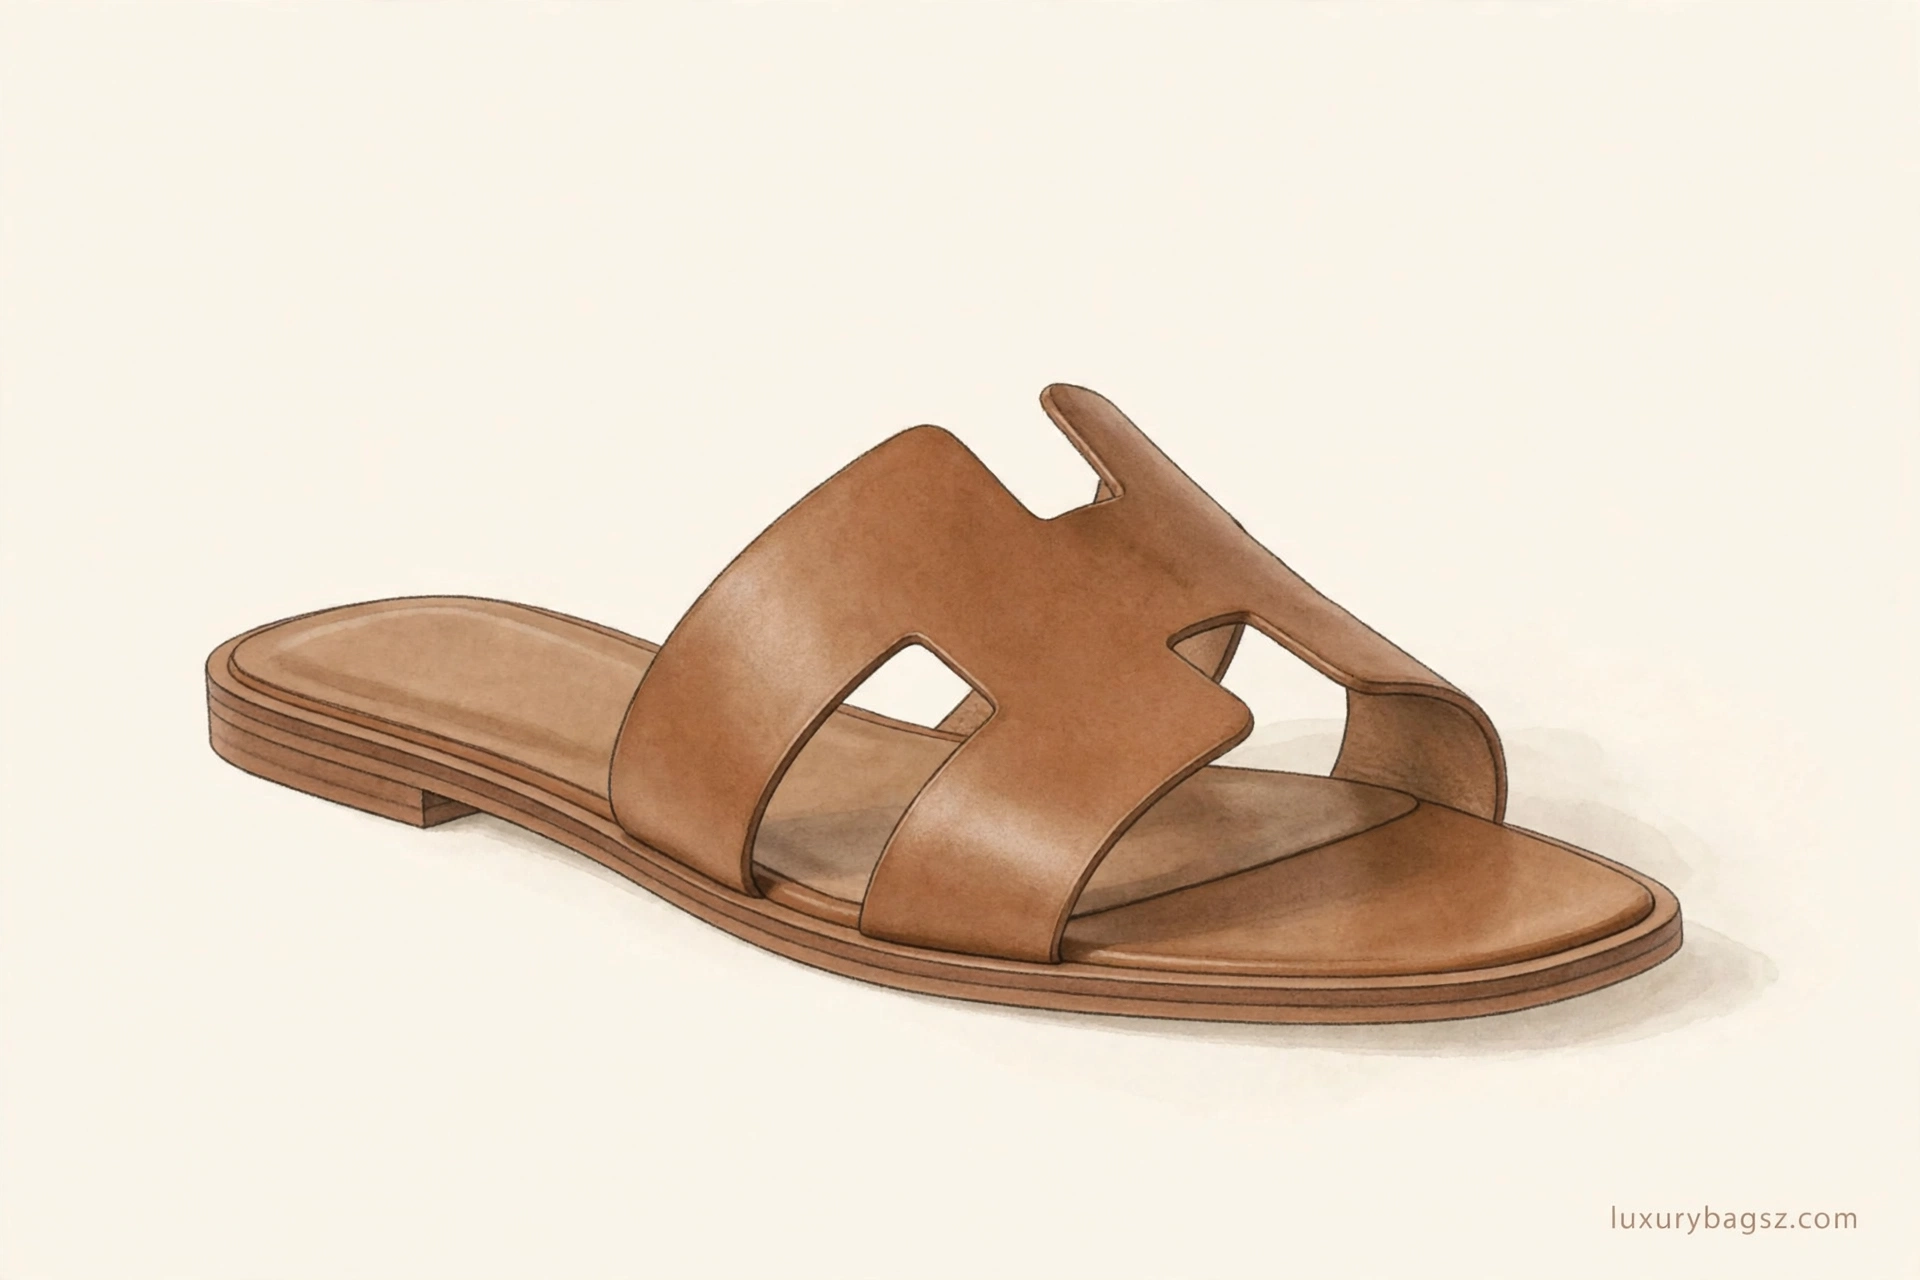
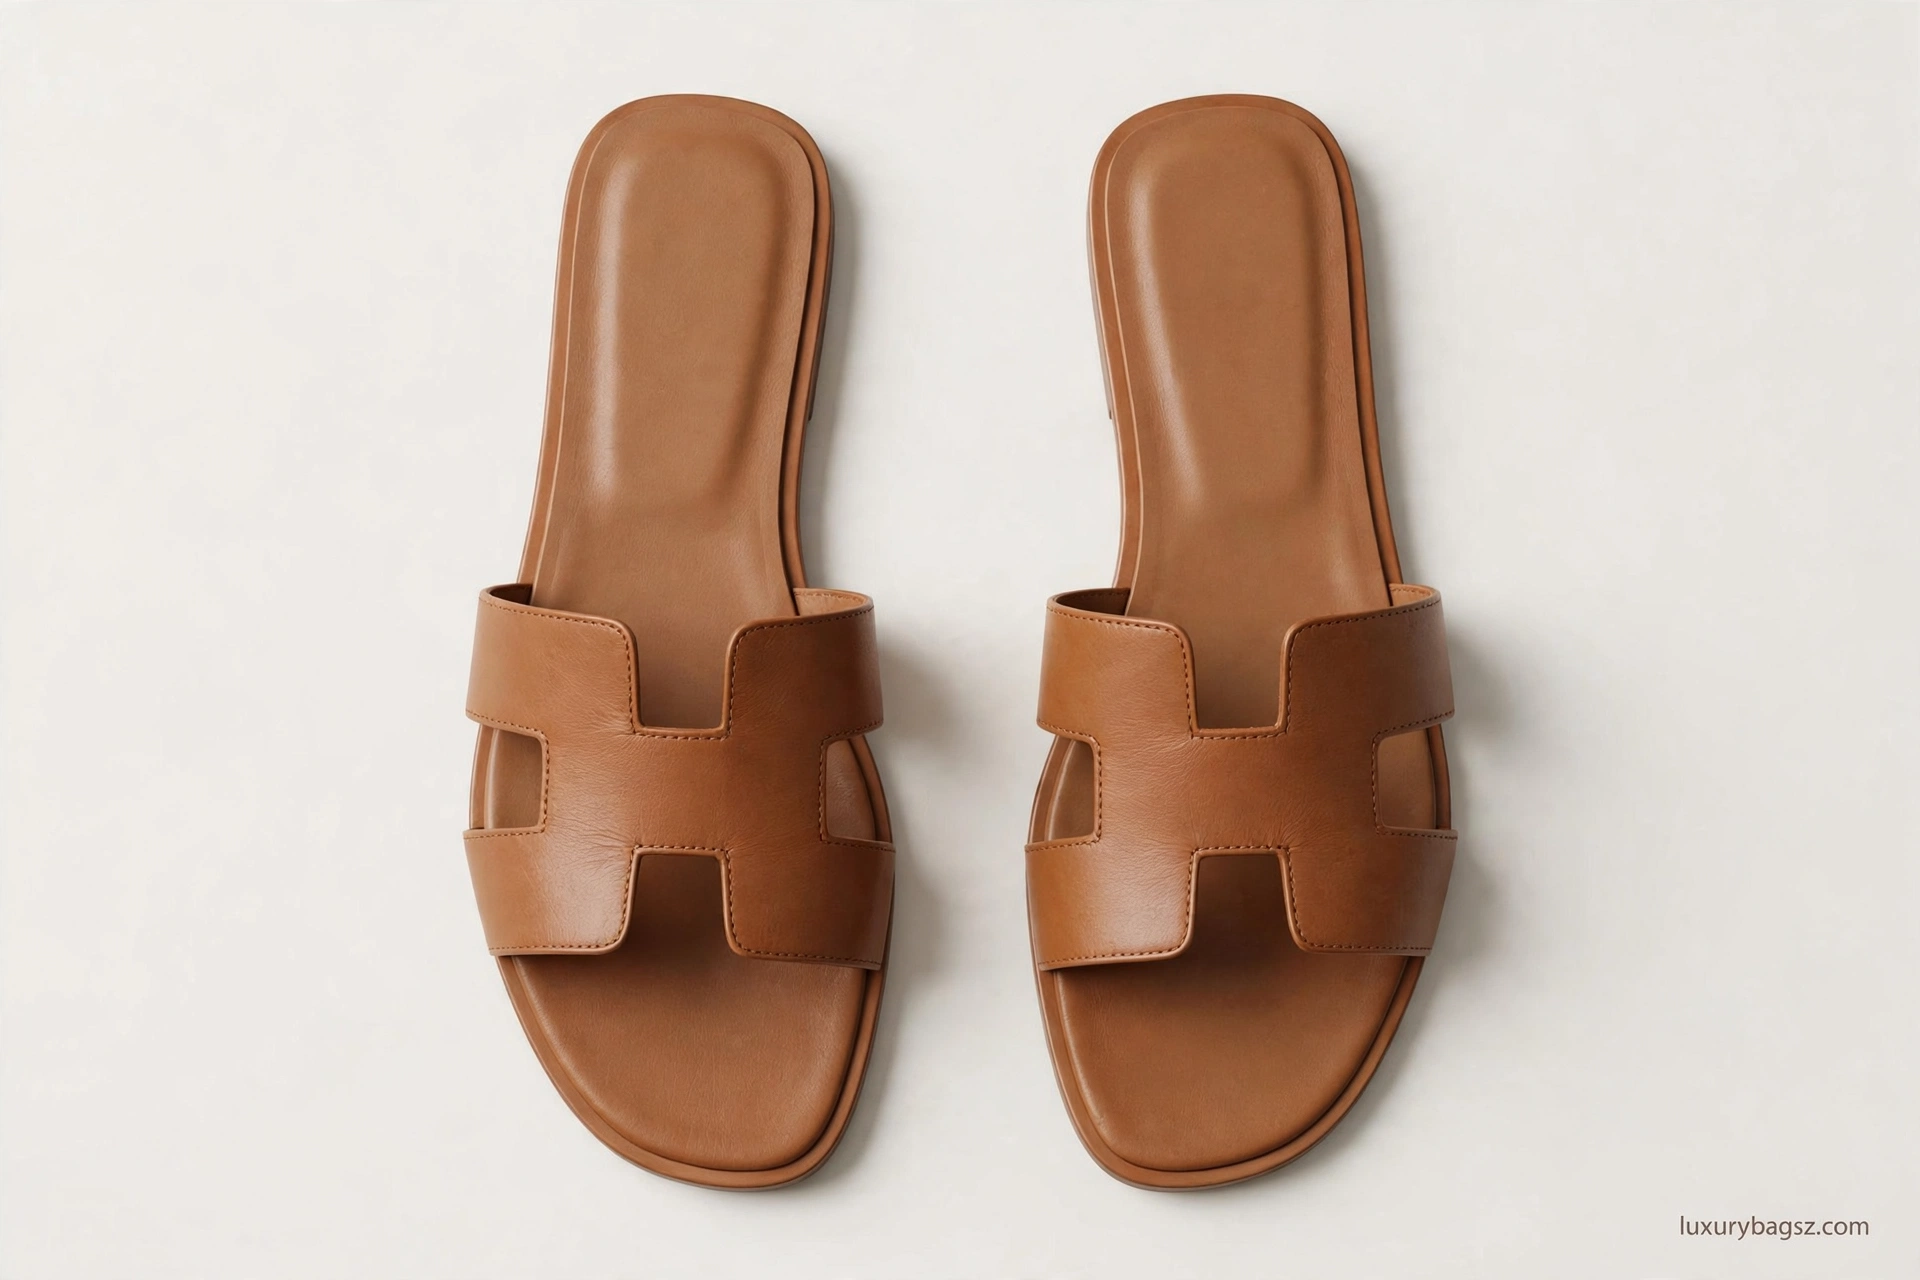
Start with the H itself: on a genuine pair it is crisply cut, balanced and smooth-edged, with stitching tracking its outline closely. Next check that stitching for depth and regularity — shallow, short or uneven stitches are a classic warning on lesser copies.
Then compare the insole marking with the sole marking, the stated size and the claimed material; they should all agree, though a convincing stamp alone settles nothing. Lay both sandals together too — colour, toe shape, sole tone and stitching should match. Hermès does not supply authenticity cards, so any card offered should raise suspicion, not settle it. Nor can any serial number or code be checked online — Hermès offers no such public check.
A fake Hermès Oran sandal is rarely caught by one dramatic giveaway. It is usually caught — or missed — by a pile of small details, checked in the right order, on the actual pair in front of you. That is why so many buyers get it wrong, and why so many guides get it wrong too: they give you five quick tells, you tick them off, and you feel safe, while the pair that fooled you passed all five easily.
The Oran makes this harder than most Hermès pieces, and simpler in one way. Harder, because it is small, flat, and extremely widely copied. A counterfeiter only has to get a leather strap, an H-shaped cutout, a leather insole, and a flat leather sole roughly right, and at arm’s length, in a single resale photograph, most copies look roughly right. The sandal has no clasp, no lock, no zip, and no complex hardware to test. There is nothing to open, nothing to click, and nothing to weigh in the way a bracelet or a bag lock can be weighed. Simpler, because the whole sandal is on show. The strap, the stitching, the edges, the insole, the sole, and the heel are all visible, all at once, and all of them have to be right at the same time. A fake that gets the H right often gets the sole stamp wrong. A fake that gets the sole stamp right often gets the stitching depth wrong. A fake that gets both right often gives itself away in the leather, the toe shape, or the way the two sandals fail to match each other.
This guide is written for a buyer, not for a professional authenticator, and it is honest about its limits. No guide, and no set of photographs, can give you a certain verdict on a high-grade counterfeit. What this guide can do is teach you to spot the large majority of fakes, to ask for the photographs and measurements that make a fake much harder to hide, to recognise the traps that prove nothing at all, and to know when to stop and pay for professional authentication before you pay for the sandals.
A note on the pictures in this guide, because it matters for an authentication article more than for any other kind. Every picture here is a generic illustration, not a photograph of a real Hermès sandal, and none of them should be used as a reference for what a genuine Oran looks like in detail. Illustrations simplify leather, flatten stitching, and tidy up edges. Use them to follow the checks, not to compare a pair of sandals against them line for line. Where an illustration simplifies a detail, the words in this guide prevail. In particular, no illustration in this guide is a genuine-versus-fake comparison photograph, and none should be presented as one.
Key Takeaways
- Judge a pair of Orans as a whole. No single check — stamp, price, photograph, card, or receipt — proves a pair genuine, and no single flaw, on its own, always proves it fake. It is the pattern across all twelve checks that matters.
- Hermès issues no authenticity cards as a general rule. A card, a certificate, or a “check online” number supplied with Orans is a red flag, not reassurance. A copied stamp proves nothing either, because counterfeiters copy stamps.
- The H cutout is the most underrated check in the whole subject. A genuine H is a precise, cleanly cut letter with smooth, even edges and stitching that follows the shape exactly. A ragged, lopsided, or roughly cut H, or stitching that wanders away from the edge of the H, deserves a much closer look, even if the leather looks good.
- Stitching depth matters as much as stitching neatness. On a genuine Oran, the stitches around the H sit deeply and evenly in the leather, with consistent length and spacing. Thin, short, shallow, or uneven stitches are one of the most consistent tells on mid-grade copies.
- The insole stamp and the sole stamp must agree with each other, with the size, and with the claimed age and material of the pair. A misspelled stamp, a wrongly weighted letter, a size that does not match the listing, or wording that no genuine pair carries is a serious warning — but a correct-looking stamp is not proof, because stamps are among the easiest details to copy.
- The pair must match. Two sandals from the same genuine pair should agree in colour, leather, stitching, toe shape, sole colour, and stamp. A pair that does not match itself has already failed a check that no single-sandal photograph can hide, if you ask for photographs of both sandals together.
- A box, a ribbon, and a dust bag prove nothing on their own. All three are widely copied, and all three can be borrowed from a genuine purchase. Judge the sandals, not their packaging.
- Price is a warning, never a verdict on its own. A price far below any plausible range for that material and condition with no credible explanation is a reason to stop, but a high price proves nothing either — expensive fakes are common, and a genuine pair can be listed cheaply by a seller who needs a quick sale or who has misidentified what they own.
- Wear is not the same as fakery, and perfection is not the same as genuineness. Genuine leather creases, darkens, and scuffs with wear, and a worn genuine pair can look rough. A fake can also be made to look worn, and a genuine pair can be kept unworn. Judge the pattern of the wear, not the mere fact of it.
- Ask for twelve photographs before you pay, including the H close-up, the stitching close-up, the insole stamp, the sole stamp, the heel from the side, both soles side by side, and the sandals worn. A seller who cannot or will not supply them has not given you enough to buy safely, however good the first photograph looks.
- If you have already bought a pair and now doubt it, stop wearing it as a proven genuine pair, keep everything that came with it, do not alter, polish, dye, or repair it, and get a professional opinion before you try to resell it or confront the seller. The already-bought section sets out the order to follow.
Spotting a Fake Oran in Brief
Can you tell a fake Oran from one photograph? Almost never, and you should distrust any seller or guide that says you can. One photograph can rule a pair out — a plainly lopsided H, a misspelled stamp, or stitching that wanders off the edge of the strap can be enough to walk away — but it cannot rule a pair in. Good counterfeits are photographed to pass the one angle you are shown, usually a clean top view in soft light, with the sole, the heel, and the inner strap markings conveniently out of frame.
What is the fastest honest check? Look at the H first, then the stitching that follows it, then the two stamps. Ask for a close-up of the H strap from directly above, a close-up of the stitching along one leg of the H, a close-up of the insole stamp, and a close-up of the sole stamp, all in bright, natural light, with no filter. A genuine pair should pass all four without strain. Many fakes look fine from a distance and give themselves away the moment you get close to any one of those four places.
What about the stamps? Check them, but do not stop there. A genuine stamp is a small, cleanly pressed mark in a place that matches the model and the era, and the wording must fit the claimed material and origin of the pair. A stamp that breaks that pattern, or a claimed size that contradicts the stamp, is a serious warning — but a correct-looking stamp is not proof, because stamps are among the easiest details to copy, and because this guide itself records disagreements between sources about exactly what wording appears on genuine soles from different years.
What is the one trap to avoid above all? Treating anything that came in the box as proof. Hermès does not issue authenticity cards as a general rule, and it does not give an Oran a serial number that a buyer can check in a database. A card, a certificate, a “serial number check”, or a receipt photograph can all be faked, borrowed from another purchase, or printed at home. The same caution applies to a dust bag and an orange box, however convincing they look in a photograph.
When should you walk away without further argument? When several checks fail at once, when the seller refuses the twelve photographs listed in the seller-photo checklist section, when the size on the sole contradicts the listing, when the price is far below any plausible range for that material and condition with no credible explanation, or when the seller pressures you to pay quickly, off-platform, or by a method with no buyer protection. Any one of those is a reason to pause. Two or more together are a reason to stop.
When should you pay for professional authentication? Whenever the pair passes your own checks but the price is high, the seller is unknown to you, the colour is a desirable or rare colourway, or anything in the listing still feels slightly off after you have run all twelve checks. Professional authentication is not an admission that you cannot tell; it is the normal, sensible step for a purchase at this price, and reputable resellers expect it. A seller who discourages it, or who will not allow a return if a reputable authenticator disagrees, is telling you something important. That pattern-first discipline is the same discipline behind a fake Kelly check: no one detail carries the verdict, and the whole pattern has to agree.
What a Real Oran Is Supposed to Look Like
The Oran is a flat slide sandal built around a single wide strap across the front of the foot, cut into the shape of the letter H. That sentence sounds simple, and it is the reason the sandal is so often misdescribed. Guides that call it a heeled sandal are wrong. Guides that show a photograph of a different sandal — a Chypre with its chunky sole, an Oasis, or a generic H-strap slide — and label it an Oran are wrong in a way that poisons every check that follows. Start by being sure you are looking at an Oran at all: a flat leather sole, a low profile, a single H strap, and nothing else. If the sandal in the listing has a thick moulded sole, a buckle, or a second strap, it is not an Oran, whatever the listing title says.
The classic Oran upper is box calfskin leather. That is the material most older guides name, and it is the material behind the most famous colourway, the warm hazelnut shade often called Gold. But box calfskin is not the only Oran material, and any guide that treats it as the only one will mislead you on seasonal pairs. Resale listings and current guides also describe Orans in Epsom leather, in suede, in patent leather, and in canvas and other seasonal materials, and some pairs combine a leather strap with a differently finished insole. What matters for authentication is not that the leather is box calfskin in every case, but that the leather in front of you matches the material claimed in the listing, that it feels and behaves like that material, and that its finish is consistent across both sandals. A pair listed as box calfskin that feels plasticky, papery, or stiff in a way that does not soften with handling deserves a closer look, and so does a pair listed as suede that has a shiny, coated surface.
The leather on a genuine Oran is soft but firm. One long-running guide puts it well: the leather is soft to the touch and comfortable, yet firm enough to keep its shape, so that the sandal does not collapse or lose its outline when it is not being worn. That combination — soft, but structured — is hard to fake cheaply. Cheap copies tend to fall to one side or the other: either floppy, thin leather that creases deeply and loses the H shape, or stiff, board-like material that holds a shape but feels wrong and creaks rather than flexes. Neither extreme, on its own, proves a fake, because a genuine pair that has been stored badly can go floppy, and a genuine pair in a firmer leather such as Epsom will feel stiffer than a box calfskin pair. But a pair that is both floppy and badly cut, or both stiff and roughly stitched, is telling you the same story twice.
Next, the shape. The toe of a genuine Oran is more square than round, but it is not extremely square. One guide describes it as “more of a square toe” that is “not extremely square”, and that careful wording matters, because it rules out two opposite mistakes: calling a gently squared toe fake because it is not a sharp rectangle, and calling a pointed or very rounded toe genuine because it is “close enough”.
Look at the toe from directly above, with both sandals side by side. The two toes should match, the front edge should be a calm, even curve into a squared-off front, and there should be no pinching, puckering, or asymmetry where the strap meets the sole. A toe that is pointed, very round, or different on the left and right sandal is a warning, not a quirk.
Then the sole. A genuine Oran has a leather sole and a leather insole, with a low, flat profile. Resale listings commonly describe a small heel of about half an inch, which is really the thickness of the sole and heel block rather than a raised heel in the usual sense, and the sandal should sit flat on a table without rocking.
The sole is slim but not paper-thin, and the layers of the sole and heel should be neatly stacked, aligned, and finished, with no gaps and no visible glue lines. That last point is one of the most reliable in-person checks in this guide, and one of the hardest to judge from a single photograph, which is why a side view of the heel is one of the twelve photographs in the seller-photo checklist section.
Finally, the finish should be quiet in the way Hermès finish usually is. The stitching should be neat, the edges should be smooth, the stamps should be small and clean, and there should be no large external branding shouted across the sandal.
The brand mark, where it appears, is pressed into the insole and the sole, not printed in large letters on the outside of the strap. A sandal that looks loud, rough, or plasticky at close range has already failed the first impression, even before you run a single formal check.
The Standard Points, and What They Leave Unchecked
Most competitor guides for the Oran cover the same five or six points, and they cover them in the same order: the leather, the stitching, the insole logo, the sole, and the box and dust bag. Those points are real, and this guide covers them too, but on their own they are not enough, for three reasons.
First, they are the points counterfeiters already know. A guide that has been public for years teaches a counterfeiter exactly what to fix next. The leather on a good copy is now often plausible.
The H is often straight. The stamp is often copied letter for letter. A guide that stops at those points is testing a fake against last year’s standard, not this year’s copy.
Second, most guides treat each point as a pass or fail test on its own. “If the sole colour is light, it is fake” or “if the stitching is thin, it is fake” sounds decisive, and it is misleading. Genuine sandals vary by material, by colourway, by year, and by wear. A worn genuine pair can have faded stitching.
A genuine pair in a pale colourway can have a lighter-looking sole edge than a genuine pair in a dark colourway. A single failed point is a reason to look harder, not always a reason to declare a fake — and a single passed point is never a reason to declare a pair genuine.
Third, and most importantly, most guides miss the checks that actually separate a good copy from a genuine pair in practice. They rarely describe the H cutout itself in usable detail: how the inner corners of the H should look, how the cut edges should feel, and how the stitching should follow the H without wandering.
They rarely explain pair matching, even though a fake pair often betrays itself by the two sandals disagreeing with each other. They rarely explain wear patterns — where a genuine leather sole wears first, and what wear looks like when it is faked or hidden with dye. They rarely give a seller-photo checklist that a buyer can actually send to a seller, with the exact angles that matter.
They rarely explain the difference between a genuine pair that has been resoled, re-dyed, or repaired and a fake pair, so buyers mistake a repaired genuine pair for a fake, or mistake a fake that has been polished to hide poor leather for a genuine pair in good condition. And they almost never explain what to do after you have bought a pair you now doubt, which is when most buyers actually need help.
This guide is built to fill those gaps. The twelve checks below are ordered the way a buyer should run them: start with what you can see in a photograph, move to what you can feel and test in person, and finish with the traps that should never decide a purchase.
Where sources disagree — on prices, on stamp wording, on weights, on inner markings, on dust bag colours — this guide says so plainly, instead of picking one version and presenting it as settled.

Check 1: The H Cutout Shape and Edges
The H is the whole identity of the Oran, and it is the first check for a reason: it is the largest visible feature on the sandal, it is the feature most buyers look at least carefully, because they are looking at the colour instead of the shape, and it is the feature where cheap copies most often fail.
On a genuine Oran, the H is a precise, balanced letter. The two upright legs should be the same width as each other, the crossbar should sit level and centred, and the whole letter should sit symmetrically across the front of the foot, not drifted towards the inside or the outside edge. The inner corners of the H — the four corners where the crossbar meets the legs — should be clean, sharp, and consistent.
They should not be rounded off into blobs, pinched into points, or cut at visibly different angles from one corner to the next. The cut edges of the leather should feel smooth and even, with no fraying, no ragged fibres, no wavering line where the cutter slipped, and no thick, lumpy edge paint trying to hide a rough cut.
On a fake, the H goes wrong in several distinct ways, and each one tells you something different. A lopsided H, with one leg wider or longer than the other, or a crossbar that slopes, suggests a pattern or a cutting process that was not made to a tight tolerance. Rounded, soft inner corners suggest a moulded or poorly cut strap rather than a cleanly cut leather strap.
Ragged or fibrous cut edges suggest cheap leather or a blunt cutter. Edges that are thickly painted over, or that feel rough under a fingertip, suggest an attempt to hide a bad cut. A strap that is too wide or too narrow for the sole it sits on, so that it overhangs the edge or leaves a wide margin of bare sole on either side, suggests a strap and a sole that were not made for each other.

Check 2: The Stitching
Stitching is the second check, and it is the check most guides mention but few describe well enough to use. “Neat stitching” is not a usable test. What you need is a set of specific things to look for, in a specific order.
On a genuine Oran, the stitching that follows the H should be even in length, even in spacing, and even in depth. Each stitch should be the same size as its neighbours, the gaps between stitches should be consistent, and the thread should sit deeply enough in the leather to look settled, not perched on the surface.
The stitching should follow the edge of the H at a consistent distance all the way round, without wandering closer to the edge in one place and further away in another, and without cutting across a corner. The thread colour should match the leather or the intended contrast of that colourway — many Orans use a matching thread, while some well-known colourways, such as a black pair with white top stitching, use a deliberate contrast — and the thread should be the same colour on both sandals. There should be no loose threads, no doubled-back stitches where a mistake was corrected, and no skipped stitches.
On a fake, stitching goes wrong in the ways one authentication guide describes most usefully: the stitches are too thin, the threads are too short, and the stitches do not sit as deeply in the leather as they should. Thin thread looks spindly against the leather, especially in a close-up photograph. Short stitches look cramped and fussy, where genuine stitches look calm and regular.
Shallow stitches look as if they are sitting on top of the leather rather than sunk into it, and they are often accompanied by a faint groove that is too shallow or missing altogether. Add to that list the faults other guides name: uneven spacing, stitches that vary in size, loose ends, crooked lines that drift away from the H edge, and thread that frays easily or changes colour along its length.
There is one more stitching place that buyers forget, and it matters: the stitching or finishing where the strap meets the sole, and any stitching visible on the insole edge. On a genuine pair, those joins are tidy and consistent with the rest of the sandal. On a fake, they are often where the maker stopped caring, because most buyers never look there. Ask for a photograph of the strap-to-sole join on both sandals, from the side, and compare the two sides with each other.
If the pair is suede, the stitching check needs a small adjustment, and this is a place where a natural link helps rather than distracts: suede shows stitching differently from smooth calfskin, and the fibres around the stitches can look slightly raised even on a genuine pair. The same gentle, dry approach recommended for a suede brush is the right starting point for looking after suede Orans, and it is also a reminder not to judge suede stitching by smooth-leather standards. Do not wet, scrub, or steam a suede pair to “test” it, and do not let a seller do so on your behalf.
Check 3: The Leather Feel and Shape
Leather is the check that is hardest to do from photographs and easiest to do in person, which is why it causes so many arguments between buyers who have only seen photographs and sellers who insist the pair “feels real”. Both sides can be right about what they saw and still be wrong about the verdict, because leather feel is a comparison, not a measurement.
On a genuine Oran in box calfskin, the leather is soft but firm, as described in the section on what a real Oran looks like. It should flex without creasing deeply in a single sharp line, it should spring back when you bend the strap gently, and it should keep the shape of the H when the sandal is sitting unworn on a table.
The surface should be smooth, with a fine, even grain that is the same across the strap, and the colour should be even, with no blotches, no patches where dye has pooled, and no areas where the colour has been painted over a different base colour. The underside of the strap, where it can be seen, should look like leather, not like cardboard, plastic, or a coated fabric.
On a fake, leather goes wrong in ways that are often described too vaguely as “bad quality”. Be specific. Plasticky leather feels warm, slick, and uniform, with a grain that repeats too regularly, like a printed pattern, and it often smells of chemicals or of nothing at all, rather than of leather.
Papery leather feels thin and dry, creases in sharp white lines when bent, and tears or splits at the strap edges. Stiff, board-like material does not flex naturally and makes the sandal feel like a rigid shape rather than footwear. Floppy leather collapses when the sandal is held up, so that the H loses its outline.
Dye faults show as colour that rubs off on a white cloth with gentle pressure, colour that is visibly different on the two sandals, or colour that changes sharply at the strap edges where it has been touched up.
Check 4: The Insole Stamp
The insole stamp is the check most buyers start with, and the check most guides over-trust. It deserves a careful, slow treatment, because it is both genuinely useful and genuinely easy to fake.
On a genuine Oran, the insole carries a pressed brand mark. Guides describe it in slightly different terms, and the differences matter. One guide describes the logo as embedded into the lining in the same colour as the leather, so that it reads as a blind or tonal emboss rather than a printed logo. Resale listings, by contrast, commonly describe a gold-embossed calfskin insole, where the mark reads in gold.
Those two descriptions are not necessarily in conflict — the finish of the stamp can vary by colourway, by material, and by year, and a pale insole will show a tonal stamp differently from a dark insole — but they do mean that you cannot use “it must be gold” or “it must be tonal” as a fixed rule. What you can use is consistency: the stamp should be cleanly pressed, evenly deep, correctly spelled, correctly accented, and correctly placed, and it should look like it belongs to the sandal it is on, not like it was stamped afterwards onto a finished insole.
The lettering itself is where fakes most often fail, and one dedicated authentication guide describes the failures precisely: on fake pairs, the insole lettering is too thin, the horse-and-carriage emblem — where it appears — is too little detailed, so that the horse is not perfectly visible when it should be, the “HERMES” text looks too thin and too tall, and the “PARIS” text looks too thin, where the genuine pair’s lettering is thicker and more defined.
That thickness test is useful, but it must be used with care. Letter thickness varies with the depth of the press, with the colour of the insole, and with the photograph, and a stamp photographed at an angle will always look thinner or taller than it is. Judge thickness only in a straight-on, well-lit close-up, and compare it with the thickness of the sole stamp on the same pair, which should be of a similar quality even if the wording differs.
Spelling and accenting are simpler, and they are unforgiving. The brand name carries an accent on the E in “Hermès”, and a stamp that drops the accent, misspells the name, or uses a visibly wrong font is a serious warning.
So is a stamp that is blurred, doubled, misaligned, or pressed so lightly that it is barely legible on a pair sold as new or lightly worn. So is a stamp placed in the wrong place — too far forward, too far back, or at a visible angle — where a genuine stamp sits level and centred on the insole.
Check 5: The Sole Stamp and Sole Colour
Turn the sandal over. The sole stamp is the second stamp check, and it is the one where sources disagree most openly, so this part states the disagreement rather than hiding it.
One dedicated authentication guide describes the genuine sole stamp as carrying the “HERMES” text and the size number below it, with the fake pairs getting the thickness wrong in the opposite direction from the insole: on the sole, the fake “HERMES” text looks too thick, the fake size number looks too thick and too bold, and the fake “semelle cuir” and “MADE IN ITALY” text looks too thick, where the genuine pair’s same inscriptions look thinner.
Another long-running guide describes the genuine sole differently: the logo “HERMES” perfectly engraved, with the shoe number below it, and states that in the replica it reads “Hermès Paris”, wording that cannot be found on the authentic sole. A third source, a detailed owner review, shows the sole stamp and notes that in real life the stamp is straight and the accent grave on the “È” is visible.
Those accounts do not all describe the same sole, and that is the point. Sole wording, and the exact combination of brand text, size, “semelle cuir” (leather sole), and origin text, can vary by year, by production run, and by the market the pair was made for, and guides written in different years, about different pairs, will naturally describe different combinations. This guide therefore does not publish a single “correct sole wording” table as if it were settled for every Oran ever made. What it does say, firmly, is this: whatever wording the sole carries, it must be cleanly and evenly pressed, correctly spelled and accented, correctly aligned, and consistent with the size and material claimed in the listing. A sole that reads “Hermès Paris” where the insole and the listing describe a different format, a size number that does not match the listing size, a stamp that is blurred, doubled, or crooked, or lettering that is wildly thick or thin compared with the insole stamp on the same pair, is a warning in every era.
Sole colour is the other half of this check, and it is where a single-tell guide is most likely to mislead you. One authentication guide states that the shade of brown used to paint the fake sole is too light, most visibly at the top of the sole, where the genuine pair has a darker and more concentrated shade of brown. That observation is useful for the pairs that guide was written about, but sole colour varies by material, by colourway, and by wear, and a leather sole darkens, lightens, and scuffs with use. A pale sole edge on a well-worn pair, or on a pair in a pale colourway, is not the same evidence as a pale, cheap-looking sole on a pair sold as new. Judge sole colour in photographs of both soles together, in the same light, and judge it alongside the stamp quality, not instead of it. A sole that is both the wrong colour and badly stamped is a much stronger warning than either fault alone.

Check 6: Heel and Sole Construction
A flat sandal has nowhere to hide bad construction, and the side view is where bad construction shows. Hold the sandal sideways, or ask for a side photograph, and look at the layers.
On a genuine Oran, the sole and the small heel block are neatly stacked and aligned, with no gaps between the layers, no overhang where one layer sticks out beyond the next, and no visible glue lines. The edges of the sole should be smooth and evenly finished, with a consistent colour and a consistent edge treatment all the way round. The sandal should sit flat on a table without rocking from side to side or from front to back, and the heel block should sit squarely under the back of the sole, not shifted towards the inside or the outside edge.
On a fake, the side view gives itself away in the ways an older guide describes plainly: glue lines, gaps, rigid parts where there should be soft leather, and a sole that looks badly put together, with no comparison to the genuine article. Look for a dark line of glue squeezed out between the sole layers, for a gap you can see daylight through, for a heel block that is visibly crooked, for sole layers of different thicknesses on the left and right sandals, and for an edge finish that is rough, flaky, or painted over in a thick coat to hide unevenness. Run a fingertip — in person — along the sole edge. A genuine edge feels smooth and continuous. A fake edge often feels stepped, ridged, or sticky.
Check 7: Size and Inner Markings
Size is a check that looks trivial and catches more fakes than buyers expect, because counterfeiters often get the size right on the listing and wrong on the sandal, or right on one sandal and wrong on the other.
Start with the basics. Orans are sold in French sizes, including half sizes, and a listing should state the French size plainly. Ask the seller to photograph the size as it appears on the sole, and to state the French size in words, not only as a converted US or UK size. A listing that only says “size 7” without saying whether that is a US, UK, or French 7 has not told you enough, because a French 37, a US 7, and a UK size are not the same foot, and a seller who is vague about size may be vague about other things too.
Next, compare the size on the sole with the size in the listing, and compare the two sandals with each other. Both sandals should carry the same size number, in the same style, in the same place. A pair where one sole reads 37 and the other reads 38, or where one size number is crisp and the other is blurred, has failed a check that no amount of good leather can rescue. The same applies to any inner markings. Some Orans carry small markings on the inner part of the H strap, and this is where sources disagree, so the disagreement is stated here rather than smoothed over.
One detailed owner review, of a pair bought in 2018, reports that most authentic Orans have a small number on each side at the inner part of the H strap closest to the little toe, and adds frankly that it is unclear whether older pairs have them or not, and that on darker leather the marking is really tough to see. That is a careful, limited claim: a marking that is present on some pairs, hard to see on dark leather, and not confirmed for older pairs. It is not a rule that every genuine Oran must carry it, and it is not a rule that any pair without it is fake. Treat an inner strap marking, where it is present, as supporting evidence that should be consistent on both sandals and plausible for the claimed year. Treat its absence, on its own, as no evidence at all, especially on a dark pair or an older pair. And treat a marking that is present on one sandal and absent on the other, or that reads differently on the two sandals, as a warning worth investigating.
The same caution applies to any claim that a number on the strap is a “serial number” that can be checked. There is no public database check for Oran strap numbers of this kind, and a number that looks plausible proves nothing on its own, because numbers are easy to copy. A seller who offers to “verify” a strap number for you online is offering a trap, not a service, and the traps section returns to that trap in full.
Finally, use a physical measurement as a cross-check, but use it honestly. One owner review gives a single example: a French 39 pair measuring 25.2 cm, or 9.9 inches, from the toe to the end of the heel. That is one pair, in one size, measured by one owner, and it is not a size table. It is useful only as a reminder to ask the seller for the actual length of the actual pair, measured from toe to heel, and to compare that length with the length of a pair you already own in the same French size, or with the length the seller states for that size. A pair whose measured length is wildly different from its stated size, with no explanation, is either mislisted or misrepresented, and either way you should not buy it until the difference is explained.
Check 8: Pair Matching
Pair matching is the check most competitor guides skip entirely, and it is one of the strongest checks in this guide, because it does not depend on knowing what a genuine Oran looks like in the abstract. It depends only on whether the two sandals in front of you agree with each other.
Lay both sandals side by side, or ask for a photograph of both together, from directly above, in the same light. Then compare, point by point: the colour of the leather, the shape and width of the H, the stitching colour, length, and spacing, the toe shape, the sole colour, the insole stamp, the sole stamp, and the heel construction. On a genuine pair, all of those should agree. Leather is a natural material, so a tiny variation in grain between the two sandals is normal, and a tiny variation in shade can occur, especially on a pair that has been worn unevenly. But a visible difference in colour, a different stitching pattern, a different toe shape, a different sole colour, or a different stamp style between the left and right sandals is not natural variation. It is evidence that the two sandals were not made as a pair, or that one of them has been replaced, repaired with a different material, or taken from a different pair altogether.
Pair matching also catches the most common listing trick in the whole subject: the seller who photographs only one sandal well, and shows the other sandal only in a distant, soft, or cropped photograph, or not at all. There is no innocent reason to hide the second sandal in a listing for a pair. If the listing shows one sandal in detail and the other only as a blur in the background, ask for the twelve photographs in the seller-photo checklist section, with both sandals in frame for the pair shots, and do not pay until you have seen them.
Check 9: Wear Pattern
Wear is the check where buyers most often go wrong in both directions: they condemn a genuine pair because it looks worn, and they accept a fake because it looks worn in a way that feels “authentic”. The remedy is to judge the pattern of the wear, not the mere fact of it.
On a genuine leather-soled sandal, wear follows the foot. The sole wears first at the ball of the foot and at the heel, the insole darkens and softens where the foot sits, the strap creases where it bends over the foot, and the edges of the sole scuff where they meet the ground. That wear should be consistent across the pair, allowing for the fact that most people wear one foot slightly harder than the other, and it should be consistent with the condition claimed in the listing. A pair sold as “worn a handful of times” should not have a sole worn through at the ball. A pair sold as “heavily worn” should not have a pristine insole.
On a fake, wear goes wrong in a few recognisable ways. Artificial distressing — scuffs that are too even, too regular, or concentrated in places the foot never touches — suggests wear that was added to make a new fake look used. Dye or polish used to hide wear, especially a sole edge that has been freshly painted over worn leather, suggests wear that was covered up to make a used fake look new. Wear that is inconsistent with the listing — a sole worn through on a pair sold as new, or a strap that is creased in a way that does not match the shape of a foot — suggests a story that does not fit the object. And wear that is wildly different between the two sandals, where one sole is heavily worn and the other is barely touched, suggests a pair that was not worn as a pair at all.
Cleaning and repair complicate wear, and they deserve a plain word here, because they are where a genuine pair is most often mistaken for a fake. Leather can be cleaned, conditioned, and polished, and a well-cleaned genuine pair will look better than a neglected genuine pair, without being fake. The same gentle approach that works for other Hermès leather — a soft cloth, a suitable leather conditioner used sparingly, and no harsh cleaners — is the right starting point, and the caution given for clean Chanel bags about testing any product in a hidden spot first applies just as well to sandals, where a conditioner that darkens the leather will change the colour you are trying to judge. Do not let a seller “clean up” a pair for your photographs with a product you have not agreed to, because a fresh coat of conditioner or dye can hide exactly the wear pattern you need to see. Ask for photographs before any fresh cleaning, or ask the seller to state plainly what has been applied to the pair, and when.
Check 10: Box and Dust Bag
Packaging is the check that feels reassuring and proves the least, which is why it gets its own check rather than being folded into the traps section. It is worth doing properly, because packaging faults can support a verdict reached on the sandals themselves, even though packaging alone can never reach a verdict.
A genuine Oran pair, when sold complete, typically comes with an orange box, a dust bag, and sometimes tissue and a ribbon, and resale listings commonly describe the pair as coming with “sleepers” — the protective covers — the signature box, and ribbon. The box should be sturdy and well made, with clean printing and no spelling errors, and the dust bag should be made from a quality cotton material, soft to the touch, with a cleanly printed or embroidered brand mark. The size or style information on the box, where it appears, should match the pair inside it.
On a fake, packaging goes wrong in the ways guides describe: a flimsy, thin, or badly printed box, a dust bag made from a thin or rough material, a brand mark on the dust bag that is the wrong colour, the wrong size, or the wrong weight of lettering, and a box whose size or style information does not match the pair. One dedicated authentication guide gives a specific dust bag example: the fake pair’s dust bag logo is coloured in a very light brown, almost red, where the real dust bag’s logo is black, and the fake letter “H” inside the circle is too thick and too big, where the genuine logo is thinner and smaller. That example is useful, but it is one guide’s example, about one set of pairs, and dust bag finishes can vary by year and by region, so treat it as a supporting observation, not as a fixed rule that every genuine dust bag logo must be black. What does not vary is the principle: the packaging should be consistent, well made, and matched to the pair, and any mismatch between the box and the pair is a warning.
Check 11: The Price Trap
Price is the check that most buyers use first and should use last, because it is the easiest check to get wrong and the easiest check for a seller to manipulate.
Start with the disagreements, stated plainly. Sources do not agree on a single current retail price for the Oran, and this guide does not pretend otherwise. One owner review, written about a pair bought in 2018 and updated since, states that Orans are available from $900 USD on the brand’s own website or in a boutique. Another current guide puts comparable standard leather models at roughly $750 USD in the US market, and around 620 euros for standard leather versions on a European online store. Those figures are not the same, and they were not written at the same time, for the same market, or for the same material. A price that looks “too low” against one figure may look plausible against another, and a price that looks “normal” against one figure may be far below another. Do not use any single figure from this guide, or from any guide, as a fixed retail price. Use the current price for the exact material and colourway, from the brand’s own current listing or a boutique, on the day you are buying, and compare the resale price with that figure, allowing for condition, rarity, and the seller’s costs.
With that caution in place, the price check itself is straightforward. A price far below any plausible range for that material and condition, with no credible explanation, is a reason to stop. A pair in a desirable colourway, in new condition, with a full box, listed at a small fraction of the current price, is not a bargain waiting to be found. It is either a fake, a misidentified pair, or a listing designed to attract a quick payment from a buyer who will not check. The same applies to the opposite trick: a price that is only slightly below retail, presented as a “small discount” to make the listing feel safe, on a pair that fails other checks. A small discount does not make a fake genuine.
Prices also need to be judged as single-listing examples, never as market averages, because averages hide exactly the variation that matters. As single examples only: one resale listing for a new black calfskin Oran with white top stitching, in French size 37, with box, was listed at $785; another resale listing for a new Gold box calfskin Oran, in French size 38, with box, was listed at $895. Those are two individual listings, for two different colourways and sizes, at two different times, and they are not a price range, a market rate, or a guide to what any other pair should cost. They are included here only to show the order of magnitude that genuine resale pairs in new condition can reach, and to show why a new pair listed at a tiny fraction of those figures deserves a much closer look.
Check 12: Seller Photographs, Listing Words, and the Whole Pattern
The twelfth check is not a check of the sandal at all. It is a check of the evidence you have been given, and it is the check that ties the other eleven together.
Read the listing words as carefully as the photographs. Vague phrases such as “authentic style”, “inspired by”, “mirror quality”, or “1:1” describe a pair without plainly claiming it is genuine Hermès, and contradictory words — new condition claimed beside a worn sole, a rare colourway claimed beside a common one, a box claimed but never photographed — are warnings on their own. So are missing words: no French size, no material, no condition description, and no statement of whether the pair has been resoled, re-dyed, or repaired. A listing that shows only one sandal, only from the top, or only in studio-style photographs that could belong to any pair has not shown you the pair you would be buying.
Then put the whole pattern together. A pair that passes the H, the stitching, the leather, the two stamps, the construction, the size, the pair matching, the wear, the packaging, and the price, and whose seller supplies the twelve photographs in the seller-photo checklist section without fuss, is a pair worth considering, with professional authentication if the price warrants it. A pair that fails two or three checks is a pair to pause on and re-check in daylight. A pair that fails four or more, or that fails on the H and the stamps together, or on pair matching together with any other check, is a pair to walk away from, however attractive the price or the colourway. That pattern-first discipline is the same discipline used for a fake Geta or a fake Lindy check: no one detail carries the verdict, and the whole pattern has to agree.


Traps That Prove Nothing
Some things look like proof and prove nothing at all. They are worth listing together, because they are the things sellers mention first when they want you to stop checking, and they are the things buyers mention first when they want to reassure themselves.
An authenticity card. Hermès issues no authenticity cards as a general rule. A card supplied with Orans, however official it looks, however detailed its printing, and however plausible its numbers, is a red flag, not reassurance. Cards are cheap to print, easy to copy, and routinely included with fakes precisely because buyers expect them. If a seller’s main evidence is a card, the seller has no evidence.
A certificate, a “verification” website, or a number to check online. There is no public database in which a buyer can type a number from an Oran and receive a genuine-or-fake verdict from Hermès. Any website that claims to offer such a check for a fee, any QR code that leads to a generic “authentic” page, and any seller who offers to “verify” a pair for you through a private contact, is offering a trap. A copied number will “verify” just as easily as a genuine number, because the website checking it is not Hermès.
A receipt photograph. A receipt can be borrowed from another purchase, edited, photographed from a different pair, or printed at home. A receipt photograph that does not show the exact pair, in the exact size and colourway, bought by the seller, from a source you can independently confirm, proves nothing about the pair in front of you. Even a genuine receipt proves only that someone once bought something, not that the pair in the listing is the pair on the receipt.
A box, a dust bag, and a ribbon, on their own. All three are widely copied and widely sold separately, as the packaging check explains. A beautiful box with a fake pair inside it is a common combination, not a contradiction. Judge the sandals, not the packaging, and treat packaging as supporting evidence only when the sandals themselves already pass.
A seller’s reputation, feedback score, or number of sales, on its own. Reputation helps, and a long history of positive feedback for genuine luxury sales is a good sign. But feedback can be bought, accounts can be hijacked, and a seller can sell genuine items for years and then sell one fake, whether knowingly or because they were fooled themselves. Reputation is a reason to consider a seller, not a reason to skip the twelve checks. The same caution applies to a seller who says “I bought these from a boutique myself” without photographs, a receipt you can confirm, or a return window. A story is not evidence.
A high price, or a low price, on its own. A high price does not make a pair genuine, because expensive fakes are common and are priced high precisely to look genuine. A low price does not make a pair fake, because a genuine pair can be listed cheaply by a seller who needs a quick sale, who has inherited a pair, or who has misidentified what they own. Price is a warning when it is far out of line, as the price-trap section explains, but it is never a verdict on its own.
Perfect photographs, on their own. Studio-quality photographs, a clean background, and a flattering angle prove that the seller can take a good photograph, not that the pair is genuine. In fact, the better the photographs, the more carefully you should check whether they show the actual pair, from the angles that matter, or whether they show a different pair, a stock image, or a single flattering angle repeated twelve times. Ask for the twelve photographs in the seller-photo checklist section, taken in one session, of the actual pair, and judge those, not the listing’s hero image.
A “professional authentication” claim with no name, no report, and no return. A seller who says a pair “has been authenticated” but will not name the authenticator, show the report, or allow a return if a reputable authenticator disagrees, has not given you authentication. They have given you a sentence. Real authentication comes with a named service, a written report you can read, and a seller who is not afraid of a second opinion. If any of those three is missing, treat the claim as a trap, not as evidence.
The feel of the leather, on its own. Leather feel is useful in person, as the leather section explains, but it is not a verdict, because good copies now use plausible leather, because genuine leather varies by material and by wear, and because a buyer who has never handled a genuine Oran has no reference point for what “real” should feel like. Use feel alongside the H, the stitching, and the stamps, never instead of them.
If You Have Already Bought a Pair You Now Doubt
Most buyers do not read an authentication guide before they buy. They read it after, when something about the pair they already own starts to bother them: a stitch that looks uneven in daylight, a stamp that looks thinner than a friend’s pair, a sole colour that does not match a photograph online. This part is for that buyer, and its first advice is the hardest to follow: do not panic, and do not act quickly.
First, stop wearing the pair as a proven genuine pair. That does not mean you must throw it away, or accuse anyone, or conclude that it is fake. It means you should not wear it to an occasion where its genuineness matters, lend it, photograph it as genuine for resale, or use it as a reference for judging other pairs, until you know more. Wearing a doubtful pair also adds wear that makes later authentication harder, because it blurs the line between the wear the pair arrived with and the wear you added.
Second, keep everything that came with the pair, exactly as it arrived. Keep the box, the dust bag, the tissue, the ribbon, any cards or papers — including any card that this guide says is a red flag, because that card is now evidence about the seller, not evidence about the pair — and keep the listing screenshots, the seller’s messages, the payment record, and any photographs the seller sent you before the sale. Do not throw anything away because it looks fake, and do not “tidy up” the pair. Evidence that looks unhelpful now may be the piece that matters later.
Third, do not alter, polish, dye, resole, or repair the pair before you have an opinion. Cleaning a pair gently, with a soft dry cloth, to see it clearly is reasonable. Applying conditioner, dye, polish, or a new sole is not, because it changes the very details an authenticator needs to see: the stitching depth, the sole colour, the edge finish, and the wear pattern. If the pair is suede, do not brush it aggressively or wet it before authentication, for the same reason. The same care that applies to Saphir Renovateur use on other leather — test first, use sparingly, and never on a pair whose genuineness is in question until an authenticator has seen it — applies here with even more force.
Fourth, run the twelve checks again, slowly, on the actual pair, in daylight, with the photographs from the seller-photo checklist section taken by you, not by the seller. Write down which checks pass, which fail, and which you are unsure about. A list written down is much harder to argue with than a feeling, and it is the list an authenticator will want to see. If the pair passes most checks and fails only on a point that this guide says varies by era — such as an inner strap marking, or a sole wording combination — say so plainly in your notes, rather than forcing a verdict.
Fifth, get a professional opinion from a reputable authentication service, and choose one that gives a written report, not only a yes-or-no message. Send the service the photographs you took, the listing screenshots, and your written list of checks, and ask specifically about the checks you failed or were unsure about. A good authenticator will explain their reasoning, not only their verdict, and that reasoning is useful even if you disagree with the verdict, because it tells you what to look at next time.
Sixth, only then decide what to do about the seller. If the pair is judged fake, or if the authenticator cannot confirm it, contact the seller through the platform you bought on, with the report, the photographs, and a calm, factual message stating what was claimed, what the report says, and what remedy you are seeking — a return and refund, in most cases. Do not threaten, do not accuse the seller of a crime you cannot prove, and do not accept a partial refund in exchange for keeping a pair you believe is fake and withdrawing a complaint, because that leaves the pair in circulation to be sold again as genuine. If the seller refuses, use the platform’s buyer protection process, and keep every message, because a platform case is won on records, not on feelings.
Seventh, if the pair is judged genuine, keep the report with the pair. It will help the next buyer, it will help you if you ever resell, and it will save you from running the same anxious checks again in a year’s time. And if the pair is judged fake and you cannot return it, do not resell it as genuine, do not give it away as genuine, and do not donate it in a way that lets it re-enter resale as genuine. A fake pair kept at home, clearly marked as a copy for study, does no harm. A fake pair sold on as genuine does harm to the next buyer, and it puts you in the position of the seller you complained about.
One final note for this part, because it is where buyers most often blame themselves unfairly: being fooled by a good fake is not a failure of intelligence, and it is not a reason to stop buying preloved luxury altogether. Good fakes fool experienced buyers, fool resellers, and sometimes fool authenticators on a first look. What matters is not whether you were fooled once, but whether you change the way you buy next time: photographs first, pattern first, professional authentication when the price warrants it, and no payment without buyer protection. That is a system, not a talent, and a system can be learned.
Seller-Photo Checklist: 12 Photographs to Ask For
Copy this list into a message to the seller, exactly as it stands, and do not pay until you have received all twelve, of the actual pair, in one session, in bright natural light, with no filter. A seller who supplies them willingly has given you a good sign. A seller who supplies only some of them, or who substitutes studio photographs for the close-ups, has not given you enough, however good the photographs they did supply look.
- Pair together, top view. Both sandals side by side, from directly above, on a plain background, showing the H, the toe shape, and the colour of both sandals in the same light. This is the pair-matching photograph, and it is the first one to ask for.
- H strap close-up. A close-up of the H on one sandal, from directly above, showing the inner corners, the cut edges, and the symmetry of the letter. Ask for the same close-up on the second sandal if the first one shows any asymmetry.
- Stitching close-up. A close-up of the stitching along one leg of the H, showing stitch length, spacing, depth, and thread colour, with no filter and no softening.
- Insole stamp. A straight-on close-up of the insole stamp, in bright light, showing the full lettering, the accent, and the depth of the press, on both sandals if the stamps differ at all.
- Sole stamp. A straight-on close-up of the sole stamp, showing the full wording, the size number, and the letter thickness, on both soles.
- Heel side view. A side view of the heel and sole layers, showing the stacking, the alignment, any gaps or glue lines, and the edge finish, on both sandals.
- Inner strap markings. A close-up of the inner part of the H strap, on both sandals, showing any small numbers or markings, or showing plainly that there are none. On dark leather, ask the seller to angle the light so that any marking can be seen.
- Toe shape. A top view of both toes together, showing the squared-off shape and whether the two toes match.
- Both soles side by side. Both soles together, in the same light, showing sole colour, stamp placement, and wear, so that you can compare the pair with itself.
- Box and dust bag. The box, the dust bag, and any tissue or ribbon, photographed together with the sandals, showing any size or style information on the box and the brand mark on the dust bag. Remember that this photograph supports a verdict, it does not make one.
- Wear close-up. Close-ups of any wear the seller mentions — sole wear, insole darkening, strap creasing, edge scuffs — photographed plainly, not hidden by angle or light, so that you can judge whether the wear matches the condition claimed.
- Sandals worn on feet. A photograph of the sandals being worn, or at least held against a foot for scale, showing how the H sits on the foot and whether the size looks plausible for the claimed French size. This photograph does not prove genuineness, but it catches size and shape listings that do not make sense, and it is a photograph a seller who does not have the pair cannot easily fake.
When the photographs arrive, check them in order, not all at once. Check the pair photograph first, for matching. Check the H and stitching photographs second, for shape and depth. Check the two stamp photographs third, for spelling, accent, thickness, and size agreement. Check the heel, toe, and soles photographs fourth, for construction and wear. Check the packaging photograph last, and give it the least weight. If any photograph is missing, blurred, cropped to hide a detail, or inconsistent with the others in background or light, ask for it again, once, plainly. If it is still not supplied, do not pay. A seller who cannot photograph a pair they own, from the angles a buyer needs, is a seller who has not given you a pair you can safely buy.

Final Verdict
A fake Oran is not usually caught by a single tell, and a genuine Oran is not usually proved by a single stamp, a single card, or a single beautiful photograph. The pairs that fool buyers are the pairs that pass the easy checks and fail the hard ones: the H that looks straight from a distance but is ragged at the inner corners, the stitching that looks neat until you look at its depth, the stamp that looks right until you compare its thickness with the other stamp on the same pair, the two sandals that look like a pair until you lay them side by side and see that they do not quite match.
Run the checks in order. Start with the H, because it is the identity of the sandal. Move to the stitching, because it is the craft of the sandal. Move to the leather and the shape, because they are the material of the sandal. Move to the two stamps, because they are the record of the sandal, and because they must agree with each other and with the size. Move to the construction, the size, the pair matching, and the wear, because they are the evidence that the two sandals belong together and have lived the life the listing claims. Leave the box, the price, and the seller’s story until last, because they are the evidence that is easiest to fake and easiest to borrow.
If the pair passes that order, and the seller supplies the twelve photographs without fuss, you have a pair worth considering, with professional authentication if the price warrants it. If the pair fails two or three checks, pause, and run them again in daylight, on the actual pair, before you decide. If the pair fails four or more, or fails on the H and the stamps together, or fails on pair matching together with any other check, walk away, however much you wanted the colour, however hard the size is to find, and however good the price looked. Another pair will come. A fake pair, once bought, does not get better for being wanted, and the money spent on it is money that cannot be spent on the genuine pair that comes next.
Frequently Asked Questions
1. Can you spot a fake Oran from a single photograph?
Almost never. A single photograph can rule a pair out, if it shows a plainly lopsided H, a misspelled stamp, or stitching that wanders off the edge of the strap, but it cannot rule a pair in. Good counterfeits are photographed to pass the one angle you are shown. Ask for the twelve photographs in the seller-photo checklist section before you pay.
2. Is the insole stamp enough to prove a pair genuine?
No. A correct-looking insole stamp is one check among twelve, and stamps are among the easiest details to copy. Judge the stamp together with the sole stamp, the H, the stitching, and the pair matching, and remember that stamp finishes vary by colourway and by year, so a tonal stamp on one pair and a gold-embossed stamp on another are not automatically in conflict.
3. Does a card with the sandals prove they are genuine?
No, and the opposite is closer to the truth. Hermès issues no authenticity cards as a general rule, so a card supplied with Orans is a red flag, not reassurance. A card, a certificate, or a number to check online should make you more cautious, not less.
4. What does “semelle cuir” on the sole mean, and must every genuine sole carry it?
“Semelle cuir” means leather sole, in French. Some genuine soles carry that wording, together with a brand text, a size number, and an origin text such as “MADE IN ITALY”, while other genuine soles, described by other guides and owners, carry a different combination of wording. Sources disagree on the exact combination by year and by production run, so this guide does not treat any single wording combination as a fixed rule. Judge the sole stamp on its quality, spelling, accent, alignment, and agreement with the listing, not on one phrase alone.
5. Do genuine Orans have a number on the inner H strap?
Some do, and some do not, and that is the honest answer. One detailed owner review of a pair bought in 2018 reports a small number on the inner part of the H strap closest to the little toe on each sandal, and adds that it is unclear whether older pairs carry one, and that it is hard to see on darker leather. Treat a marking, where present, as supporting evidence that should match on both sandals. Treat its absence, on its own, as no evidence at all.
6. Why do guides disagree on the retail price of Orans?
Because they were written at different times, for different markets, and for different materials. One owner review states a price from $900 USD on the brand’s own website or in a boutique, while another current guide puts comparable standard leather models at roughly $750 USD in the US and around 620 euros in Europe. Prices also change over time and vary by material and colourway. Check the current price for the exact pair you are considering, from the brand’s own current listing, on the day you buy, rather than relying on any single figure in any guide.
7. Is a light-coloured sole always a sign of a fake?
No. One authentication guide notes that fake soles in the pairs it examined were too light in brown, where genuine soles were darker and more concentrated in colour. That is a useful observation for those pairs, but sole colour varies by material, by colourway, and by wear, and a leather sole changes colour with use. Judge sole colour together with stamp quality, in photographs of both soles in the same light, not on its own.
8. Should I worry if my genuine-looking pair has been resoled?
Not automatically. A thin rubber half-sole, or a full resole by a cobbler, is a common and sensible protection for a leather sole, and it does not by itself prove a pair fake. What matters is whether the seller disclosed it, whether the work is neat, and whether the rest of the pair still passes the twelve checks. A hidden resole, combined with other failed checks, is a different case from a disclosed, neatly done resole on an otherwise passing pair.
9. What is the single most useful photograph to ask a seller for?
There is no single most useful photograph, and any guide that names one is misleading you. If you must prioritise, ask for the pair together from above, the H close-up, the stitching close-up, the insole stamp, and the sole stamp, in that order, because together they test matching, shape, craft, and record. But do not stop there: the heel side view and both soles together are the photographs that catch construction faults and pair mismatches that the first five photographs can miss.
10. What should I do first if I think a pair I already bought is fake?
Stop wearing it as a proven genuine pair, keep everything that came with it, do not alter, polish, dye, or repair it, and run the twelve checks again on the actual pair in daylight, writing down which checks pass and which fail. Then get a written opinion from a reputable authentication service before you contact the seller or try to resell the pair. The already-bought section sets out the full order, including how to approach the seller through the platform’s buyer protection process if the pair is judged fake.