Huda Foundation Stick: The Honest Guide to the Faux Filter Skin Finish Stick
Search “huda foundation stick” and you will find two different products mixed together, prices that range from suspiciously cheap to very expensive, and reviews that call the same stick both matte and glowy. No wonder it is confusing.
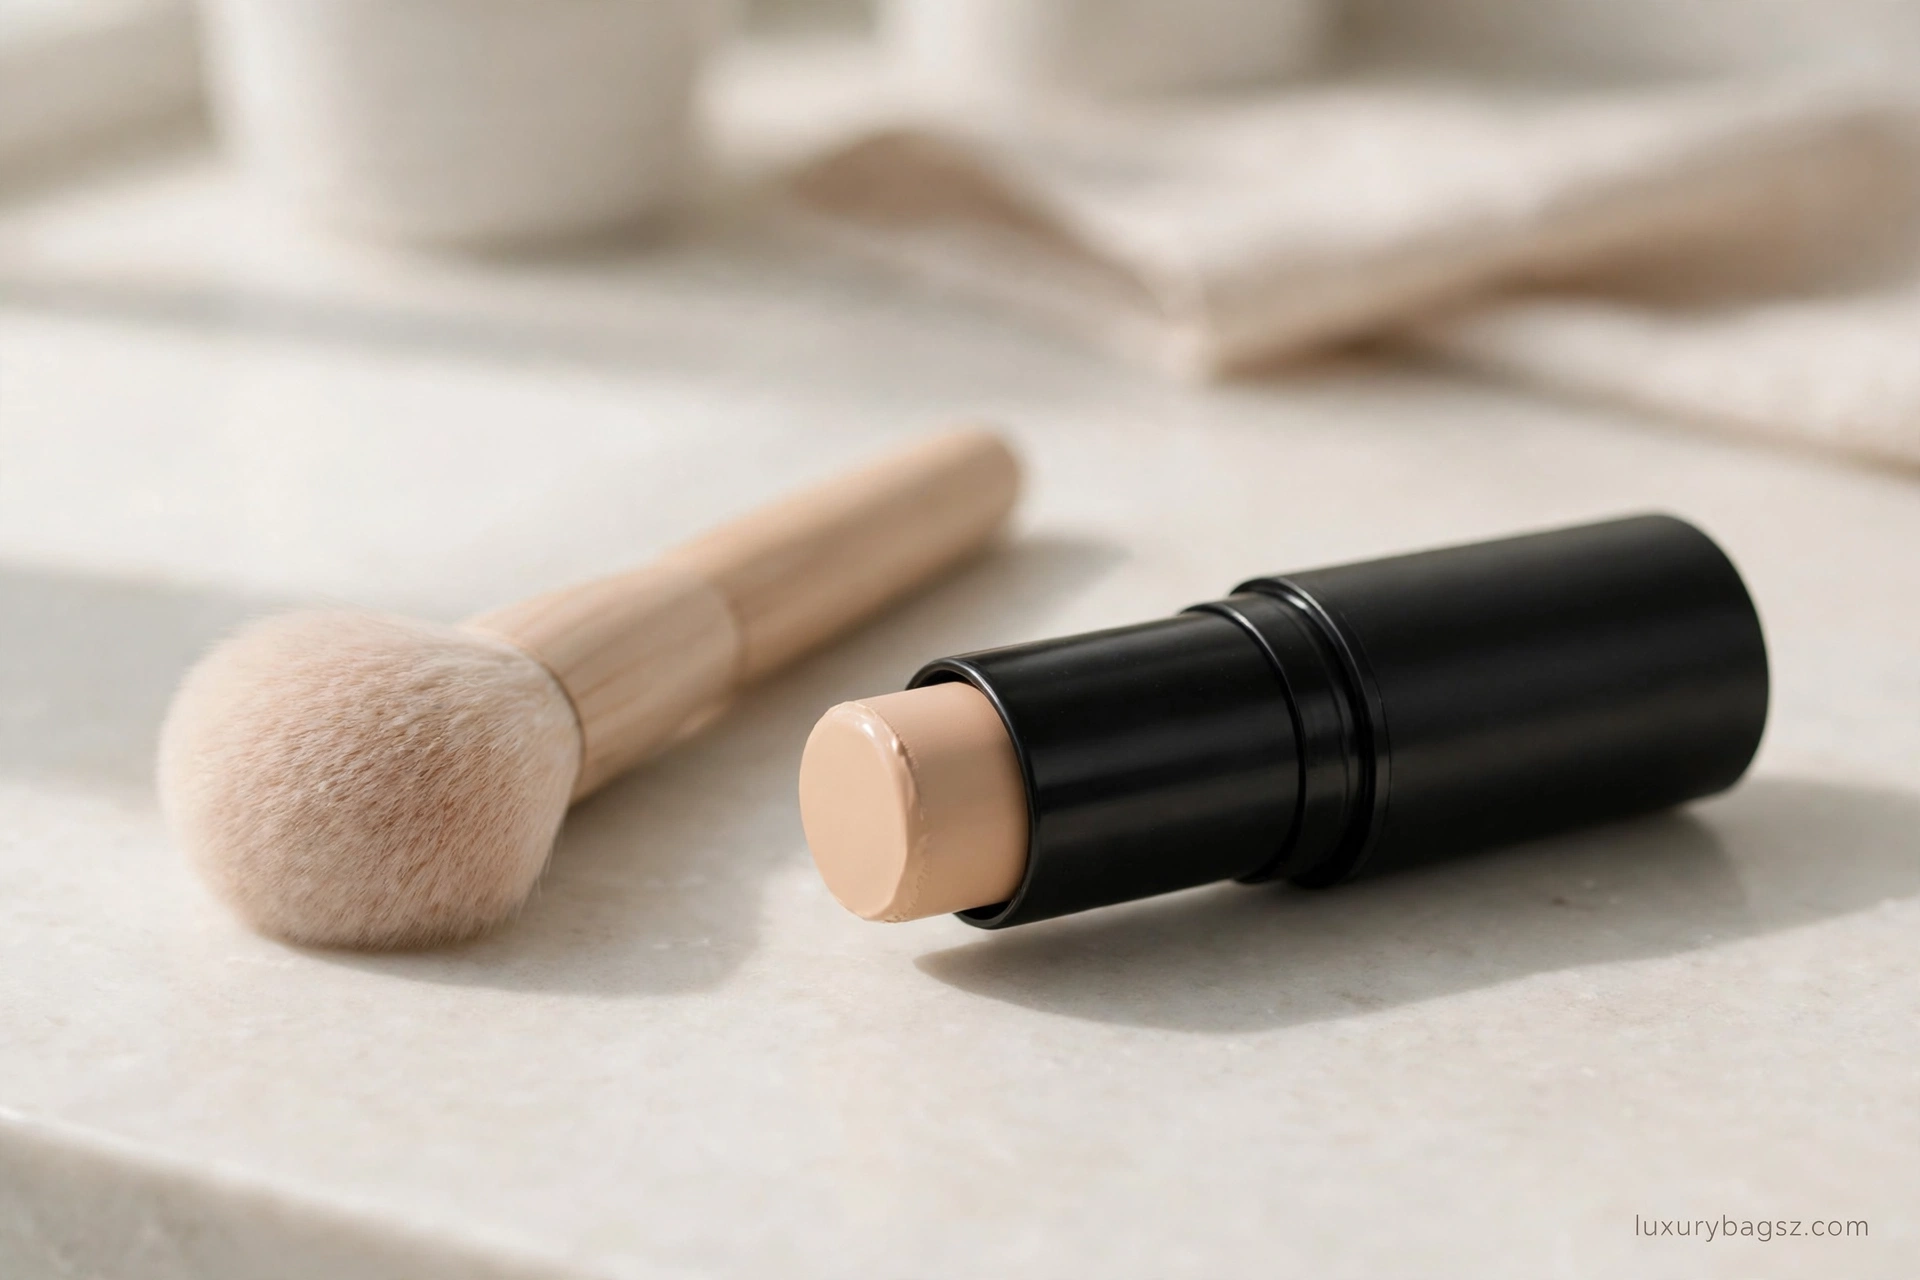
So let us be clear from the first paragraph. The product most people mean by “huda foundation stick” is the Huda Beauty #FauxFilter Skin Finish Buildable Coverage Foundation Stick. It is a creamy stick foundation, not a liquid. It gives light-to-medium, buildable coverage with a natural, filtered finish. It is not the full-coverage #FauxFilter liquid, and it is not Easy Blur, which is a liquid serum-like foundation.
This guide sorts out that confusion first, then covers what the stick actually does, how to choose a shade, how to apply it without streaks, how long it really lasts, who it suits, who should skip it, and how to avoid buying a fake — especially when shopping online, where prices vary a lot by seller.
Key Takeaways
- The Huda foundation stick is the #FauxFilter Skin Finish Stick: light-to-medium coverage, natural finish, 10-hour wear claimed by the brand, 39 shades, 12.5 g / 0.44 oz.
- It is lighter and more natural than the #FauxFilter liquid. If you want full coverage in one layer, this is the wrong product.
- Application matters more than the product itself: swipe, then buff. One thin layer, blended well, looks better than two thick layers.
- Shade codes matter: the number is depth, the letter is undertone. Do not buy on the shade name alone.
- Official US price is $39. Prices vary widely by seller online, and very cheap listings are a red flag for copies.
The 60-Second Answer
What is it? A creamy, portable foundation stick from Huda Beauty, made to give a natural, filtered look with light-to-medium coverage you can build up.
Who will love it? People who want everyday, skin-like coverage, quick application, and a product they can carry in a bag without a bottle leaking. Beginners often find a stick easier than liquid because you can see exactly where you put it.
Who should skip it? People who want full coverage in one pass, heavy cover for dark spots or scarring, or a truly matte, long-wear finish for very oily skin in extreme heat. For those needs, the #FauxFilter liquid or a different formula will serve you better, and you may still want a concealer on top of the stick.
How much is it? $39 on Huda Beauty’s US site. In the UK it was £32 at the time of the Stylist review. Listings found in research ranged from about Rs. 9,800 to Rs. 21,149 depending on the seller and shade. Check the price at a trusted seller on the day you buy, and be very careful with listings far below that range.
How long does it last on skin? The brand claims up to 10 hours. In real life, that depends on your skin type, your prep, whether you set it, and the weather. Expect a good full workday with setting, and less in heavy humidity without it. More on that in Section 8.
Stick vs Liquid vs Easy Blur: Do Not Buy the Wrong One
This is the single most useful section in this guide, because most of the disappointment around this product comes from buying the wrong formula.
#FauxFilter Skin Finish Foundation Stick
- Form: Stick, 12.5 g / 0.44 oz
- Coverage: Buildable light to medium
- Finish: Natural, filtered — not flat matte, not dewy
- Wear claimed: Up to 10 hours
- Shades: 39
- Price (US): $39
- Best for: Everyday wear, quick application, travel, natural look
#FauxFilter Luminous Matte Full Coverage Liquid Foundation
- Form: Liquid
- Coverage: Full
- Finish: Luminous matte
- Wear claimed: 24 hours
- Shades: 39
- Price (US): $39
- Best for: Full glam, events, photography, covering a lot in one layer
The liquid is the original #FauxFilter that made the brand famous for a filter-like, full-coverage look. It is also the heavier of the two. The stick was made for people who wanted that filtered idea in a lighter formula. Reviewers agree on this point: the stick is “completely different” in finish from the liquid — blurring, but natural and glowing rather than matte.
Easy Blur Natural Airbrush Foundation
- Form: Liquid, serum-like, 30 ml
- Coverage: Medium to buildable
- Finish: Natural, airbrushed
- Key ingredients highlighted by the brand: 1.5% niacinamide, pore-blurring silica
- Best for: People who want a lightweight liquid with skincare-style ingredients
Easy Blur is not a stick, even though search results often mix it into “huda foundation stick” results. Its routine — prime with Easy Blur Primer, apply with a base brush, set with Easy Bake powder — is the brand’s Easy Blur routine, not a stick routine. If a seller lists “Easy Blur stick,” check the product carefully, because that is not the official Easy Blur format.

Quick decision table
| If you want… | Pick… |
|---|---|
| Light, natural, everyday coverage | Skin Finish Stick |
| Full coverage in one layer | #FauxFilter liquid |
| Lightweight liquid with a blurred finish | Easy Blur liquid |
| Heavy spot coverage | A concealer, with or without the stick |
| A travel-friendly format | Skin Finish Stick |
Price, Size, Shades, and Shade Codes
Price — check locally
The official US price for the stick is $39. That is the anchor. Everything else is a local seller’s price, and it will move with import costs, stock, and shade availability.
Research for this article found listings at roughly Rs. 9,800, Rs. 9,996, Rs. 13,500, Rs. 15,950, and Rs. 21,149 for different sellers and shades. That spread alone tells you to compare sellers, not just prices. A shade that is out of stock in one place may be priced higher in another, and a very low price is not a bargain if the product is not genuine.
One listing found at Rs. 350 for a “Huda Beauty Matte Foundation Stick” is far below every genuine price found. Treat that kind of listing as a red flag, not as a deal. Section 10 covers fake checks in full.
Size
The stick is 12.5 g / 0.44 oz. That sounds small, and it is — but a stick lasts longer than it looks, because you apply it directly and waste less than you do pouring liquid onto a hand or sponge. How long it lasts depends on how much coverage you build every day. Light daily use will last weeks; heavy daily layering will finish it faster.
The 39 shades
The stick comes in 39 shades, including nine shades that were new or reworked from the original #FauxFilter range when the stick launched. The range runs from fair to rich, with examples across the range:
- Fair: Vanilla, Panna Cotta, Milkshake (100B)
- Light: Angel Food (110N)
- Light-medium: Shortbread, Peaches N Cream
- Medium: Toasted Coconut (240N), Latte (300N), Beignet
- Rich: Coffee Bean, Hot Fudge, Lava Cake
Do not rely on those names alone. Two shades can sound similar and look very different on skin, and the same name in a different Huda formula is not a guarantee of the same match.
How shade codes work
Huda shade codes follow a pattern you will see across the range: a number, then a letter, then a name. For example, 100B Milkshake, 110N Angel Food, 240N Toasted Coconut, 300N Latte.
- The number is depth. Lower numbers are lighter, higher numbers are deeper. 100B is very fair; 300N is medium; shades above that go deeper still.
- The letter is the undertone family. In Huda’s system, the letter tells you whether the shade leans warm, cool, neutral, golden, beige, and so on. The exact letter meanings vary by range, so use the brand’s shade finder or a swatch, not a guess from the letter alone.
- The name is marketing. Milkshake, Toasted Coconut, Latte — these help you remember a shade, but they do not tell you its undertone or depth reliably.
Practical rule: find your depth first (the number), then your undertone (the letter), then check the name. If you are between two depths, the lighter one is usually safer for a light-to-medium product, because you can warm it up with bronzer, but a too-dark stick is hard to fix. The same code-first logic applies elsewhere — do not trust a name alone, whether it is a shade name or, in our other buying guides, a serial number check on a watch.
How to Apply the Stick Without Streaks
The stick looks foolproof, and mostly it is — but the streaks people complain about come from one mistake: swiping thick lines and not buffing them out. The product is creamy and melts with the warmth of your face, so blending is where the finish is made.

Step by step
Step 1: Prep, but do not over-prep.
Start with clean, moisturised skin. Let your moisturiser and sunscreen sink in for a few minutes. If you apply the stick on top of wet skincare, it will slide and patch. If your skin is very dry, a hydrating primer helps. If your skin is oily, a mattifying primer only in the T-zone helps. You do not need a full face of primer for everyday wear.
Step 2: Dot or swipe lightly — do not draw thick stripes.
You have two good options. Option A: swipe the stick lightly down the cheeks, forehead, nose, and chin, then blend. Option B, which is better for beginners: dot the stick on the areas that need coverage, then blend outward. Option B wastes less product and makes streaks less likely.
Focus on the centre of the face first — around the nose, cheeks, and any redness — and blend outward toward the hairline and jaw. The edges should fade to nothing. Do not stop blending at a hard line along the jaw.
Step 3: Buff, do not drag.
Use a dense buffing brush or a damp makeup sponge. A brush gives a little more coverage; a damp sponge gives a more sheer, airbrushed finish. Work in small circles or light tapping motions. The Stylist reviewers both blended with a buffer brush and found that even cakey-looking swipe lines blended out perfectly. That is the key: the stick looks streaky before blending and skin-like after it.
Step 4: Build only where you need it.
Wait a few seconds, look in natural light if you can, then add a second light layer only on spots that still show through — redness, a blemish, uneven tone. Do not add a second layer all over the face. That is how a light-to-medium product turns cakey.
Step 5: Set lightly.
A light dusting of translucent powder in the T-zone, or a setting spray, will help it last. You do not need to bake the whole face. Heavy powder over a natural-finish stick defeats the point of the product.

Brush vs sponge vs fingers
- Dense buffing brush: Best coverage, fastest blending, best for medium coverage. Huda’s own suggestion is its N.Y.M.P.H. Face Skin Perfector Brush, but any dense, soft buffing brush works.
- Damp sponge: Sheerest, most skin-like finish, best for light coverage and dry skin. It will eat a little product, so expect slightly less coverage.
- Fingers: Works in a pinch and the warmth helps melt the product, but it is harder to get an even finish, and it is less hygienic for a stick you will use daily. Use fingers to dot, then buff with a tool. Using the right tool for the material is a general care principle — it is why, for example, a suede brush is not interchangeable with an ordinary brush, even though both are called brushes.
How much to use
Less than you think. One light pass is usually enough for light coverage. The reviewer who built to near-full coverage needed about four applications — and noted that as a good thing, because it meant the product stayed natural at each step. If you need four layers every day, you probably need a fuller-coverage product or a concealer, not more stick.

Coverage, Finish, and Wear — Honestly
Coverage: light to medium, truly buildable
The brand says buildable light to medium, and reviewers agree. One layer gives a sheer-to-light, even-toned look. Two careful layers give medium coverage. It will even out redness and mild uneven tone well. It will not fully cover dark spots, heavy hyperpigmentation, or scarring on its own — and pretending otherwise is how people end up disappointed.
If you have a few dark spots, use the stick for the overall base and a concealer just on the spots. That combination looks more natural than layering stick over stick.
Finish: natural, filtered, not matte
This is where reviewers split, and both sides are partly right. The stick is not the matte finish of the original liquid. It is a natural finish with a blurring, filtered effect. On normal and combination skin it looks skin-like, with a soft glow. On very dry skin, one reviewer found it “a little bit too matte” for her taste, and fixed it with highlighter. On oily skin, that same natural finish can turn shiny faster than a matte foundation would, so setting matters more.
So: do not buy the stick expecting a flat matte finish, and do not buy it expecting a dewy glow. Expect natural — skin, but more even.
Wear: 10 hours is a best case, not a promise
The brand claims up to 10 hours. Real wear depends on:
- Skin type: Oily skin will break it down faster, especially in the T-zone. Dry skin will hold it longer, but may show dry patches if prep is poor.
- Weather: Humidity and heat shorten wear for any natural-finish foundation. The brand calls the formula waterproof and humidity-proof, but that does not mean it is sweat-proof through a full day in extreme heat.
- Setting: A light powder or setting spray extends wear noticeably. No setting at all shortens it.
- Touching your face: The more you touch, the faster it wears, especially around the nose and chin.
A realistic expectation: a full workday with light setting on normal to combination skin, with a touch-up or blot in the afternoon on oily skin. If you need 12-plus hours without touch-ups in heat, a longer-wear matte formula is a better choice.
Texture and feel
Reviewers consistently call the stick buttery, creamy, and lightweight. It melts on contact with the warmth of the face and blends without cakiness when buffed properly. It does not feel heavy, even when built up, which is unusual for a stick format — sticks are often heavy and oily, and this one is not. That lightweight feel is also why it does not give full coverage: the formula is deliberately lighter.
By Skin Type
Dry skin
The stick can work well, but prep is everything. Moisturise properly, let it sink in, and use a damp sponge rather than a dry brush for the most skin-like finish. Avoid heavy powder — powder on dry skin over a natural stick will emphasise texture. If your skin is very dry or flaky, exfoliate gently the night before, not the morning of, and skip the stick on flaky patches until they settle. A drop of facial oil mixed into moisturiser, not into the stick, can help, but test it first — oil can break down coverage.
Oily skin
Use a mattifying primer in the T-zone, apply in thin layers, and set with powder where you get shiny first — usually forehead, nose, and chin. Blot with blotting paper in the afternoon instead of adding more powder, which can cake. The stick alone, without setting, will likely shine through by midday on very oily skin. That is not a flaw in the product; it is the trade-off of a natural finish.
Combination skin
Treat the zones differently, which is easy with a stick. Use a light layer all over, a mattifying primer and powder only in the oily zones, and a damp sponge on the drier cheeks. This is where the stick format actually helps: you can dot more product where you need it and less where you do not, instead of applying one even layer of liquid everywhere.
Sensitive and acne-prone skin
The stick is fragrance-free in the sense that the brand highlights it as suitable for all skin types, but “suitable for all skin types” is not a guarantee for your skin. Patch-test on the jawline for a day before full-face use. Use clean tools, do not share the stick, and wipe the tip clean after use. If you are acne-prone, the stick format has one advantage — you do not dip fingers into a pot — and one risk — the tip touches your face directly, so keep it clean. If a blemish is active and broken, do not swipe the stick directly over it; dot concealer with a clean brush instead.
Mature skin
A light-to-medium, natural finish is often kinder on mature skin than a heavy matte foundation, because it settles less into fine lines — provided you do not over-powder. Use thin layers, a damp sponge, and set only where needed. Heavy layering around the eyes and mouth will emphasise texture, not hide it.

Shade Matching Guide
Shade matching is the most common reason for returns, and the stick makes it harder in one way: you cannot swatch a stick as easily as a liquid in some stores, and online shade names are misleading.

Find your undertone first
Look at your bare skin in natural daylight, not shop lighting.
- Warm: Skin looks golden, peachy, or yellow. Gold jewellery usually looks better than silver. Veins on the wrist often look greenish.
- Cool: Skin looks pink, red, or blue. Silver jewellery usually looks better. Veins often look blue or purple.
- Neutral: A mix, or neither warm nor cool dominates. Both gold and silver look fine.
- Olive: A greenish-grey cast, common in South Asian and Mediterranean skin. This is the hardest to match, because many ranges lean too pink or too yellow. If you have olive undertones, look for neutral or olive-friendly shades and test carefully — a shade that looks right in the shop can look orange or pink in daylight.
Huda’s letter codes are meant to help here, but do not rely on the letter alone. Use the brand’s shade finder, look for swatches on a skin tone close to yours, and if you are between shades, buy the lighter one for this product.
Between two shades? Mix, or go lighter
The Stylist reviewer mixed Chocolate Mousse and Mocha to get close to her skin tone. That is a legitimate strategy with a stick: dot the lighter shade all over, then dot the deeper shade only where you need warmth, and blend. It is easier than it sounds, and it is cheaper than buying a third shade.
For everyday wear, a slightly lighter stick that you warm up with bronzer looks more natural than a stick that is too dark and leaves a visible edge at the jaw. Always blend down the neck a little if there is any doubt, and check in daylight before you leave.
Testing a shade
- Test on the jawline, not the hand. Your hand is a different colour from your face.
- Let it sit for 10 minutes. Foundations oxidise — they can darken slightly as they dry. A shade that matches wet may look darker dry.
- Check in natural light, and in a photo with flash if you will wear it to events. A shade that looks fine in a mirror can look different on camera.
- If you cannot test in store, order from a seller with a return policy, and keep the packaging until you have tested it.
Shades for warm, neutral, and olive skin tones — a starting point, not a rule
Skin tones in this range go from very fair to deep, with warm, neutral, and olive undertones all common. There is no single shade for any one group. As a starting point for research, not a prescription:
- Fair with neutral undertones: look at the 100–200 range, such as Milkshake (100B) and Angel Food (110N).
- Light-medium with warm or olive undertones: look at the 200–240 range, such as Shortbread and Toasted Coconut (240N).
- Medium with warm undertones: look at Latte (300N) and Beignet.
- Deeper skin: look above 300, such as Coffee Bean, Hot Fudge, and Lava Cake.
These are starting points for swatching, not guarantees. Undertone matters more than depth, and two people with the same depth can need different letters.
Setting It So It Lasts
Setting is not optional if you want the claimed 10 hours, especially in humidity. But setting does not mean heavy powder.
Light powder method (best for most people):
Dust a small amount of translucent powder only where you get shiny — T-zone, around the nose, chin. Leave the cheeks unpowdered for a natural finish. Use a fluffy brush, not a sponge, for a light application.
Setting spray method (best for dry skin):
Mist a setting spray after foundation, let it dry without touching your face, then do blush and bronzer. Spray helps melt powder into skin and extends wear without adding texture.
Both methods (best for long days and events):
Light powder in the T-zone, then setting spray all over. This is the most reliable combination for humidity, but it will make the finish slightly more matte. If you want to keep the glow, use spray only.
What breaks wear fastest:
Rubbing your face, resting your chin on your hand, wearing a mask for hours without blotting, and applying the stick over wet skincare. Blot first, then touch up with a tiny amount of stick on a sponge, not a full new layer.
Humidity note:
In humid weather, expect to blot and touch up. No natural-finish foundation holds perfectly through a full day of heat and humidity without help. Carry blotting paper and a small powder, and set in the morning. That is more honest — and more useful — than claiming 10 hours in all conditions.

Mistakes to Avoid
- Drawing thick stripes and not buffing. The stick looks streaky until blended. Buffing is not optional.
- Building all over the face. Build only where you need coverage. All-over layering turns a natural product cakey.
- Buying on the shade name alone. Milkshake, Latte, Toasted Coconut — names do not tell you depth or undertone. Use the code.
- Skipping prep on dry skin, or skipping setting on oily skin. Both mistakes show up within hours.
- Expecting full coverage. If you need full coverage every day, this stick will disappoint you. Use it for what it is, or pick the liquid.
- Using a dirty tip. Wipe the stick tip with a clean tissue after use, and do not share it. A dirty tip is a breakout risk.
- Twisting up too much product. Twist up only a little. Too much product breaks, wastes, and melts faster in heat. Store it upright, with the cap on, away from direct heat. The same store-it-properly logic applies to luxury items generally — for example, our guide to clean Chanel bags stresses upright, supported, dust-bag storage for the same reason: shape and material suffer when storage is careless.
- Buying the cheapest listing without checking the seller. See Section 10.
- Testing only on your hand. Always test on the jawline, in daylight, after 10 minutes.
- Over-powdering to chase a matte finish. If you want matte, buy a matte product. Powdering a natural stick heavily just adds texture.
Fake vs Real: How to Spot a Copy
The Huda stick is widely copied, and the wide price spread online makes copies easy to hide. A fake foundation is not just a waste of money — it can irritate skin, because you do not know what is in it.
The same check-the-details approach is used in our other fake-spotting guides, for VIP gift bags and for a fake Rolex — in each case, one detail alone does not prove authenticity, and a price far below the market is a warning, not a bargain.
Red flags
- Price far below the market. $39 is the official US price. A listing at a fraction of the usual market price — for example, Rs. 350 when other sellers charge Rs. 9,800 and above — is not a bargain. It is almost certainly not genuine.
- No shade code, or a shade name with no code. Genuine listings give the full shade, such as 240N Toasted Coconut. Vague listings that say only “medium” or “natural” are a warning.
- Blurry packaging photos, or stock photos only. A genuine seller can show the actual product, batch code, and packaging. If every photo looks copied from the brand’s site, ask for a real photo.
- Seller with no reviews, or reviews that mention a different product. Check the seller, not just the listing.
- Packaging that feels light, flimsy, or misspelled. Huda packaging is clean and consistent. Misspellings, off-colours, or a cap that does not fit are signs of a copy.
- Texture that is waxy, gritty, or smells strongly chemical. The genuine stick is creamy and melts smoothly. A waxy or gritty stick, or one with a strong chemical smell, should not go on your face.
Safer buying checklist
- Buy from an authorised retailer, the brand’s own site, or a seller with a long history and real reviews for this exact product. Ask for the same kind of seller photos and written answers you would ask for before buying a pre-owned luxury item — our Cambon bag guide uses that photo-and-questions checklist approach for bags, and it works just as well here.
- Check the full shade code before you pay.
- Keep the box and receipt until you have patch-tested the product.
- Compare the packaging to the brand’s site photos when it arrives — logo, shade label, batch code.
- If the price is far below every other seller, walk away. A genuine product does not need to be sold at a loss.
- If you already bought a suspected fake, do not use it. Contact the seller, keep photos of the packaging, and report the listing if the platform allows it.
This section is not a guarantee — even careful buyers can be fooled — but these checks catch most copies before they reach your skin.

Huda Stick vs Other Foundation Sticks
Competitors rarely compare the Huda stick to its real rivals, so here is a short, honest comparison. Prices change, so treat these as starting points.
- Hourglass Vanish Seamless Finish Foundation Stick: Heavier and more matte than Huda’s stick, with fuller coverage. Better if you want coverage; worse if you want lightweight and natural. Sudden Chic’s reviewer found Huda’s stick lighter and more matte than Hourglass in feel, but with less coverage — which shows how personal “matte” and “coverage” can be.
- Milk Makeup, Fenty, and other cream sticks: Many are creamier or more dewy than Huda’s stick, and some are designed as multi-use (foundation + concealer + contour). Huda’s stick is more of a pure foundation stick, with a filtered, natural finish rather than a dewy one.
- Drugstore sticks: Cheaper, but shade ranges are usually smaller, and the finish is often heavier or waxier. If shade match is your main problem, Huda’s 39 shades are a real advantage. If budget is your main problem, a drugstore stick with a good shade match may serve you better than a fake Huda stick.
The Huda stick’s real strengths are its shade range, its lightweight feel, and its portability. Its real weaknesses are its light-to-medium coverage ceiling and its need for setting on oily skin. Buy it for its strengths, not for coverage it does not offer.
Frequently Asked Questions
Is the Huda foundation stick full coverage?
No. It is buildable light to medium. One layer is light, two careful layers are medium. For full coverage, use the #FauxFilter liquid, or use the stick plus a concealer on spots that need more cover.
Is it good for dry skin?
Yes, with prep. Moisturise well, use a damp sponge, and avoid heavy powder. If your skin is very dry, it may feel a little matte without a hydrating primer or a touch of highlighter, as one reviewer found.
Is it good for oily skin?
It can work, but you need to set it. Use a mattifying primer in the T-zone, set with powder where you shine, and blot in the afternoon. Without setting, oily skin will break it down faster.
How many shades are there?
39 shades, including nine that were new or reworked when the stick launched.
What is the difference between the stick and the liquid?
The liquid is full coverage, luminous matte, 24-hour wear claimed. The stick is light-to-medium coverage, natural finish, 10-hour wear claimed, in a portable stick format. Same brand family, different job.
Is Easy Blur the same as the stick?
No. Easy Blur is a liquid foundation with niacinamide. It is not a stick, and its routine does not apply to the stick.
How do I choose a shade online?
Find your depth (number) and undertone (letter) first, use the brand’s shade finder, look for swatches on a similar skin tone, and if you are between shades, go lighter. Test on the jawline in daylight when it arrives.
Does it last 10 hours?
In good conditions, with setting, on normal to combination skin, a full workday is realistic. In heat and humidity, or on very oily skin without setting, expect less, and plan a blot or touch-up.
Is it waterproof?
The brand describes it as waterproof and humidity-proof. That means it resists water and humidity better than a sheer tint, not that it will survive swimming or heavy sweating unchanged. Do not rely on it as a waterproof product for those situations.
How do I keep the stick hygienic?
Wipe the tip with a clean tissue after use, keep the cap on, do not share it, and do not twist up more product than you need. If you have an active breakout, do not swipe directly over it.
Is the Rs. 350 listing genuine?
Almost certainly not. Genuine prices found in research are many times higher. A price that far below the market is a red flag for a copy. See Section 10.
Can I use it as concealer?
Yes, in a pinch. Dot a little on a spot and tap it out with a small brush or sponge. But a dedicated concealer will usually cover better and last longer on a single spot, so do not buy the stick only as a concealer.
Final Verdict
The Huda foundation stick is a good product that is often bought for the wrong reason. Buy it if you want a portable, lightweight, natural-looking base with light-to-medium coverage and a wide shade range. Do not buy it if you want full coverage in one layer, a flat matte finish, or a foundation that needs no setting at all.
If you buy it, buy it right: pick your shade by code and undertone, not by name; apply in thin layers and buff well; set lightly; and buy from a trusted seller, not the cheapest listing you can find. Done that way, the stick does exactly what it promises — skin, but more even, in a format you can actually carry and use every day.
For a finishing touch beyond base makeup, readers often pair a natural base like this with a light fragrance rather than a heavy one — our Glossier perfume review covers that kind of everyday, skin-like scent, if you want to complete the look without overpowering it. And if the occasion is formal, the same polished-but-natural idea carries through to footwear in our dress shoes guide.