How to Clean Sneakers: Mesh, Knit, Leather, Suede and Canvas Care for Every Pair
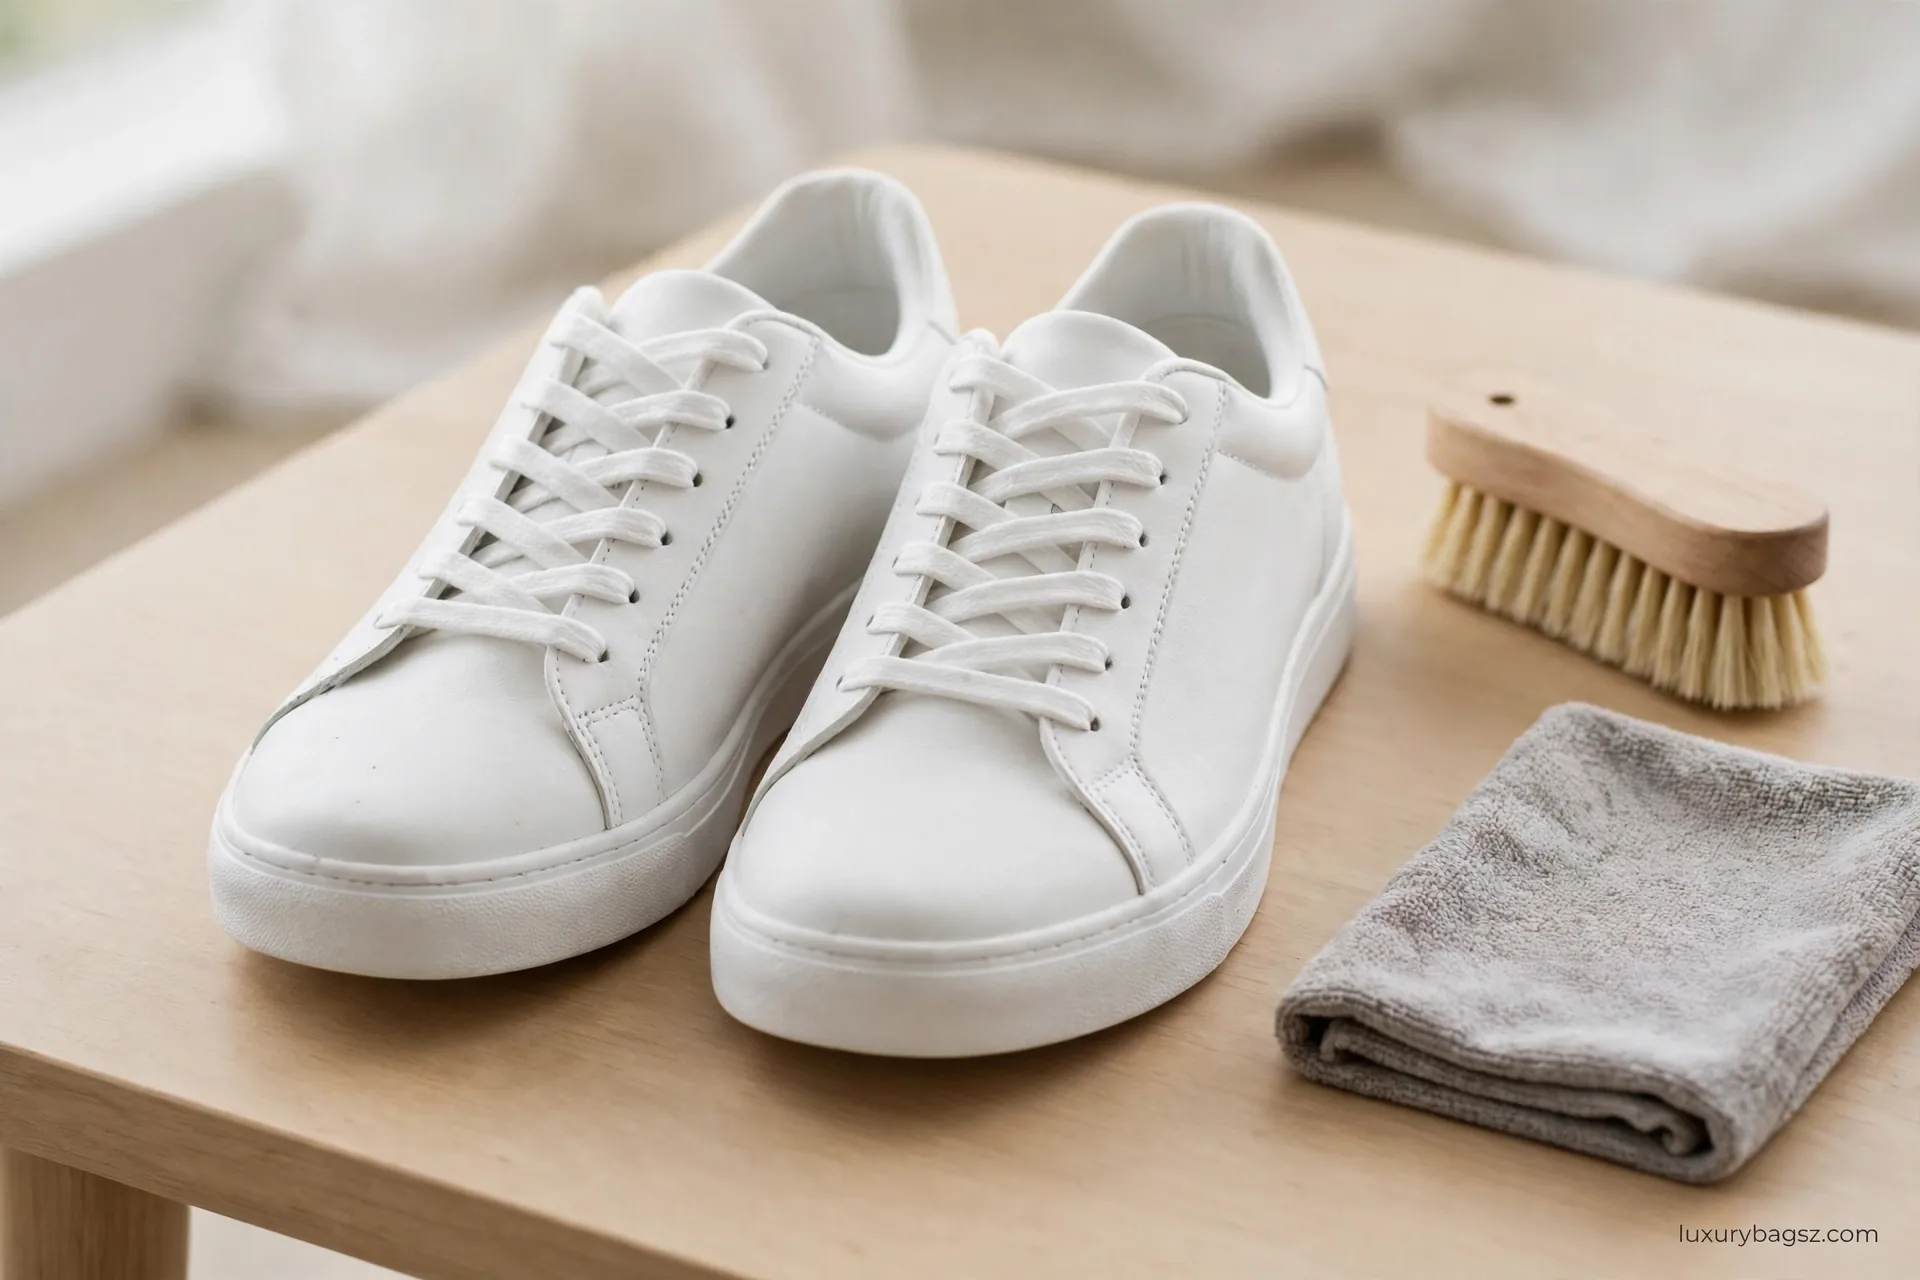
Start Dry, Then Clean Each Material Its Own Way
Take the laces out, lift the insoles where they come out, and brush away loose dirt before anything gets wet. That dry start stops grit being ground into fabric or leather, and it lets each part be dealt with separately.
Treat the upper according to what it is made from. Mesh, knit and canvas cope with mild soap and cool water applied gently; leather wants a cloth that is barely damp; suede and nubuck need dry brushing and an eraser first, with water kept to a minimum.
Scrub soles and midsoles apart from the upper, wash laces and insoles on their own, then stuff the pair with paper and leave it to air-dry in shade. Never soak the shoes, and never use heat to speed drying. Machine washing is a last resort for a few sturdy pairs, not a default.
Sneaker Cleaning in Brief
Sneakers look simple, but they combine more materials than almost any other footwear: mesh, knit, leather, suede, canvas, rubber, foam and glue, often on one pair. Cleaning them well means cleaning each material on its own terms, in the right order, without soaking the pair or heating it to dry it faster.
This guide covers general sneaker cleaning across mesh and knit, leather, suede and nubuck, canvas and mixed materials. Canvas Chucks have their own dedicated guide, since canvas sneakers have specific yellowing and machine-washing quirks, and this guide points to that guide rather than repeating it in full. The principles here still help with canvas, but the dedicated guide is the deeper reference for that one style.
If you remember one rule, let it be this: never clean a sneaker before you know what it is made of. A method that revives a leather sneaker can stain suede, and a method that cleans mesh can soak and warp a leather pair. Identify first, clean second, and your sneakers will last far longer.
Key Takeaways
- Identify every material on the pair before cleaning: mesh, knit, leather, suede, canvas and rubber need different methods.
- Remove laces and insoles first, and clean them separately from the upper.
- Brush dry dirt off before any wet cleaning, so you do not grind grit into fabric or leather.
- Clean by material: gentle soap and water for mesh and leather, dry methods first for suede.
- Never soak sneakers, never machine-wash leather or suede pairs, and never dry with heat.
- Stuff sneakers with paper and air-dry in shade; replace paper as it dampens.
- Clean soles and midsoles separately, since they carry the most dirt and need the firmest brush.
- Protect cleaned sneakers with a spray suited to the material, applied to clean, dry fabric.
Identify the Materials on Your Pair
Look at the whole pair before you choose a method. Uppers may be mesh, knit, leather, suede, nubuck, canvas or a mix, and each panel may need a different approach. A sneaker with a leather toe, a mesh tongue and suede overlays needs three methods, not one, and cleaning it as if it were one material guarantees damage to at least one panel.
Check the label, usually inside the tongue or heel, for material and care guidance. Makers sometimes state machine-wash guidance, water resistance or specific warnings, and those warnings override general advice. If the label is missing, test materials by touch: mesh and knit feel open and flexible, leather feels smooth and firm, suede feels velvety and shows nap changes, and canvas feels dense and woven.
Also notice construction details that change cleaning. Glued soles, stitched soles, foam midsoles, reflective panels, printed designs and leather trims all react differently to water, heat and cleaners. A printed or reflective panel should never be scrubbed hard, and a glued sole should never be soaked, since soaking weakens adhesives over time.
Take a photo of the pair before cleaning, especially if it is valuable or limited. A before photo helps you judge whether cleaning improved the pair, and it helps a professional or a seller understand the pair's condition later. It also stops you from mistaking a pre-existing mark for a cleaning mistake.
Build a Sneaker Cleaning Kit
A good sneaker kit is small and material-aware. Start with a soft brush for uppers, a firmer brush for soles, a suede brush and eraser for buffed leathers, and several clean, soft cloths. Add a gentle sneaker cleaner or a mild liquid detergent, a bowl of cool water, and a protector spray suited to the pair's main material.
Avoid household shortcuts that damage sneakers. Bleach whitens rubber unevenly and weakens fabric, kitchen cleaners strip finishes, and stiff brushes scratch leather and pill knit. If a product does not say it is safe for your sneaker's material, test it on a hidden area first, such as an inside heel or tongue, and wait for it to dry before judging.
Keep separate brushes and cloths for light and dark pairs, since dye and dirt transfer readily. A brush used on a muddy trail pair should be cleaned before it touches a white leather pair, and a cloth used on dark suede should not be used on pale mesh. Clean tools protect the next pair as much as the current one.
Store the kit dry and clean, away from heat. Damp brushes harbour odour and mould, and a dirty brush grinds old grit into a fresh pair. Wash brushes after heavy use, let them dry fully, and replace a brush whose bristles have bent or hardened, since worn bristles scratch rather than clean.
Prepare the Pair: Laces, Insoles and Dry Brushing
Preparation prevents most cleaning mistakes. Remove laces and pull out insoles where they are designed to come out. Laces and insoles carry disproportionate dirt and odour, and cleaning them separately lets the upper dry faster and more evenly. Keep laces paired and labelled if you clean several pairs at once, since matching laces later wastes time.
Brush the whole pair dry before any wet step. Use a soft brush on uppers and a firmer brush on soles, brushing downward and away from seams. Dry brushing removes loose dirt, dust and grit that would otherwise turn to mud when wet, and it reveals marks that need targeted treatment rather than a general wash.
Inspect the pair after brushing. Look for loose stitching, peeling soles, cracked midsoles, worn linings and marks that may not lift. A pair with structural damage needs repair before or after cleaning, not aggressive cleaning that worsens the damage. Note any marks you cannot identify, since unknown marks may need professional advice rather than a stronger cleaner.
Stuff the pair lightly if you plan to wet-clean it, so it holds shape, but do not stuff it so tightly that wet fabric cannot breathe. A light stuffing with paper or a shoe tree helps the pair dry in shape, and it should be replaced as it dampens during drying.
Cleaning Mesh and Knit Sneakers
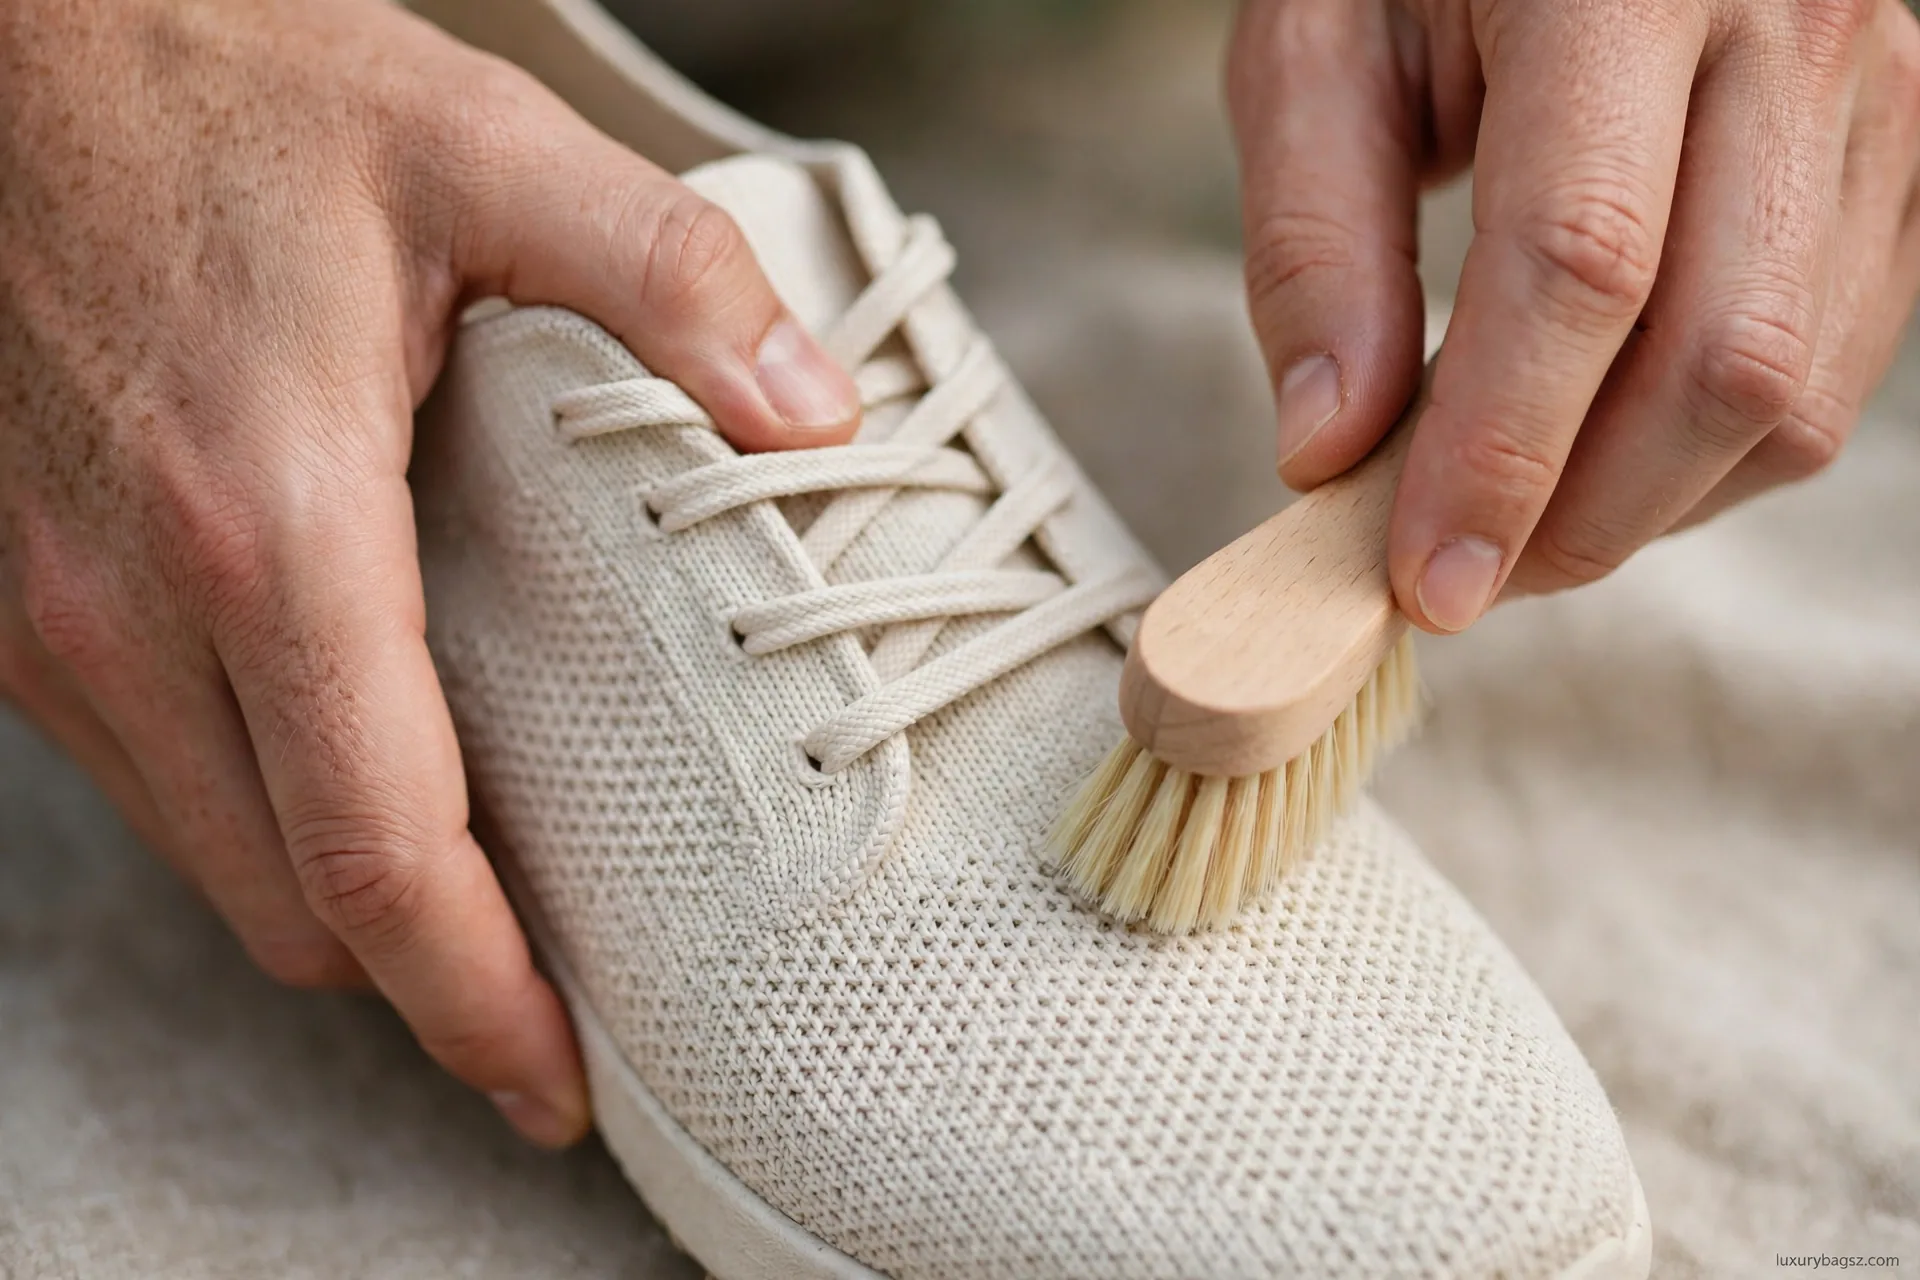
Mesh and knit uppers are breathable and flexible, and they clean well with gentle soap and water, provided you do not soak or scrub them hard. Start dry: brush the upper with a soft brush to remove surface dirt, working in the direction of the knit where you can see it.
For wet cleaning, dampen a soft cloth or brush with cool water and a small amount of gentle cleaner, and work in small circles over soiled areas. Avoid soaking the upper, since water trapped in mesh and foam takes long to dry and can encourage odour and mould. Work panel by panel, wiping with a clean, barely damp cloth between passes to lift dirt rather than spreading it.
Stubborn marks on mesh need patience, not force. Apply cleaner to the mark, let it sit briefly, and brush gently, checking often. Scrubbing hard pills knit, frays mesh and pushes dirt deeper into the weave, while repeated gentle passes lift most marks without damage. If a mark does not lift after two gentle passes, stop and consider professional cleaning, especially on a light or valuable pair.
Rinse by wiping with a clean, damp cloth, not by running the pair under a tap. Mesh holds water, and a soaked pair dries slowly and unevenly, which can warp shape and leave water marks. After cleaning, stuff the pair lightly and air-dry it in shade, as described in the drying section.
Cleaning Leather Sneakers
Leather sneakers clean much like other smooth leather, with sneaker-specific care for soles and stitching. Start dry: brush or wipe the upper with a soft, dry cloth to remove dust, then clean with a barely damp cloth and a small amount of gentle leather cleaner or mild soap on the cloth, not directly on the leather.
Work in small areas, wiping gently and removing residue with a second, barely damp cloth. Pay attention to creases, where dirt collects, and to stitching, where dirt outlines seams. Avoid soaking leather, since water swells leather, weakens adhesives and can leave marks, especially on pale leather.
After cleaning, let leather sneakers air-dry fully before conditioning, if conditioning is appropriate. A light leather conditioner, applied thinly and buffed, restores suppleness to smooth leather sneakers, but it should never be used on suede panels of a mixed pair, and it should always be tested on a hidden area first, since conditioner can darken pale leather.
Protect cleaned leather sneakers with a protector spray made for smooth leather, applied to clean, dry leather in a ventilated area. Protection helps future dirt and rain bead rather than soak in, and it makes the next clean easier. Keep sprays off suede panels and off soles, where they can make surfaces slippery.
Cleaning Suede and Nubuck Sneakers
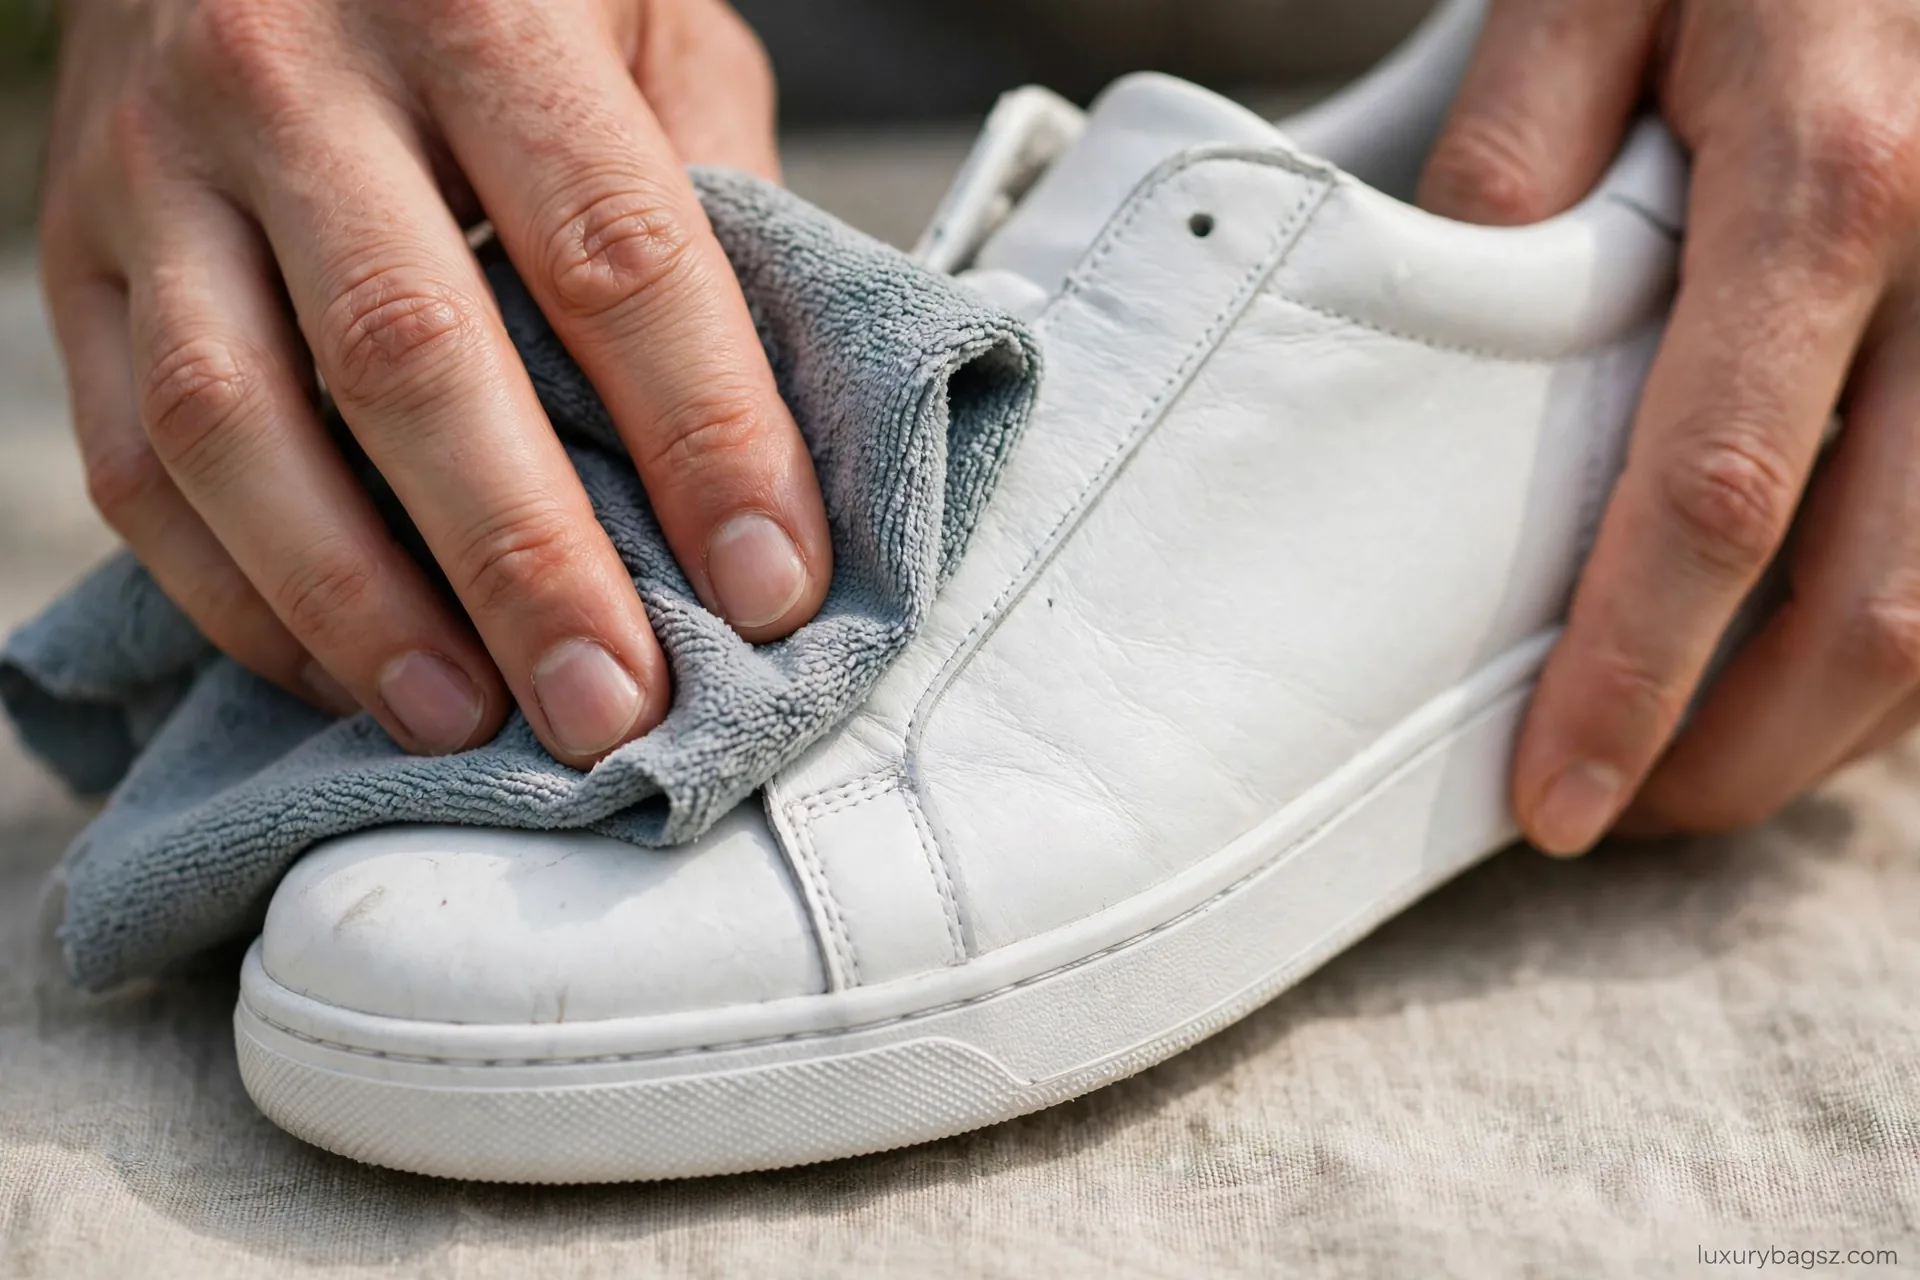
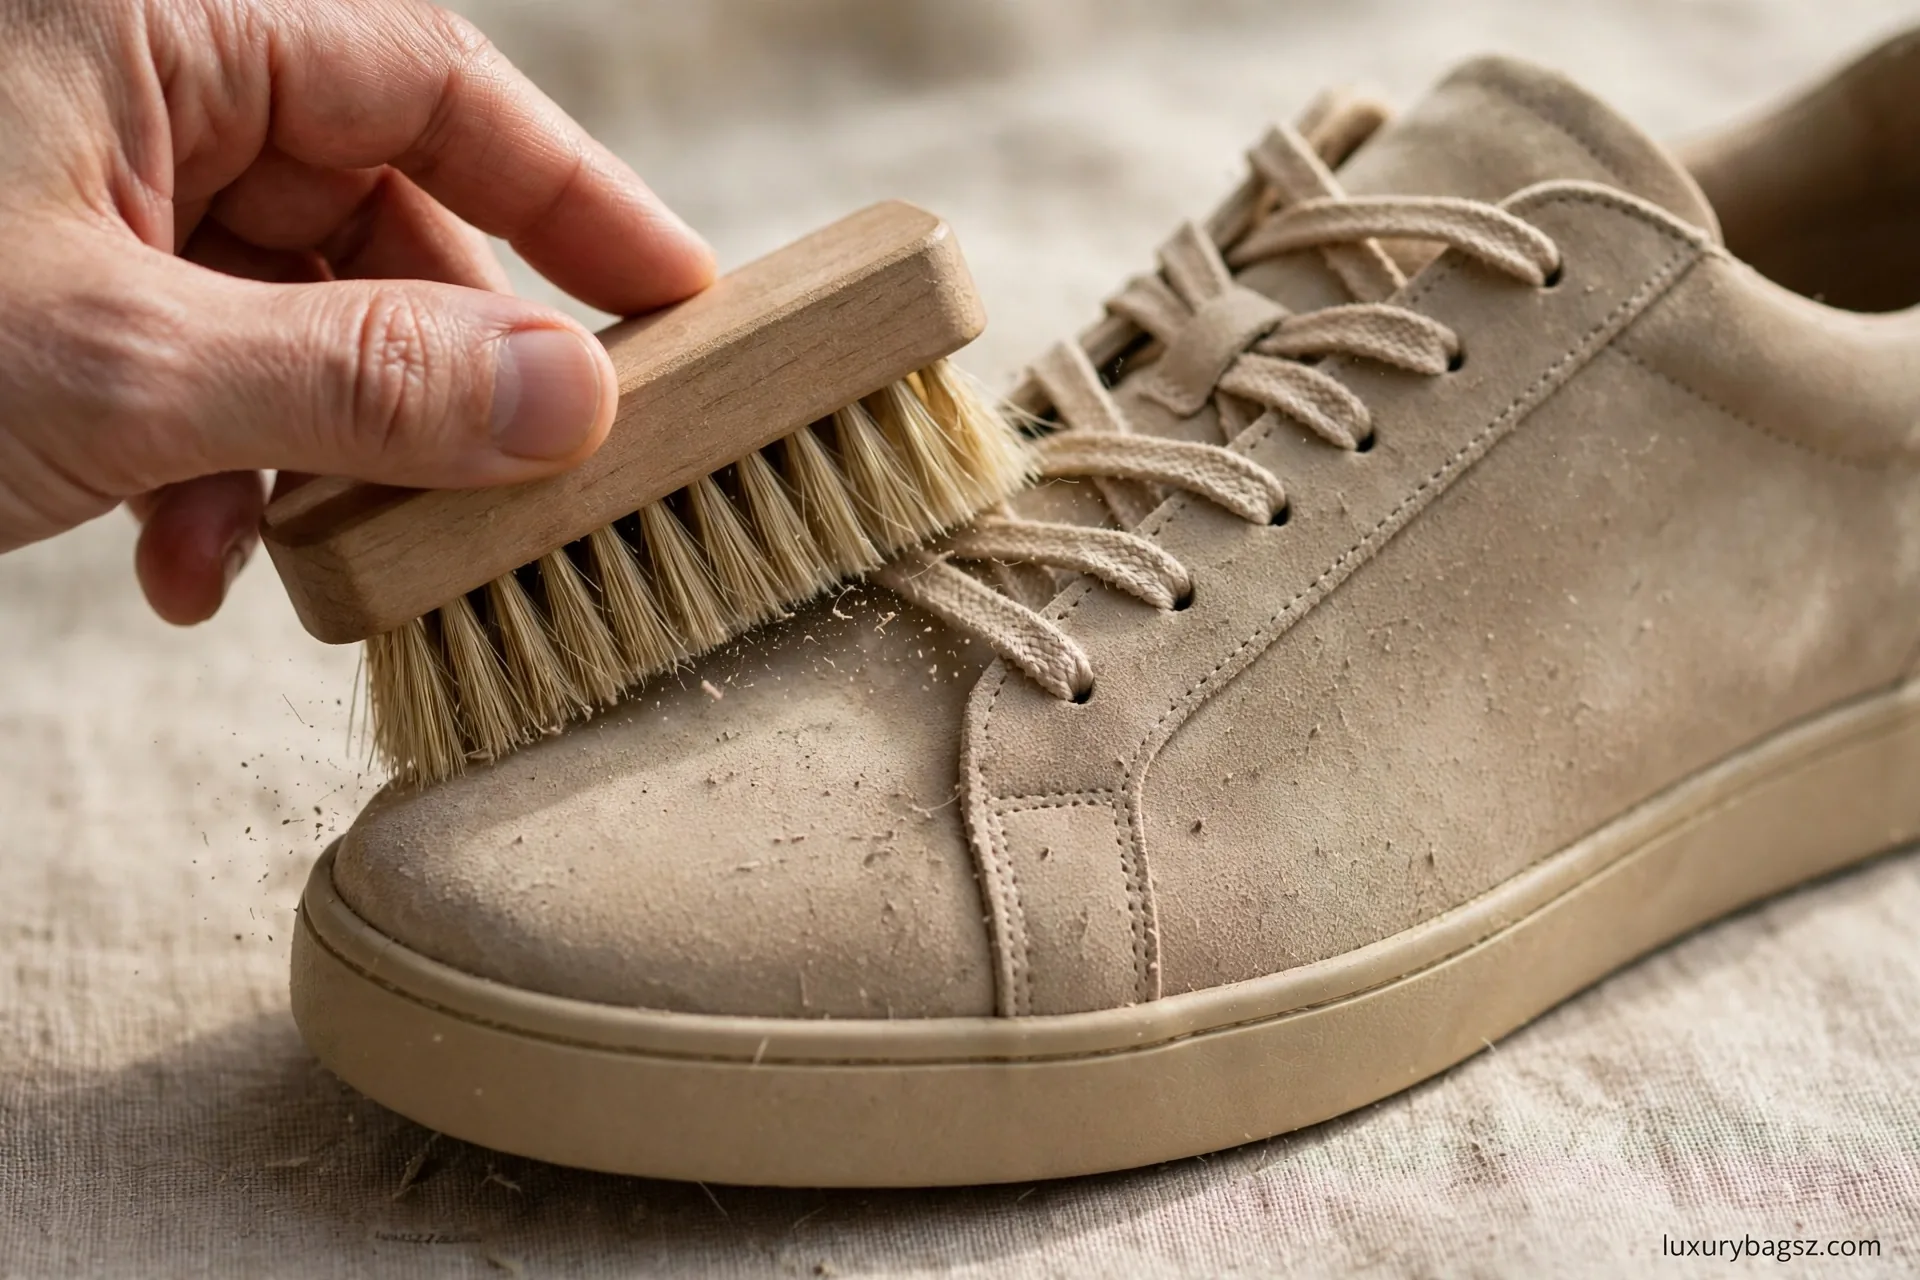
Suede and nubuck sneakers need dry methods first, always. Brush with a suede brush in one direction to lift the nap and remove dust, then use a suede eraser gently on marks, checking often. Work lightly, since aggressive erasing thins the nap and leaves a smooth, bald patch that cannot be restored.
Water is the enemy of suede sneakers, because it moves dirt and oils as it dries, leaving marks. If suede gets wet, blot it at once, stuff the pair to hold shape, and let it air-dry fully before brushing the nap back up. Never apply cream, oil or wax conditioner to suede or nubuck, since these flatten the nap and darken colour unevenly.
For stubborn suede marks, a dedicated suede cleaner, applied sparingly to a cloth and tested on a hidden area, can help, but many suede marks are best left to a professional, especially on light colours or valuable pairs. A suede protector spray, applied to clean, dry suede and allowed to dry fully, helps future rain bead rather than soak in, and it should be reapplied after deep cleaning or a season of wear.
Nubuck follows the same rules with an even lighter hand, since its finer nap shows wear sooner. Never use a stiff brush, a wet cloth or a cream on nubuck, and store nubuck sneakers away from dark, dyed materials that can transfer colour onto the nap.
Canvas, Mixed Materials and Special Finishes
Canvas sneakers clean with gentle soap and water, but they have their own quirks, especially yellowing on white canvas and dye bleeding on coloured canvas.
For canvas Chucks specifically, the Converse canvas cleaning guide covers canvas scrubbing, machine guidance and yellowing prevention in detail, and it is the deeper reference for that style rather than a routine repeated here.
Mixed-material sneakers need panel-by-panel cleaning. Clean leather panels with leather methods, mesh panels with mesh methods, and suede panels with dry methods, keeping each method off neighbouring panels where you can. Use a small brush or cloth for precision, and mask a delicate panel with a dry cloth while you clean its neighbour if the two methods conflict.
Special finishes need extra caution. Reflective panels, printed designs, metallic finishes, coated fabrics and glow materials can crack, peel or fade with scrubbing, solvents and heat. Clean these areas with a barely damp, soft cloth only, without scrubbing, and test on a hidden area first. If a finish is already cracking or peeling, stop and seek professional advice, since further cleaning will worsen it.
Waxed, waterproofed or treated sneakers should be cleaned with products compatible with their treatment, since harsh cleaners strip waterproofing. After cleaning a treated pair, reapply its treatment where the maker advises, to clean, dry fabric, so protection is restored rather than left patchy.

Soles, Midsoles and Outsoles
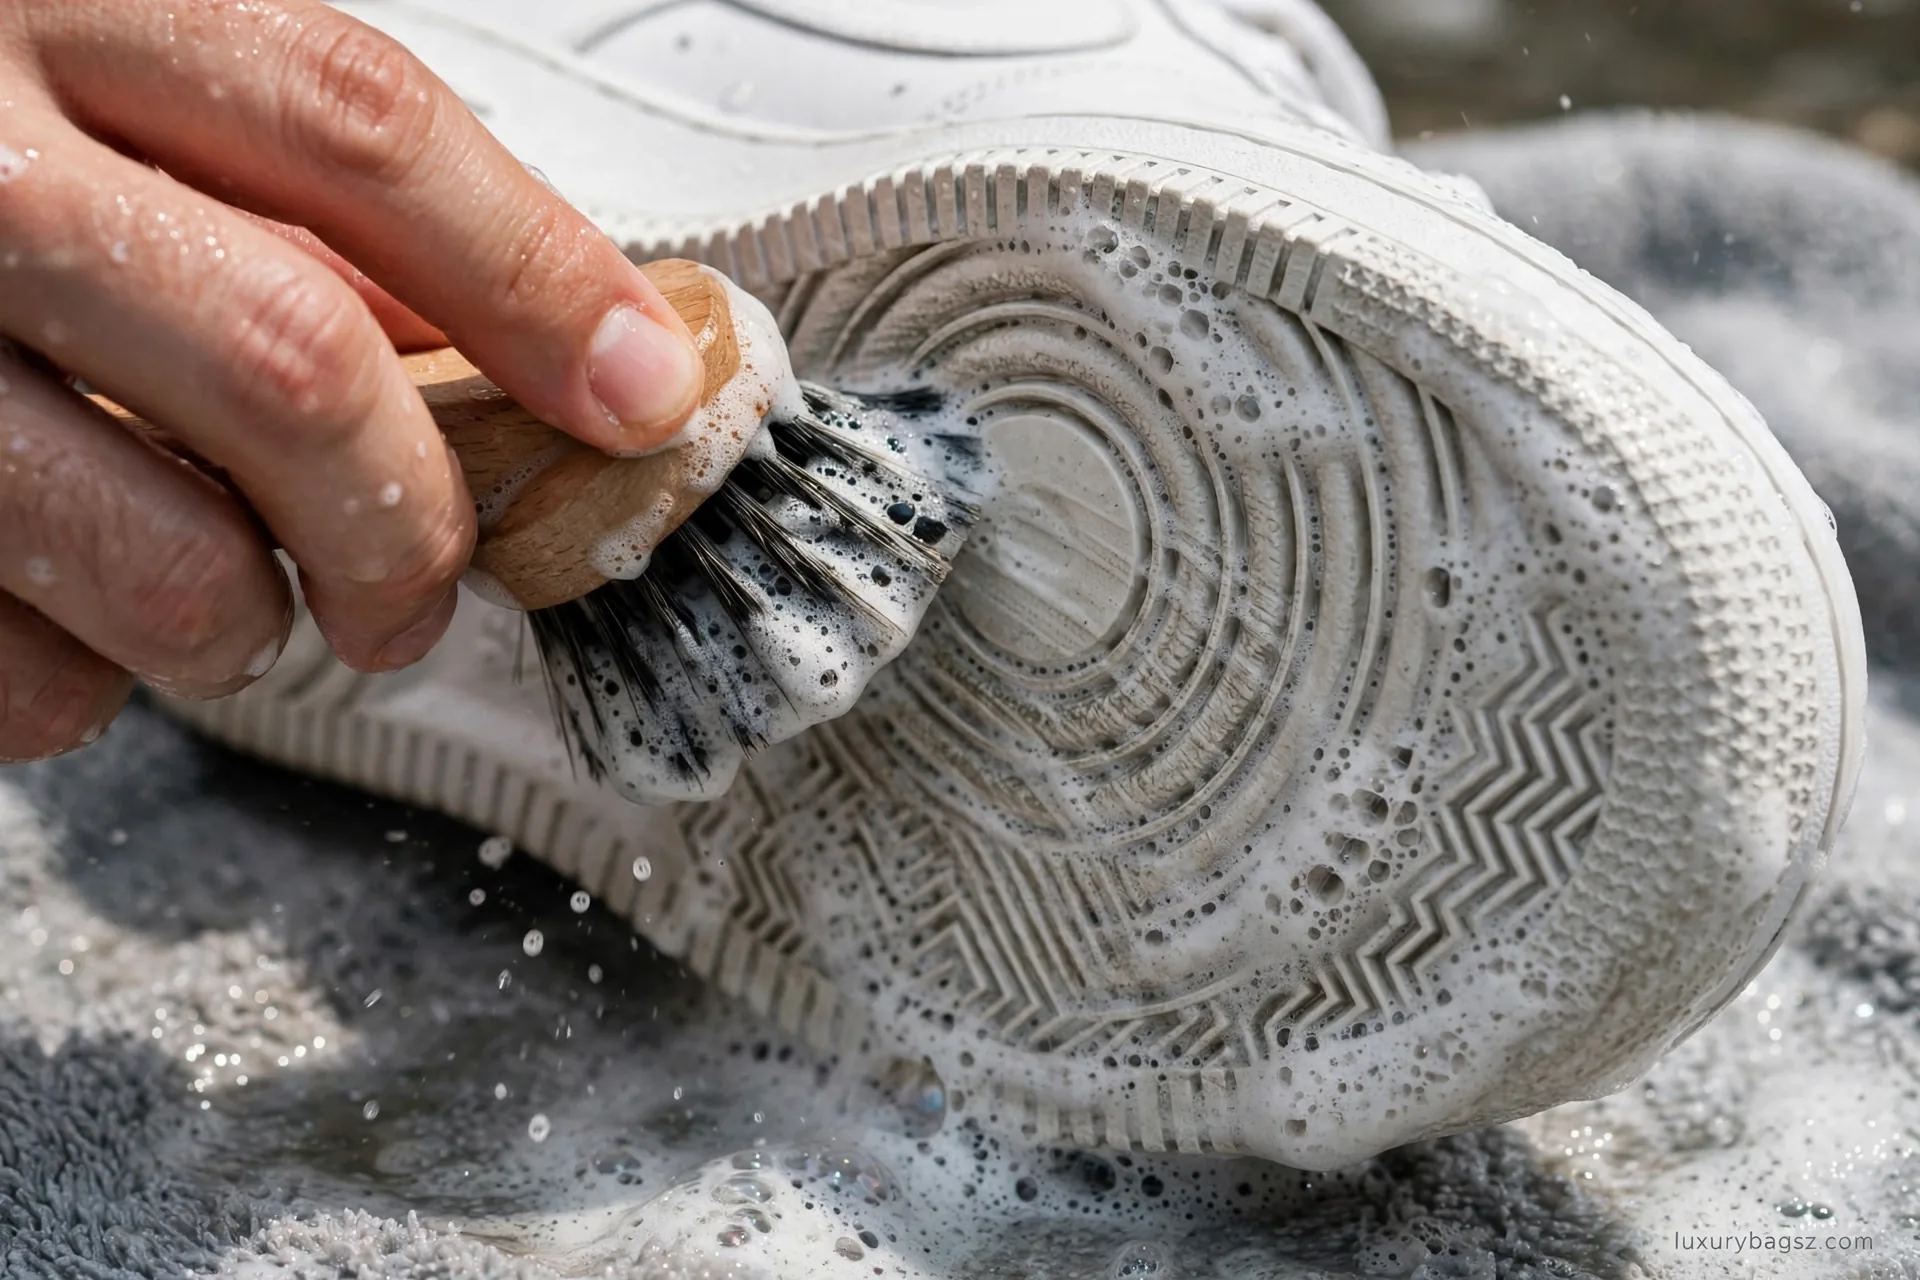
Soles carry the most dirt and need the firmest cleaning, but they also need care to avoid damaging the upper. Clean soles separately from uppers, using a firm brush, cool water and gentle cleaner, and keep dirty sole water off the upper. Work over a basin or outdoors, so mud and grit do not splash onto clean fabric.
Midsoles, especially white foam midsoles, show scuffs and yellowing readily. A firm brush with gentle cleaner lifts most surface dirt, while deeper scuffs may need a dedicated midsole cleaner or a gentle eraser, tested on a hidden area first. Avoid bleach on midsoles, since it yellows foam unevenly and weakens it over time, and avoid abrasive pads that scratch foam and create new dirt traps.
Outsoles need attention at grooves and treads, where stones and mud lodge. Pick out debris gently with a soft tool, brush the tread, and rinse with cool water, keeping water off the upper where you can. Check outsoles for wear while you clean: worn tread, cracked rubber or separating edges all affect grip and longevity, and they should be noted for repair.
After cleaning soles, wipe the junction between sole and upper with a clean, damp cloth, removing cleaner residue that could stain fabric or weaken adhesive. Let soles dry fully before wearing, since a damp sole slips more and picks up dirt faster than a dry one.
Laces, Insoles and Linings
Laces clean easily and make a surprising difference. Remove laces, soak them briefly in cool water with gentle detergent, agitate lightly, rinse thoroughly, and air-dry them flat or hung, away from heat. White laces can be brightened with a gentle oxygen-based product where the label allows, but chlorine bleach weakens lace fibres and yellows them over time.
Insoles need separate care. Remove insoles where they come out, brush off surface dirt, wipe with a barely damp cloth and gentle cleaner, and air-dry them fully before returning them. Insoles that are glued in should be wiped in place with a barely damp cloth, without soaking, since water trapped under a glued insole encourages odour and mould.
Linings follow the upper's material rules, with extra gentleness, since linings are thinner and less visible. Wipe linings with a barely damp cloth, let them air fully, and never soak a lined pair to clean its lining, since trapped water damages the whole shoe. Persistent odour in linings or insoles may mean the insole needs replacing, which is cheap and often transformative for an older pair.
For odour generally, airing, dry brushing and insole replacement beat home remedies. Baking soda, sprays and freezer tricks are widely suggested online, and results vary, with some methods leaving residue or damaging materials. A clean, dry pair with fresh insoles smells better than a pair treated with a cover-up, and it lasts longer too.
Odour prevention starts with rotation and drying, not with products. A pair that is worn, aired overnight, and rested for a day before its next wear rarely develops strong odour, while a pair worn daily in heat and stored damp in a closed bag will smell whatever you spray on it. Socks matter too: clean, breathable socks reduce moisture and bacteria, while damp or synthetic socks that trap sweat accelerate odour.
If odour persists after airing, cleaning and insole replacement, check the lining and midsole for damp or breakdown, since a collapsed, permanently damp midsole can hold odour that surface cleaning cannot reach, and that pair may need professional assessment or retirement from daily wear.
Drying Sneakers Properly
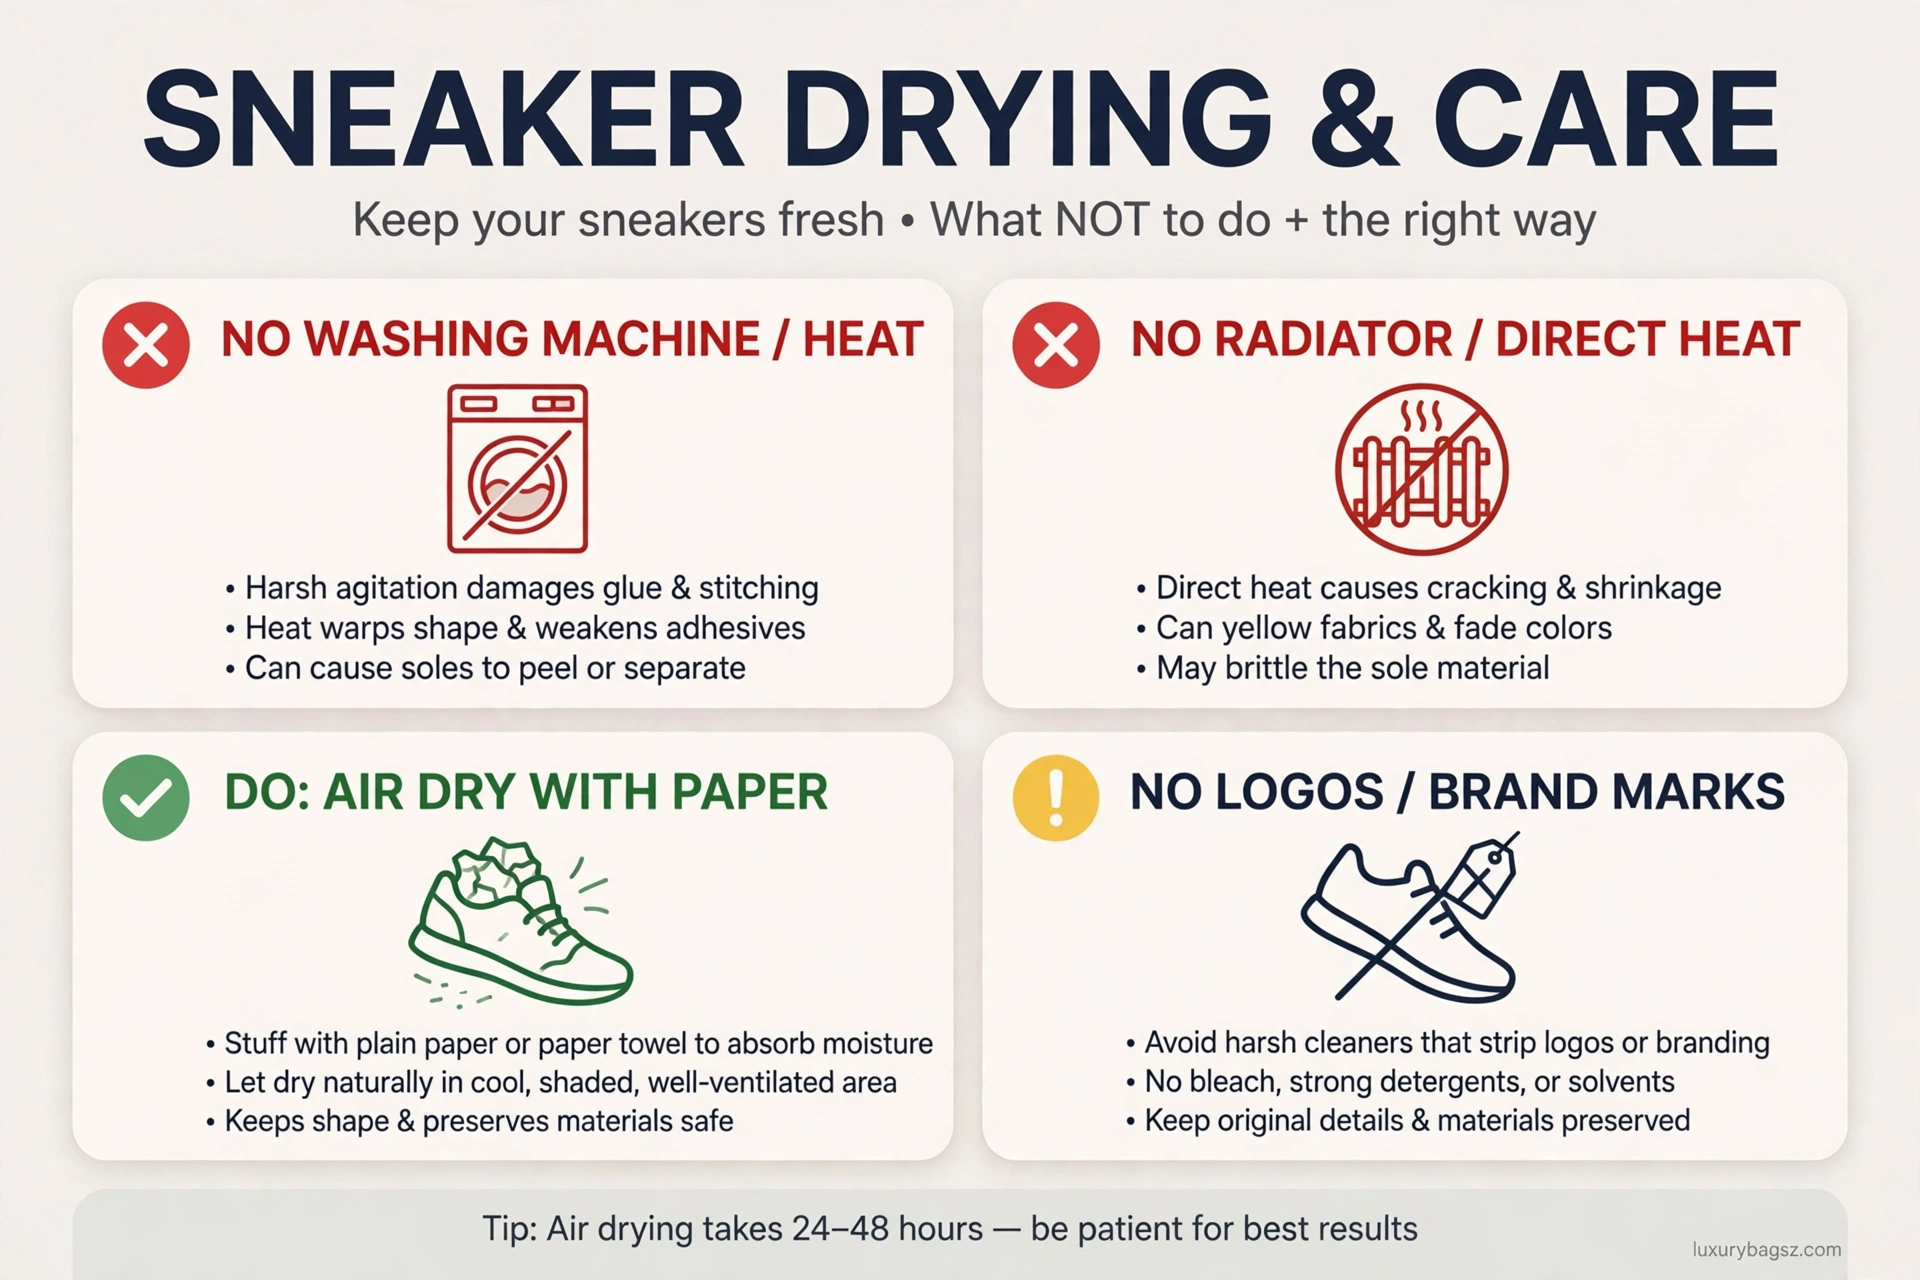
Drying decides whether a clean pair keeps its shape or warps. Stuff sneakers lightly with clean paper or use shoe trees, reshape them gently, and air-dry them in a ventilated room, away from direct sun and heat. Replace paper as it dampens, since damp paper stops absorbing and starts holding moisture against the shoe.
Never dry sneakers with a radiator, a hair dryer, a tumble dryer or direct sun. Heat warps foam, cracks leather, weakens glue, yellows white fabric and fades colour, often permanently. A pair dried slowly in air keeps its shape, colour and cushioning, while a pair dried fast with heat often emerges stiff, warped or yellowed, even if it looks clean.
Drying time varies with material and weather. Mesh pairs dry in hours in good air, leather pairs take longer, and a soaked pair can take a full day or more. Do not wear sneakers while still damp to force them to shape, since damp fabric and foam stretch unevenly and set baggy or twisted shapes. Patience at drying is the cheapest protection a pair gets.
Once dry, brush suede and nubuck to restore nap, wipe leather lightly, and check the pair in good light before wearing. A pair that is fully dry, reshaped and brushed looks far better than a pair rushed back into wear, and it stays clean longer, since dry surfaces pick up less dirt than damp ones.
Yellowing, Odour and Common Sneaker Problems
Yellowing on white sneakers has several causes: sun, heat, oxidation, bleach and age, often together. Prevention beats cure: dry in shade, avoid heat and bleach, and store white pairs away from sun and damp. Once yellowing sets in, gentle cleaning and shade drying help light cases, while deep yellowing, especially on foam midsoles, may not fully reverse, and harsh whitening products often worsen it.
Odour comes from moisture, bacteria and worn insoles, not from dirt alone. Air pairs after wear, rotate them so each pair dries fully between outings, replace insoles when they no longer refresh, and keep storage ventilated. A pair worn daily without rest days will smell sooner than a pair rotated, whatever its cleaning routine.
Creasing on leather and foam sneakers is normal wear, not dirt, and cleaning cannot remove it. Shoe trees, rotation and proper fit reduce creasing, while over-tight lacing and forcing feet into shoes increase it. Accept creasing as wear character, and focus cleaning on dirt and colour, not on erasing creases that cleaning cannot fix.
Colour transfer onto pale sneakers, from dark denim, socks or other shoes, needs prompt blotting and gentle cleaning, since transfer sets with heat and time. Keep pale sneakers away from dark, newly dyed materials in wear and storage, and clean transfer marks promptly before they become permanent.
When to Repair, Resole or Retire a Pair
Cleaning reveals damage, and damage needs a decision. Loose stitching, a peeling sole edge, a worn heel or a small hole are all repairable, often cheaply, by a cobbler or sneaker repairer. Early repair preserves the pair and prevents a small problem from becoming a structural failure, such as a sole separating fully during wear.
Resoling depends on construction. Some sneakers can be resoled, others cannot, and the difference lies in how the sole is attached and whether the upper can survive the process. The resole sneakers guide explains which constructions can be resoled and what to ask a repairer, so you can judge whether a worn pair is worth repairing or replacing.
Retirement is sensible when the midsole has collapsed, the upper has torn structurally, the lining has disintegrated, or repair costs exceed the pair's value and wear. A retired pair can still serve for gardening, painting or rough work, where its remaining life is useful without risking a good outfit. Keeping a retired pair for rough tasks also protects your good pairs from jobs they were never made for.
Keep a simple record for valuable pairs: purchase date, cleans, repairs and resoles. That record helps you judge remaining life, helps a repairer choose the right fix, and helps a future buyer trust the pair's history, all of which protect value better than a spotless but undocumented pair.
Protecting Sneakers After Cleaning
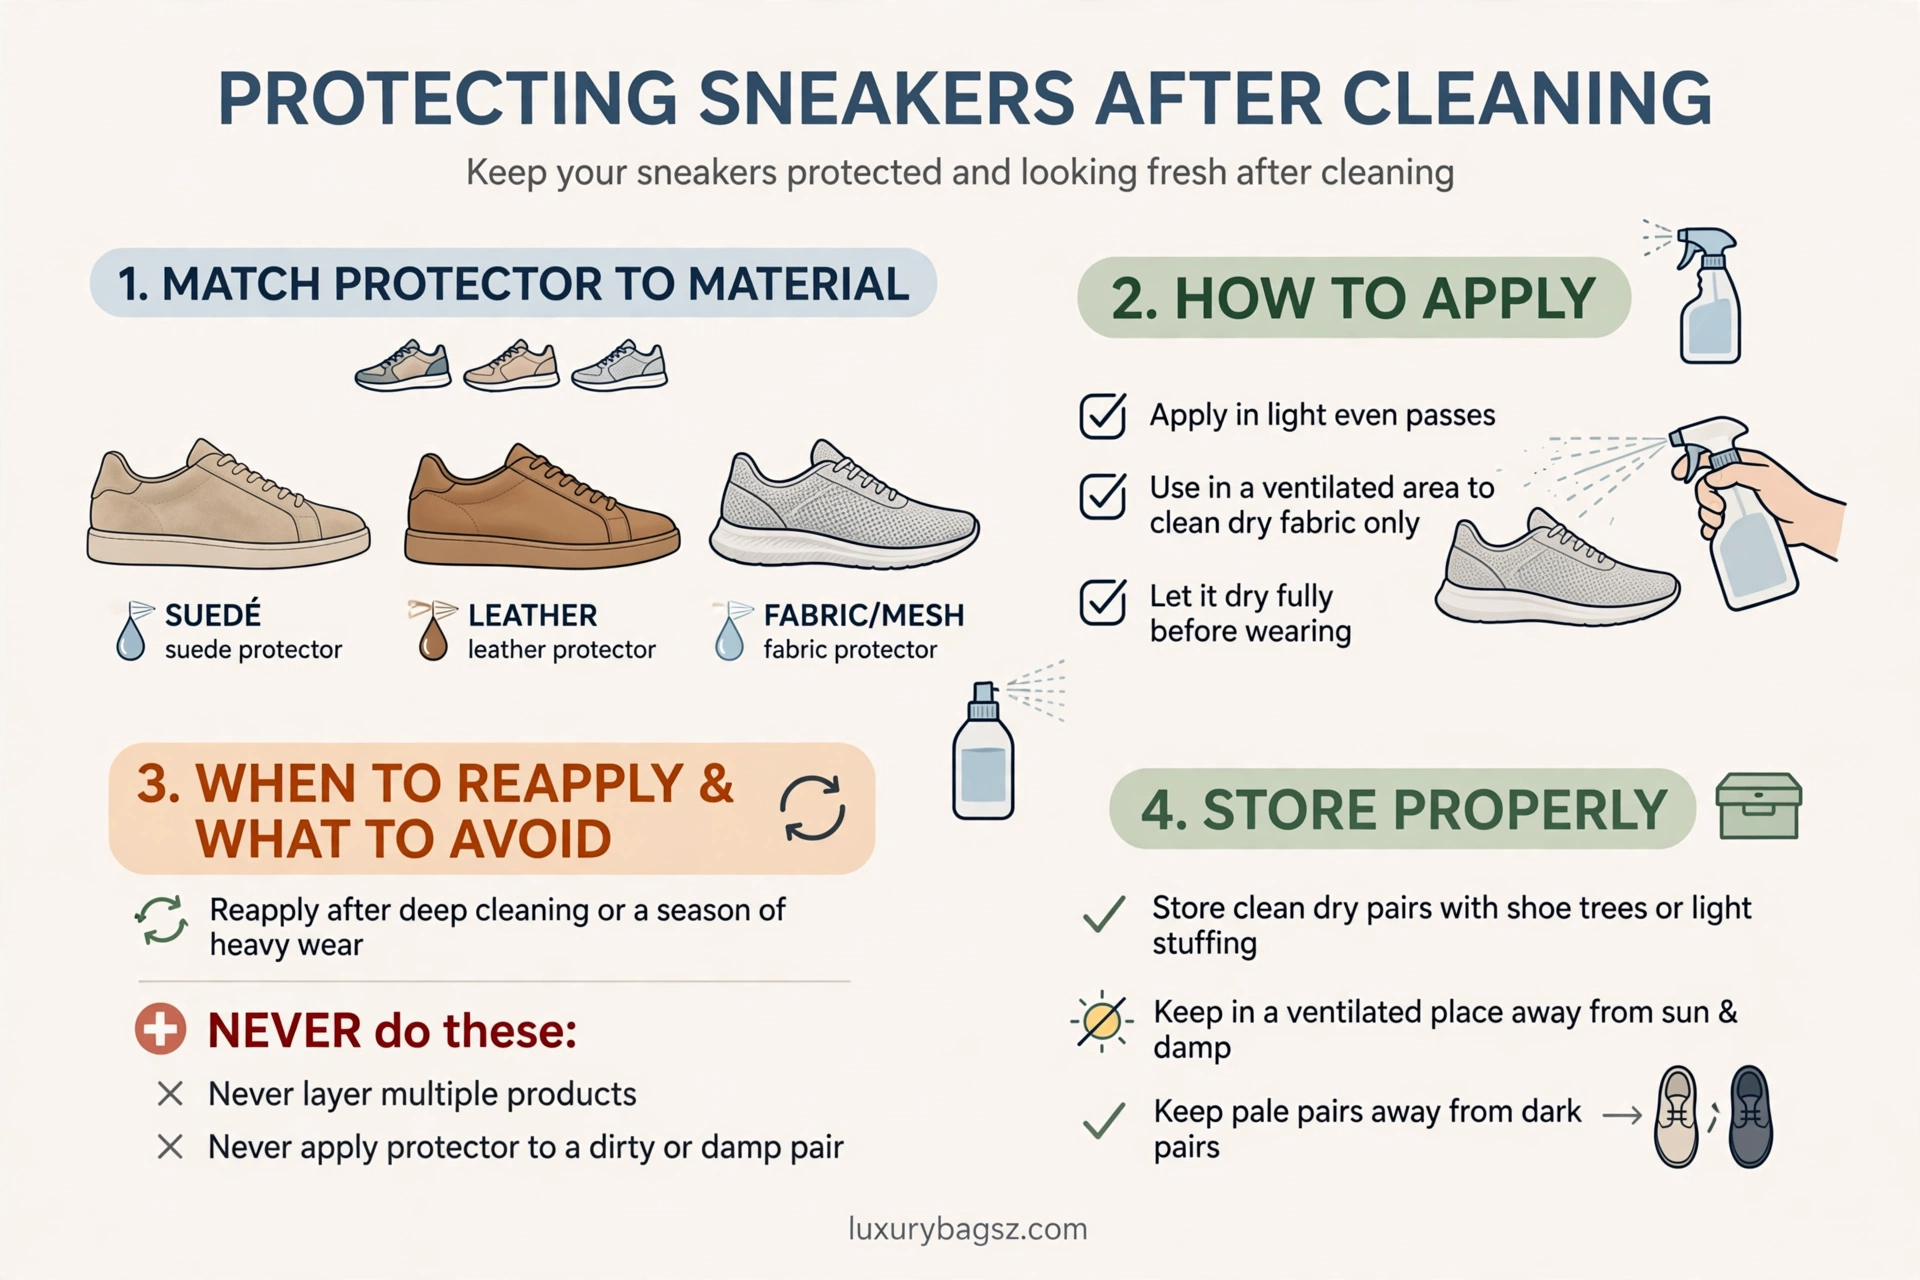
Protection after cleaning makes the next clean easier. Apply a protector spray suited to the pair's main material, to clean, dry fabric, in a ventilated area, in light, even passes, and let it dry fully before wearing. Suede needs a suede protector, leather needs a leather protector, and mesh needs a fabric protector; using the wrong protector can darken, stiffen or mark a material.
Reapply protection after deep cleaning or after a season of heavy wear, since protection wears off with use and washing. Do not layer multiple products at once, and do not apply protector to a dirty or damp pair, since protection over dirt seals dirt in and makes future cleaning harder.
Storage protection matters too. Store clean, dry sneakers with shoe trees or light stuffing, in a ventilated place away from sun and damp, with space between pairs. Keep pale pairs away from dark pairs and printed boxes, since dye and print transfer readily in heat. A stored pair checked every few months stays clean far longer than a pair forgotten in a damp box.
For pairs you wear in rain, snow or mud regularly, protection is not optional. A protected pair beads water, releases mud more easily and dries faster, while an unprotected pair soaks, stains and wears faster. The few minutes protection takes repay themselves in every rainy wear that follows.
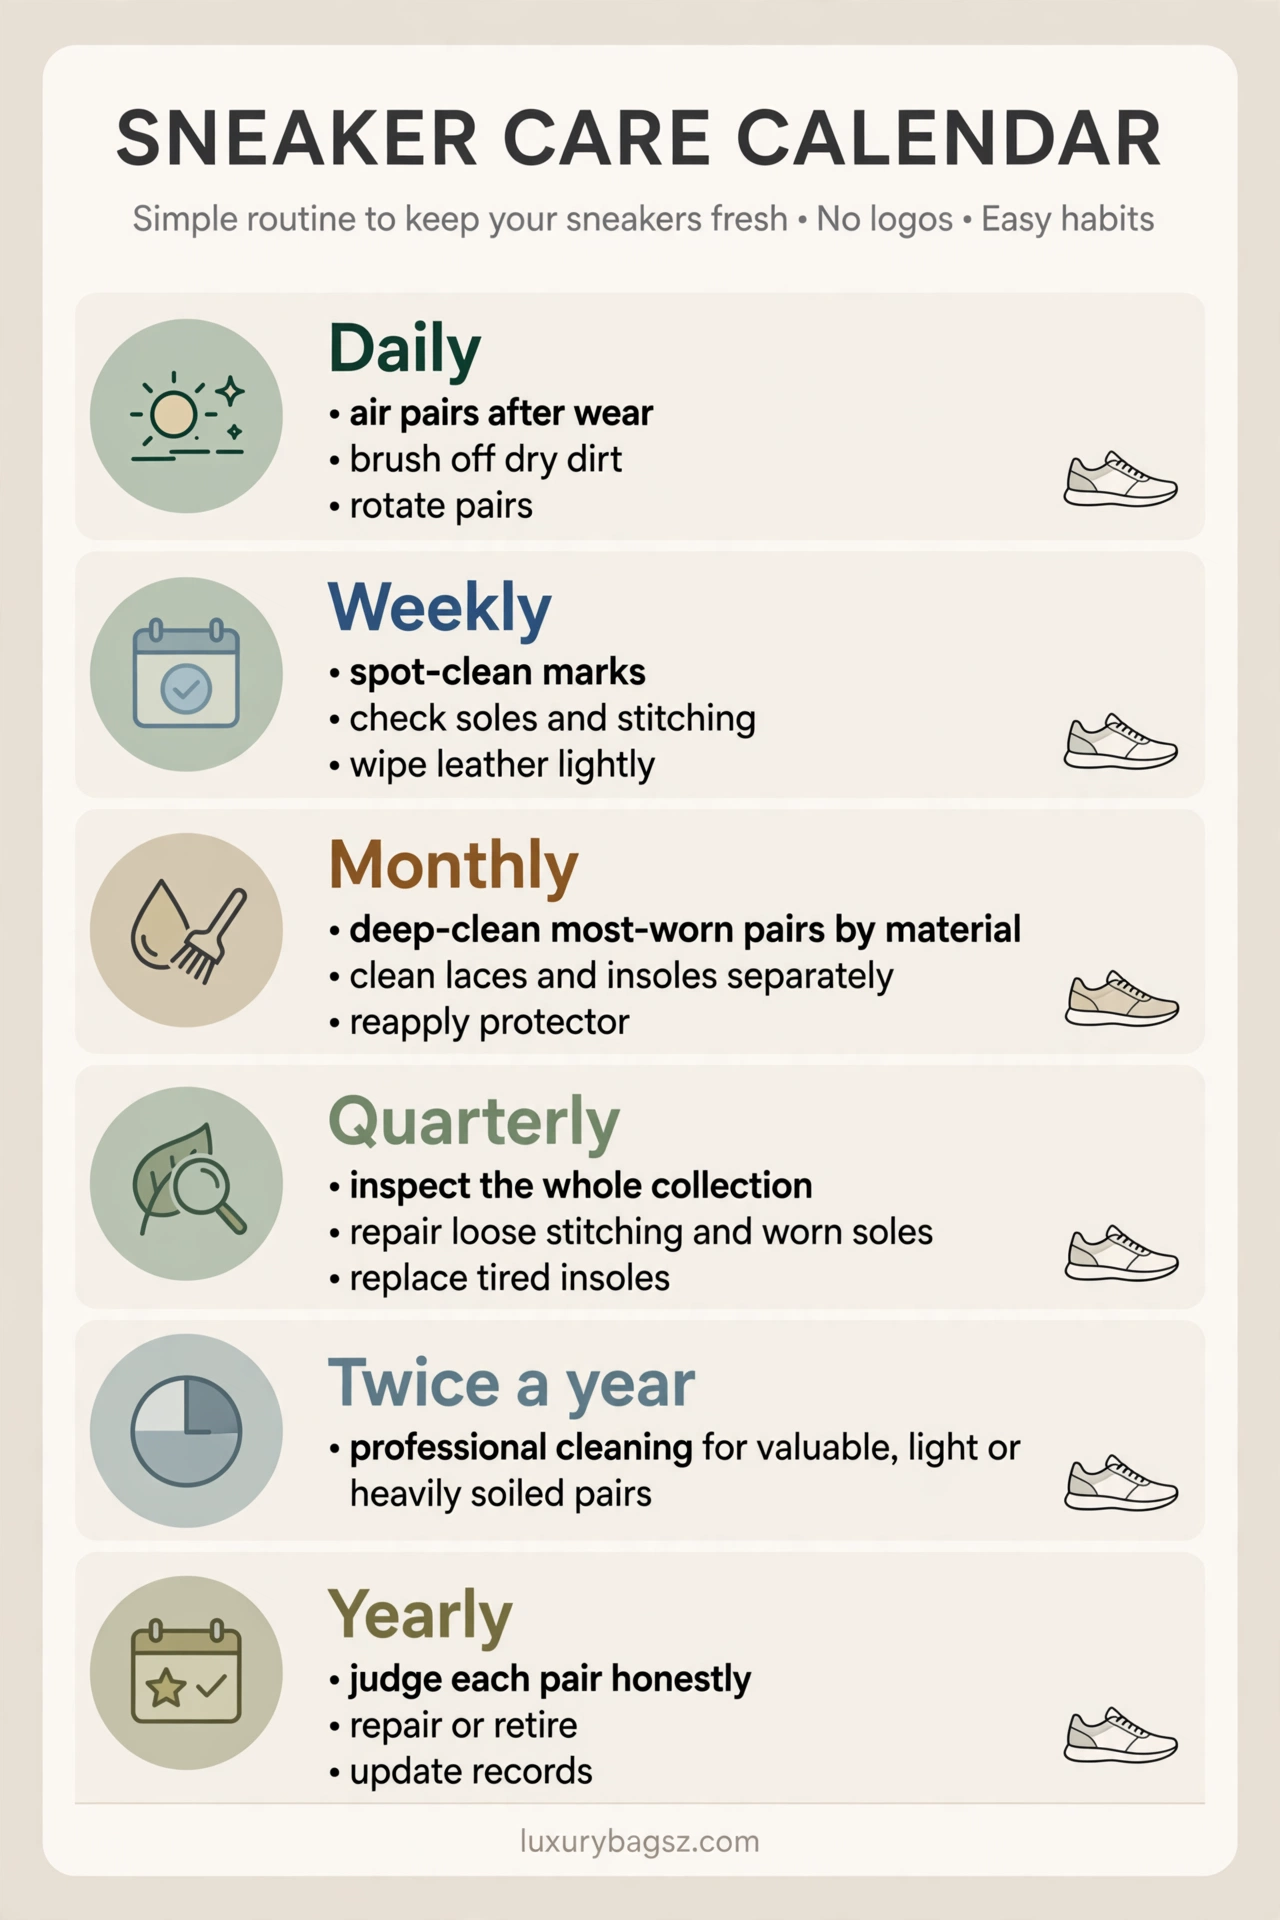
A Simple Sneaker Care Calendar
Daily: air pairs after wear, brush off dry dirt, and rotate so no pair is worn two days running where you can avoid it. Weekly: spot-clean marks, check soles and stitching, and wipe leather pairs lightly.
Monthly: deep-clean the pairs you wear most, by material, clean laces and insoles separately, and reapply protector where it has worn off. Quarterly: inspect your whole collection, repair loose stitching and worn soles, replace insoles that no longer refresh, and check stored pairs for damp, mould or fading.
Twice a year: consider professional cleaning for valuable, light or heavily soiled pairs, and for suede pairs with marks you cannot lift gently. Yearly: judge each pair honestly for remaining life, repair or retire accordingly, and update your records.
This calendar bends with use. A daily-worn running pair needs monthly deep cleaning, while a special-occasion designer pair may need only seasonal attention. Let the pair tell you: fresh after airing means wait, dirty or stale after airing means clean, and loose or worn means repair.
Seasonal change is a natural moment for a collection review, since pairs stored through a season can develop damp, fading or odour unnoticed, and a quick inspection then prevents a ruined pair later.
Frequently Asked Questions
Can I put sneakers in the washing machine?
Some sturdy canvas and mesh pairs tolerate a gentle machine cycle in a laundry bag, but leather, suede and many designer sneakers do not, and machine washing can warp shape, weaken glue and fade colour. Hand cleaning by material is safer for most pairs, and machine washing should be a last resort, not a default.
How do I clean white sneakers without yellowing them?
Clean gently with cool water and mild cleaner, avoid bleach and heat, and dry stuffed in shade with air circulation. Yellowing comes from sun, heat, bleach and oxidation together, so shade drying and heat avoidance matter more than any whitening product.
How do I clean suede sneakers safely?
Brush dry with a suede brush in one direction, use a suede eraser gently on marks, and avoid water, creams and oils entirely. If suede gets wet, blot it, stuff the pair, air-dry it fully, and brush the nap back up, and use a suede protector spray on clean, dry suede.
How often should I clean my sneakers?
Brush or wipe after every few wears, spot-clean marks promptly, and deep-clean monthly for daily-worn pairs or seasonally for occasional pairs. Airing and rotation between cleans keep most pairs fresh far longer than frequent deep cleaning.
How do I get rid of sneaker odour?
Air pairs after wear, rotate them so each pair dries fully, clean insoles separately, and replace insoles when they no longer refresh. Persistent odour in linings or collapsed insoles usually needs insole replacement rather than a cover-up spray.
Can I clean leather sneakers with soap and water?
Yes, gently: wipe with a barely damp cloth and a small amount of gentle leather cleaner or mild soap on the cloth, remove residue with a second damp cloth, and air-dry fully. Never soak leather sneakers, and condition smooth leather lightly only after cleaning, testing on a hidden area first.
How should I dry sneakers after cleaning?
Stuff lightly with paper or use shoe trees, reshape gently, and air-dry in a ventilated room away from sun and heat, replacing paper as it dampens. Never use a radiator, hair dryer, tumble dryer or direct sun, since heat warps foam, cracks leather and yellows white fabric.
What should I do about a stain on mesh sneakers?
Blot at once without rubbing, clean gently with cool water and mild cleaner on a cloth or soft brush, and wipe with a clean damp cloth to lift dirt. If the mark does not lift after two gentle passes, stop and consider professional cleaning, especially on light or valuable pairs.
Can sneakers be resoled?
Some can, depending on how the sole is attached and whether the upper can survive the process, while glued fashion sneakers often cannot be resoled economically. The resole guide linked in the repair section explains which constructions suit resoling and what to ask a repairer before committing.
How do I protect sneakers after cleaning?
Apply a protector spray suited to the pair's main material, to clean, dry fabric, in light, even passes, and let it dry fully before wearing. Reapply after deep cleaning or a season of wear, store pairs clean and dry with space and air, and keep pale pairs away from dark, dyed materials.
Final Verdict
Sneaker cleaning rewards material awareness above all else. Identify every panel, clean each material on its own terms, clean soles, laces and insoles separately, and dry every pair stuffed and in air, away from heat and sun. That awareness turns a chore into a habit, and the habit turns ordinary sneakers into pairs that stay fresh, bright and well-shaped far beyond their expected life, wear after wear.
Avoid soaking, avoid machine washing as a default, and protect cleaned pairs with the right spray for their material. Follow that routine, repair small damage early, and your sneakers will stay cleaner, hold their shape and colour longer, and give you far more wears than a harsh, one-method clean ever would. Start with your most-worn pair, clean it by material this week, and let the result set the standard for every pair that follows.
Clean sneakers feel better, look sharper and last longer, and that reward arrives with the very first pair you clean properly. Make that first pair count, and the rest of your collection will follow, one clean pair at a time. The habit is simple, the results are visible immediately, and the sneakers you save from harsh washing will thank you with many more miles of comfortable wear.